Tracking Incoming Loans
PastPerfect includes an Incoming Loans section. Incoming loans are treated much like new accessions. To begin the process, click on the Incoming Loans button under Activities on the Main Menu.
Add a New Incoming Loan
If you have no records in Incoming Loans, the screen will be blank. If you do have records, the last record viewed will appear on the screen. To create a new loan, click the Add button in the Navigation Bar at the top of the screen.
Navigation Bar

Add New Incoming Loan screen
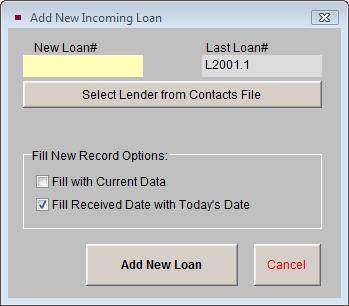
Each incoming loan must have a unique loan number to distinguish it from other loans. The loan number may be any combination of numbers and letters up to 15 characters in length. We recommend that you use a basic two-part numbering system with the prefix "L" for creating your loan numbers, for example: L2004.1. This will give you information about the year of the loan (2004), and it tells you that this is the first loan of the year 2004. However, PastPerfect is entirely flexible and allows any loan numbering system you choose.
If you have entered a duplicate loan number, PastPerfect will give you an alert and ask you to choose another number. PastPerfect displays the last loan number used on the Add New Incoming Loan screen for your reference. Enter your loan number in the New Loan# field.
If the lender is in your Contacts file, you may click the Select Lender from Contacts File button to locate the contact and fill in fields with the contact's information automatically. By selecting the lender's name from the list, you create a link between your Contact and Incoming Loan records. Later, you can view a list of all loans borrowed from a particular contact.
The check boxes in the Fill New Record Options section provide you with some shortcuts.
If Fill with Current Data is checked, PastPerfect will copy all information, including the source's name and address, from the last viewed record. Check this box only if you have not selected a new source name from the Contacts file and only if the source for the new loan is the same as the source on the Incoming Loan screen showing behind the Add screen.
If Fill Received Date with Today's Date is checked, the program will automatically insert the current date in the Received Date field. Check this box if you would like to add the current date by default.
After you have assigned the loan number and clicked the Add New Loan button.
If the lender provides a loan number, record it in the Tracking Number field. If you did not use the option to select your lender from the Contacts file, fill in the name and address of the lending institution, along with a contact name and phone number. You may enter a Credit Line for the entire loan. In the Purpose field, you may enter a short description of the purpose of the loan. Fill in the Received by and Received Date fields, as well as the Due Date, Agreement Signed and Value fields, if they are known. The Returned and Renewal fields will be filled in later.
If you chose your lender from the Contacts file, the Contact ID# field will be filled in with the Contact ID# for that contact. You may view the Contact record by clicking the file folder icon to the right of the ID#.
NOTE: If you created your loan record before adding the lender into the Contacts file, you can link a new Contact record to an existing loan record. Go into the Contacts file and find the Contact ID# for the lender, then enter the number in the Contact ID# field on the loan record.
Incoming Loan screen

If your loan record was created by transferring a Temporary Custody receipt into the Incoming Loans catalog, the Temporary Custody receipt number will display in the TC Receipt# field. You may view the Temporary Custody record by clicking the file folder icon to the right of the TC Receipt# field.
Click the Description button in the Screen View section of the Sidebar to view more fields. If there are any specific instructions for the management of this loan, enter them in the Instructions field. Use the Brief Description of Loan field to enter a short description of the items in the loan. If there are any restrictions on the loan, note them in the Restrictions field. Please be aware that each catalog record related to this loan will then be marked with a red flag showing that there are restrictions. If you do not want every item in the loan marked as restricted, leave the Restrictions field blank and note restrictions on individual catalog records. The Special Considerations field can be used to record any additional information. Once fields are filled in with as much information as required, click the Save button in the Navigation Bar. A green data light will appear on the Description button if data is entered in any of these fields.
Loan Agreement, Shipping & Insurance
In the More Screens section of the Sidebar are two buttons, Loan Agreement and Shipping & Insurance Information.
Loan Agreement
Click on the Loan Agreement button to view or compose the legal language defining this loan. Most lending institutions will have their own forms. However, you may need your own loan agreement when loans are coming in from private parties. The Loan Agreement Signed date will be filled automatically from the Agreement Signed field on the main loan screen.
Loan Agreement screen
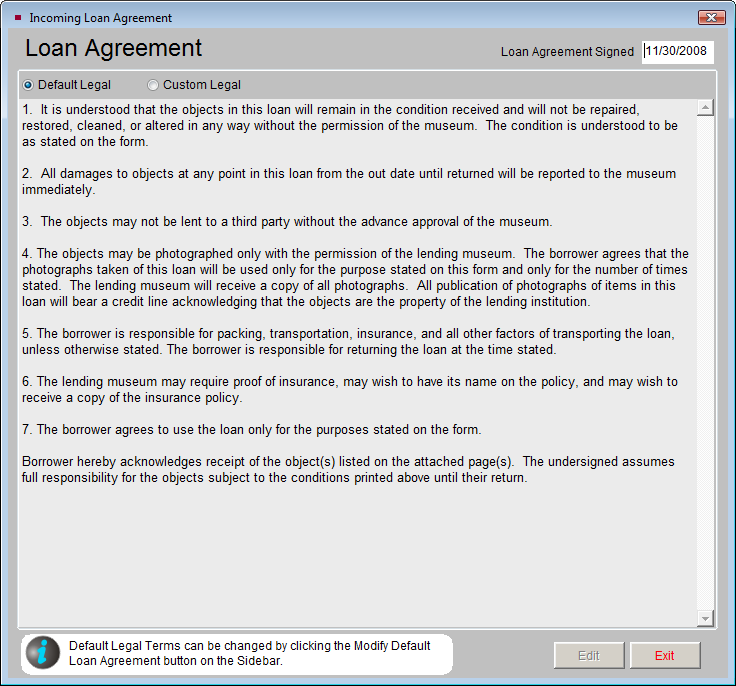
There are two radio buttons at the top of this screen, Default Legal and Custom Legal. If the Default button is selected, you will see the default loan agreement terms. Clicking the Custom radio button gives you a blank screen where you may type loan agreement terms that apply only to this loan.
Modifying the Default Loan Agreement
If the Default button is selected, the loan agreement terms may not be edited from this screen. The default terms can be edited by going to the Main Menu | Setup | Collections | Incoming Loans. On this screen, click in the Default Terms of Incoming Loan field and enter your text. Your institution's name and address that appear on the Loan Agreement may also be changed on this screen. Changes made to the default terms will affect all loans using the default loan agreement terms. To save the changes, click the Exit button. Click the Incoming Loans button on the Main Menu to return to the Incoming Loans screen.
Printing the Loan Agreement
When you return to the Incoming Loans screen, you can print or preview the loan agreement by clicking the Print button in the Navigation Bar on the main loan screen and selecting Loan Conditions.
Shipping & Insurance Information
To enter information about shipping and the insurance carrier for the loan, click on Shipping & Insurance Information in the More Screens section of the Sidebar. You may add or edit information by clicking the Edit button at the bottom of the screen. A green data light will appear the button if you have entered shipping or insurance information. You will have the option to update the insurance fields on the related catalog records with this information by clicking the Transfer Insurance Information to Catalog Records button, which appears after entering and saving information on this screen.