
You may wish to return some items on the loan while retaining others. To do this, click the Catalog Records button in the Sidebar to view the listing of records. Then click on the file folder icon located at the top right of the grid listing the loan's catalog records. This will open the Edit Catalog Record screen shown below. In addition to returning items, you may also set up multimedia links from this screen, attach images, change the catalog, view the full record screen, and accession the item.
Edit Catalog Record screen
Browse through the items using the Prior and Next buttons until you find the item you wish to return. Click on the Return this Item button on the left. The screen above will appear.
Return Loan Item screen
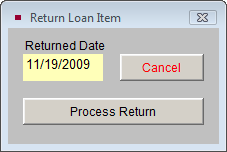
You will need to enter the date the item is being returned, then click Process Return. Returned items are deleted from their respective catalogs and abbreviated records are saved in the Returned Items list. To view the Returned Items list, from the main loan screen click the Returned Records button in the Sidebar. Click the file folder icon on the right to view more details about the records, or to transfer the record back to the loan.
After selected items have been returned to the lender, you may need to print the Returned Items Form to acknowledge the return of the items. The Loan Form lists the returned items and the date they were returned, as well as the lender's contact information and an area for the lender to sign off on the return. The Returned Items Form can be printed by clicking the Print button in the Navigation Bar and choosing the Returned Items Form option.
TIP: Customize the layout of the Returned Items Form by going to the Main Menu | Reports | Loans Incoming | Returned Items Form | Custom Layout 1 or 2 | Modify Selected Layout.
When the term of the loan is completed, you will want to return the loan. Click on the Return Entire Loan button under Actions on the Sidebar. A message will appear telling you how many records are on the loan that will be deleted from their catalogs. Returned items are deleted from their respective catalogs and an abbreviated record is saved in the Returned Items list. If you want to return all the items, click Yes. You will need to enter a return date and click Process Return to complete the operation. The loan will now be moved to the Returned Loans section. A Returned Loan record will have a brown flag at the top of the screen indicating that this loan has been returned.

If a loan was mistakenly returned, you can transfer the loan back to an Active loan. Under Actions, click the Return to Active button. The catalog records that were part of this loan will be returned to their catalog: Objects, Photos, Archives, or Library, and they may be viewed by clicking the Catalog Records button.
The Incoming Loan screen has separate views for seeing Active, Accessioned, and Returned loans. There is also a View All Loans view. To see only loan records that have been returned, click the View Returned Loans button in the Record View section of the Sidebar. An indicator will appear below the button telling you the number of Returned Records you are viewing.
Record View Modes
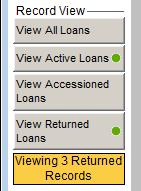
To view all Incoming Loan records, click the View All Loans button in the Sidebar.
NOTE: Incoming Loan records that have not been Returned or Accessioned are considered Active Loans. An Active Loan record will have a green flag at the top of the screen indicating that this loan is active. To view just the Active Loans, click the View Active Loans button in the Record View section of the Sidebar. An indicator will appear below the button telling you the number of Active Records you are viewing.