Starting an Exhibit
To begin the process of creating an exhibit, open the Exhibits screen by clicking on the Exhibits button in the Activities section of the Main Menu.
If you have no records in Exhibits, the screen will be blank. If you do have records, the last record viewed will appear on the screen. To create a new exhibit, click on the Add button in the Navigation Bar at the top of the screen.
Navigation Bar

Add New Exhibit

Enter an exhibit number. Duplicate exhibit numbers are not permitted. PastPerfect will display the last exhibit number used and suggest the next number. We advise allowing PastPerfect to number the exhibits sequentially.
Click the Add New Exhibit button to add a new record. You will see a screen like the one below.
New Exhibit screen
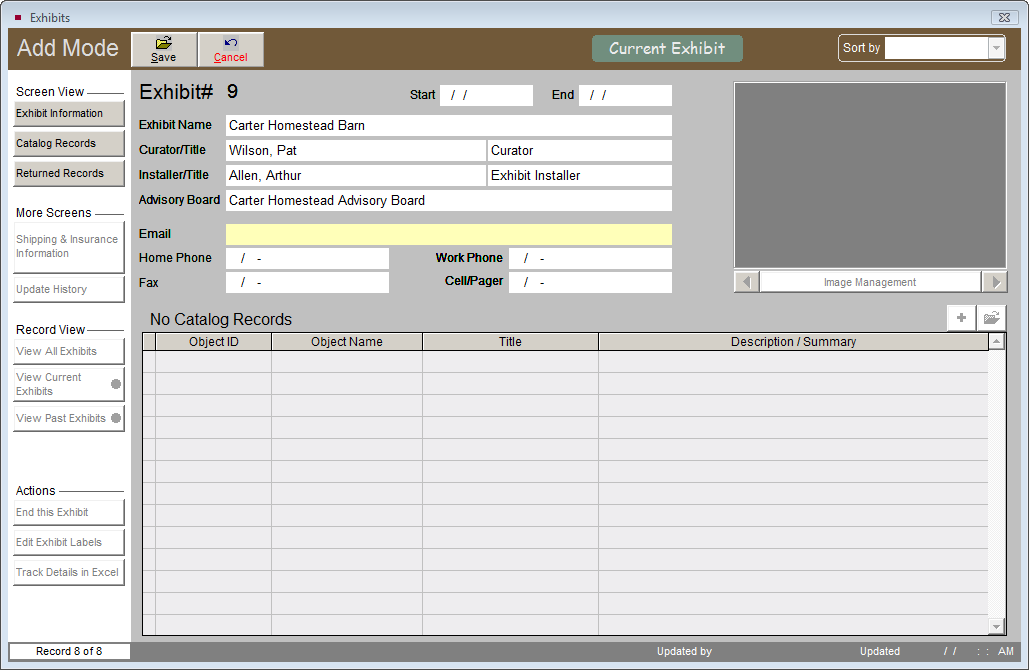
On the new exhibit screen, enter information in each field. Fill in the name of the exhibit, curator, installer, advisory board, and curator's email address and telephone numbers. You must also specify start and end dates. If you enter a future start date, the flag on the associated catalog records will say "Item on Exhibit Prep" rather than "Item on Exhibit."
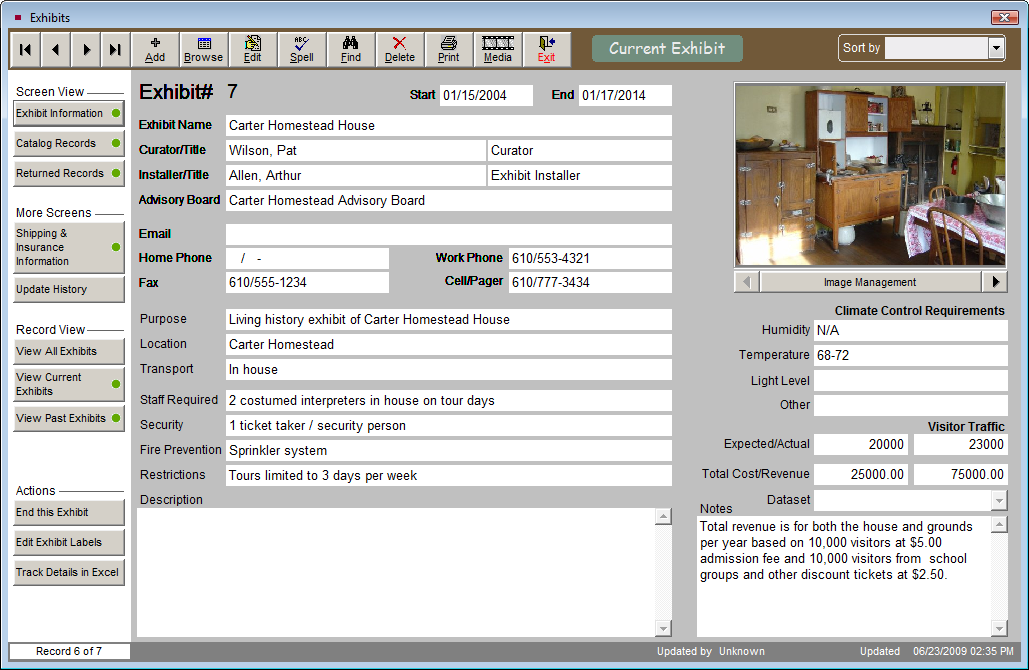
Using the Exhibit Information button in the Screen View section at the top of the Sidebar, you will be able to add the exhibit's requirements for transportation, staff, security, fire prevention, humidity, temperature, and light level as well as its purpose, description, location, restrictions, visitor traffic numbers, total cost, and revenue.
Exhibit screen showing Exhibit Information Screen View
When the fields are complete, please Save the record.
Image Management - If you have purchased the optional MultiMedia Upgrade, the Exhibits screen allows you to attach up to 20 images of your exhibit. Use these images to capture different views of the entire exhibit. Images of individual items will be attached to the catalog records of the items on exhibit. To put cataloged items on exhibit, please click Catalog Records.
Shipping & Insurance Information
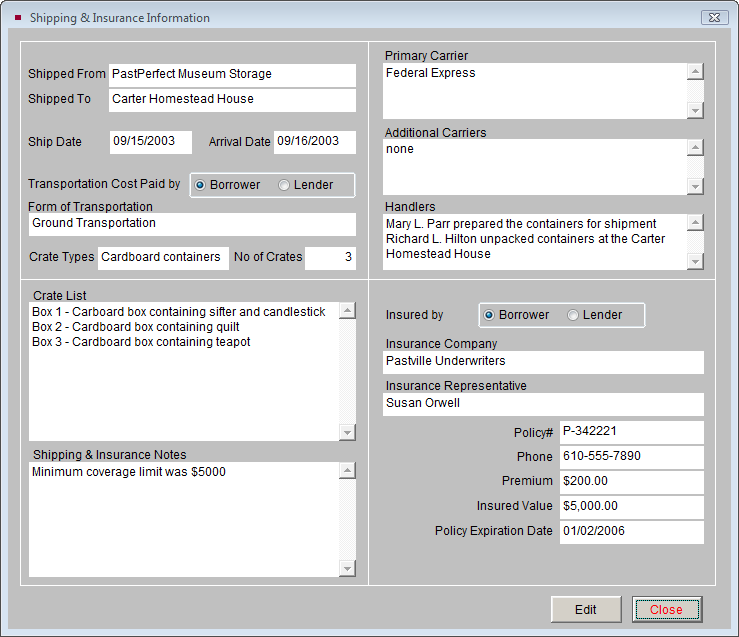
For traveling exhibits you may be shipping valuable items. PastPerfect provides fields where you can record important information about the shipping process including: point of origin, destination, ship date, arrival date, form of transportation, carriers, handlers and crate details. This screen also enables you to enter information about insurance on the items. To access these fields, please click Shipping & Insurance Information in the More Screens section of the Sidebar.
Shipping & Insurance Information screen
Track Details in Excel
At the bottom of the Sidebar under Actions, you will see a Track Details in Excel button. If you have the MultiMedia Upgrade and MS-Excel software installed on your computer, you can click the button to open a spreadsheet where you can record additional information specific to this exhibit. For example, you may use this to record accounting data for the exhibit.
Before creating spreadsheets for each Exhibit, you should set up your Default Cost and Revenue Excel file. This Excel file will be the template that is used to create a new Excel spreadsheet for each exhibit that you add. To set up this default Excel file, go to the Main Menu | Setup | Collections | Exhibits. Click the button for Setup Default Cost and Revenue Excel File. On this Excel file, enter the specific column headings and rows for the information you will need to track in Excel. When you save the file, it must be named "Default Exhibit.xls."
The Exhibits screen allows you to track every aspect of the in-house exhibit process. As with all aspects of collection management, meticulous record keeping is critical. It is good policy to periodically review your active exhibits. Removal dates should be monitored so that exhibits are removed promptly. If an exhibit is to be extended, the exhibit screen must be updated.
Viewing Past Exhibits
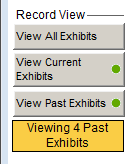
The Exhibits screen has separate views for seeing current and past exhibits. You can also view all exhibits. To see only past exhibit records, click the View Past Exhibits button in the Record View section of the Sidebar. An indicator will appear below the button telling you the number of records to view. Each record has a flag at the top of the screen to indicate the exhibit's status.
Record View Modes
To view all Exhibit records, click the View All Exhibits button in the Sidebar.
NOTE: Exhibits that have not been returned are considered Current Exhibits. A Current Exhibit record will have a green flag at the top of the screen indicating that this exhibit is current. To view just the Current Exhibits, click the View Current Exhibits button in the Record View section of the Sidebar. An indicator will appear below the button displaying the number of Current Exhibits you are viewing.
Ending an Exhibit
You will want to record when an exhibit is concluded on the Exhibits screen. Click the End this Exhibit button in the Actions section of the Sidebar. You will need to enter an End Date and click Process to complete the operation. The exhibit will now be moved to the Past Exhibits file. The catalog records on the exhibit will be listed as Returned Records, and the flag on each catalog record indicating the item is on exhibit will be removed. The Exhibit History fields on each catalog record will be filled in with the name, number, and dates of the exhibit.