Managing Lists
On the List Manager screen, the Sidebar's Manage section has tools that enable you to add records to a list, delete a list, delete an empty folder, combine lists, subtract records on one list from another list, and change list information.
Adding Catalog Records to a List
After you create a new list, the next step is to add records to that list. A quick way to do this is to use a query, which you may do by clicking on Add Records to Selected List. At the Query screen use the Search Catalog check boxes at the top of the screen to include or exclude records from specific catalogs.
To build a filter statement to select records, use the drop-down menus for Field and Condition and enter the search text in Value. Then click the Add to Statement button. You may add more than one statement to your query. Once a filter statement has been created, run the query to select the records. Review the records in Query Results. You may remove records from the results list by clicking in the column on the left. When your query results include only the items you want on the list, click Add Selected Catalog Records to List.
TIP: You may choose the fields that are available in the Field drop-down menu and on the results list by going to the Main Menu | Setup | Query Fields section.
Below are two examples of catalog lists which may be helpful in understanding building filter statements and, later, the view and action options.
Example A: You want to find all the items in the collection that you know are in the Vault, but where the room name "Vault" is missing from the Room Home Location field in the PastPerfect catalog records. Select the field "Home/Room" from the Field drop-down menu. Then from the Condition drop-down menu, select "Is empty." Please notice that there is no longer an option to enter a Value.
Run Query to Select Records
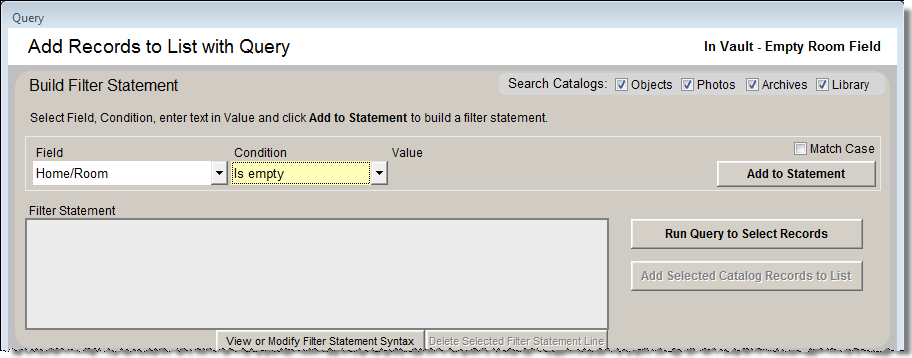
Click the Add to Statement button, then Run Query to Select Records. Your query results will appear in the grid at the bottom of the screen. Review the results and remove any items that you know are not located in the Vault. You can mark records to be removed from the list by clicking in the narrow, empty column at the left of the grid. The cell for that record will turn black. Then click the Remove Marked Records button. It will delete all marked records at once. When you have the records you want on the list, click Add Selected Catalog Records to List. Click Exit.
Now that you have a list, you can easily enter "Vault" in the Room Home Location field for all of the selected records at once. Please see the Actions section of this chapter for detailed instructions.
Example B: In another case, you want to find all the paintings in the collection that were created in the 1940s for an upcoming exhibit. To account for paintings that were created over a number of years or where you used a wide year range, use "greater than" and "less than" statements for both the early and late dates. You will build a compound filter statement and run the query, just like you would if you performed a query of all four catalogs or in the Objects catalog. First select the field Object Name from the Field drop-down menu. To do this quickly, click the down arrow, then press the "O" button on your keyboard to see "Object Name" and other fields beginning with "O." Select the Object Name field. Next, use the Condition drop-down menu and choose "Begins With." Please enter the word "Painting" in the Value box, or use the Object Name authority file by right clicking in the field to select the term. Click Add to Statement.
The radio dot should be next to the "and" to create a statement where all conditions must be met. From the Field menu, select the field "Year Range from." From the Condition drop-down menu, select "Greater than," and enter the Value "1935." Click Add to Statement. From the Field menu, select "Year Range from" again. Choose the Condition "Less than" then enter the Value "1950." Click Add to Statement. Go back to the Field menu and choose "Year Range to," then select "Greater than" from the Condition menu. Enter the year "1939" in Value. Click Add to Statement. Choose "Year Range to" again from the Field menu. Then from the Condition menu, select "Less than" and enter the Value "1955." Click Add to Statement. Review the filter statement then click Run Query to Select Records. The results will appear in the grid below the filter statement. Click the Add Selected Catalog Records to List to create the list.
Add Selected Catalog Records to List using a Compound Statement

You can now view records on this list, decide which paintings to include in the exhibit, delete the ones you decide not to use, and perform the action, "Add to an Exhibit." Please see the Actions section of this chapter for instructions.
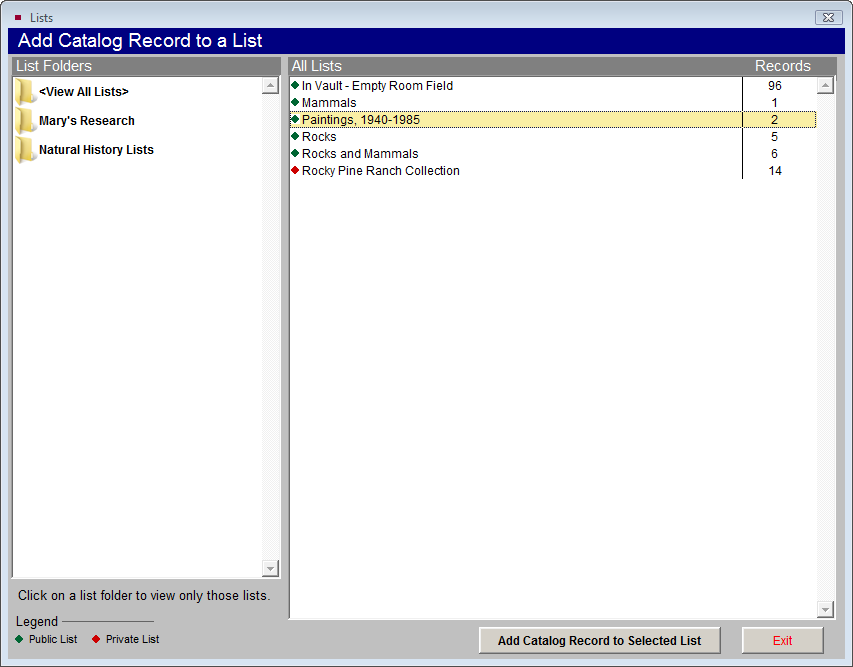
You may also put catalog records on a list from the catalog record screens. On a catalog record, click the Lists button in the Sidebar under Other Views. You will see all the Lists on which this record has been placed already. To add this record to a list, click the plus sign button to the right of the lists. On the next screen, click on the list to which you want to add the record, then click the Add Catalog Record to Selected List button at the bottom of the screen.
Add Catalog Record to a List from a Catalog Record
Deleting, Merging and Subtracting Lists
The following are additional tools for managing catalog lists.
Delete Selected List - Permanently removes the selected list from both Catalog Lists and the Lists view in each catalog record. PastPerfect does not track items on past (deleted) lists.
Delete Selected List Folder - This option allows you to delete the selected folder that does not contain lists. If the folder has lists, please change each list's List Folder using the Change List Name or Parameters option. Or if the list is no longer needed, it may be deleted using Delete Selected List. Once the folder is empty, it may be deleted.
Merge Lists
You can combine lists by adding all records from a Source List to a Target List. On the Merge Lists screen, please choose the Source List from the list on the left. This is the list you will be adding to another list. Then choose the Target List from the list on the right. This is the list to which you are adding the records. You will see the number of records on both the Source List and the Target List. When you have verified these are the correct lists, click the Append Records button. You will be prompted with the number of new records that will be added to the Target list, and how many records already exist on both the Source List and Target List that will not be added. If you wish to combine multiple lists, select another Source List from the left, keep the same Target List on the right, and click Append Records again.
Merge Lists

Subtract Lists
You may remove all records from a Target List that appear on a Source List. On the Subtract Lists screen, from the Target List on the left, select the list from which you want to subtract records. Select the Source List on the right with the records to subtract. You will be removing records from the Target List. You will see the number of records on both the Source List and the Target List. When you have verified these are the correct lists, click the Subtract Records button. You will be prompted with the number of records that will be removed from the Target List, and how many Source records did not exist on the Target List.
Subtract Lists

Change List Name or Parameters - This screen allows you to change the List Folder, List Manager, List Name, Description, and the private and locked settings. It also provides a breakdown of the catalog record types. You can see how many Archives, Library, Objects and Photos records are on the list. To view this screen, first click on the list name, then click the Change List Name or Parameters button.
Change Folder Name - To change the name of an existing folder, click on the folder name, then click the Change Folder Name button. Enter the new name, then click OK.