Examples
Now that you know the basics, here are a few examples of report modifications. The important part of these instructions is the process, which you may apply to any report.
For the first example, let's say you want to modify the Objects Summary report to include more information. The default report includes these fields: Catalog (O, P, A, L), Object ID, Object Name, Description, Condition, Status, and Home Location. If you want to remove the fields Condition and Status and add the fields Other Name and Collection to the report, follow these steps.
Modifying Fields and Text
- From the Reports menu, select Objects from Report Types and click once on the report Objects Summary.
- From the Report Layout Options section, choose Custom Layout 1 or Custom Layout 2 and click on the Modify Selected Layout button. This will open the Report Designer screen.
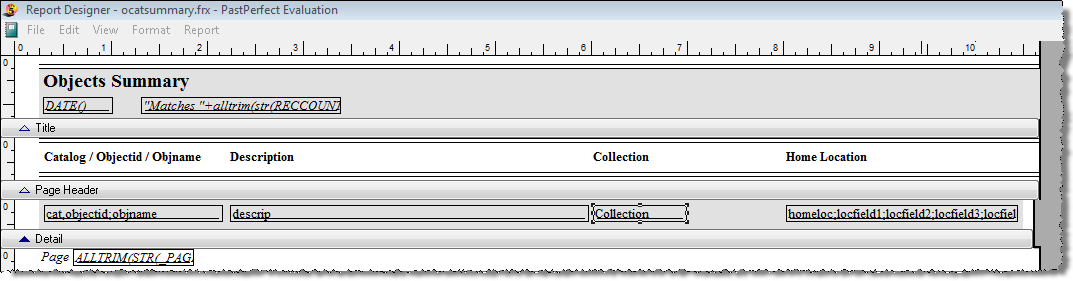
- Now let's change the Condition field to Collection. To do this,
double click on the field "Condition" which is in a
box above the gray band labeled Detail. In the Report
Expression screen, change the Expression
from Condition to Collection and click OK.
Change Expression

- Next, you need to change the label for the field as it appears in the Page Header band. To make that change, select the Label tool from the Report Controls toolbar, click on the word "Condition," use backspace and/or delete on your keyboard, then type the text "Collection." Then click the Select Objects tool to complete the change.
- Now, to make more room for the Collection field, let's remove the Status field. First click on the word "Status" in the Page Header band and press the Delete key on your keyboard. Then click on the field status in the box below in the Detail band and press the Delete key again.
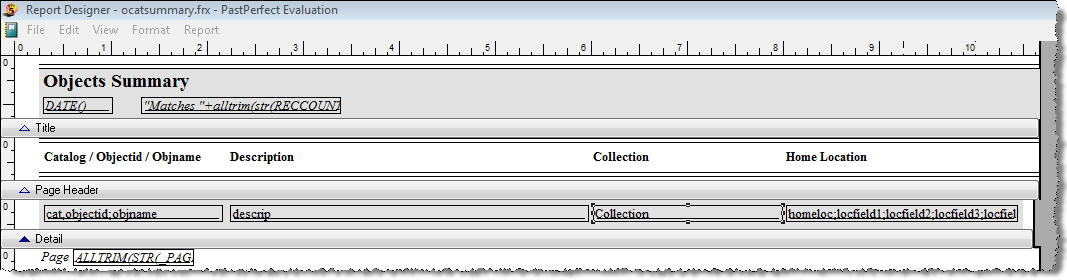
- With the extra space available to the right, you can expand
the width of the Collection field to accommodate longer entries.
To do this, first click on the Collection field box in the Detail
band. When it is selected, you will notice that the box has eight
small dots, one each on the four corners and in the center of
each side.
To increase the width of the field, point the mouse to the center dot on the vertical right edge of the field. You will see your mouse cursor change to a vertical line with arrows pointing to the left and right. Press and hold the left mouse button while you drag to the right. When it reaches the desired width, release the mouse button, seen below.
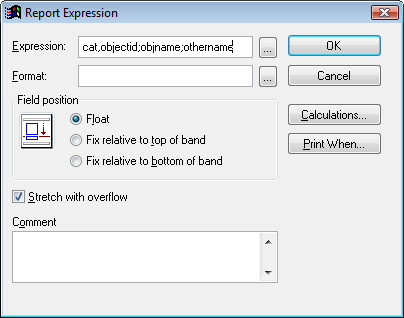
- The last step is to add the Other Name field. We want to have
the Other Name print in the left column of the report, below the
Object Name. To do this, double click on the field cat,objectid;objname
in the Detail band. In the Expression field, after "objname,"
add a semi-colon and the word othername. When you print the report,
you will see the catalog, a space, the Object ID, a carriage return,
the Object Name field, a carriage return, and the Other Name field.
Expression field
- Since there is not much space in the Page Header to add the words "Other Name," select the Label tool, click on the text "Catalog/Objectid/Objname" just after the "e" and add an "s." This will change the field label to "Catalog/Objectid/Objnames."
- Finally, save your changes by selecting Close from the File menu and answering Yes when asked, "Do you want to save changes to report?"
Now you can run the modified report from the Reports menu. Be sure that the report is set to the Custom Layout you selected, under Report Layout Options. You can narrow the records to include by selected fields, sort the results, and preview or print the report.
Modified Objects Summary report

Adding Images Attached to Catalog Records
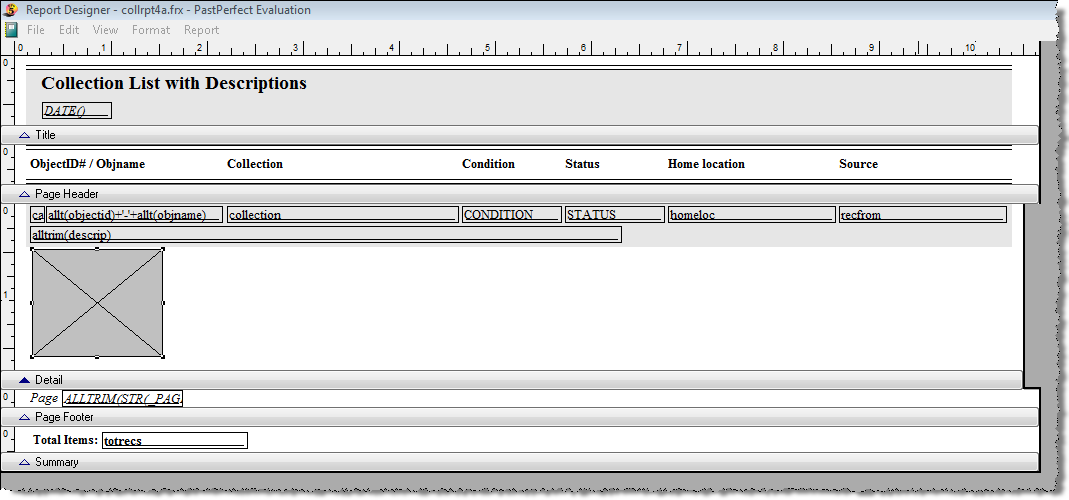
With PastPerfect it is also possible to include images on a report. In this example, we will add the image of each item to the Collection List with Descriptions report.
- First, open the design screen by selecting Reports | All 4 Catalogs, and Collection List with Descriptions. Select a Custom Layout, then click Modify Selected Layout.
- Let's place the image on the left of the report just below the alltrim(descrip) field box. You will need to increase the height of the Detail band to accommodate the image. Click on the gray Detail band and drag it down to make the space. Then select the Picture/OLE tool on the Report Controls toolbar and move your cursor to the blank area where you want to place the image. You will notice your cursor is a plus sign. Click and hold your mouse button down and draw a box.
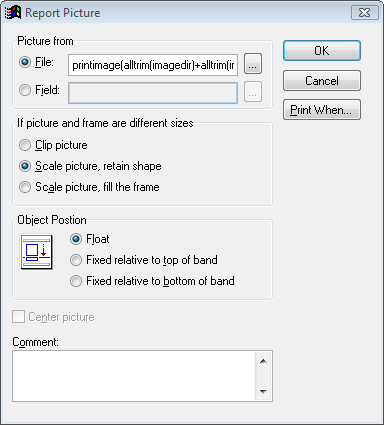
- As soon as you release your mouse, the Report
Picture screen will open, which allows you to specify the
filename of the digital image. Since we want to add images that
have been attached to PastPerfect records, we will use a specific
expression. In this case the entry would be as follows:
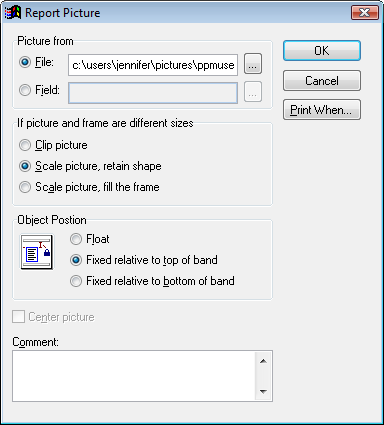
printimage(alltrim(imagedir)+alltrim(imagefile))
Be sure to select Scale picture, retain shape as shown below.
Report Picture screen
- You will also need to use the Print When function, in case
there are records without images on the report. Click the Print When button, then in the
Print only when expression is true line, enter the following expression.
!empty(imagefile) and file(alltrim(imagedir)+alltrim(imagefile))
- Click on OK to return
to the Report Picture
screen. Please be sure the image is set to the Object Position
Float. Click OK to return
to the design screen. You should now see a gray box with an "X"
on the screen where the image will be placed. You may need to
adjust its size by clicking on the selection dots on the edges
of the image and dragging one of the corners.
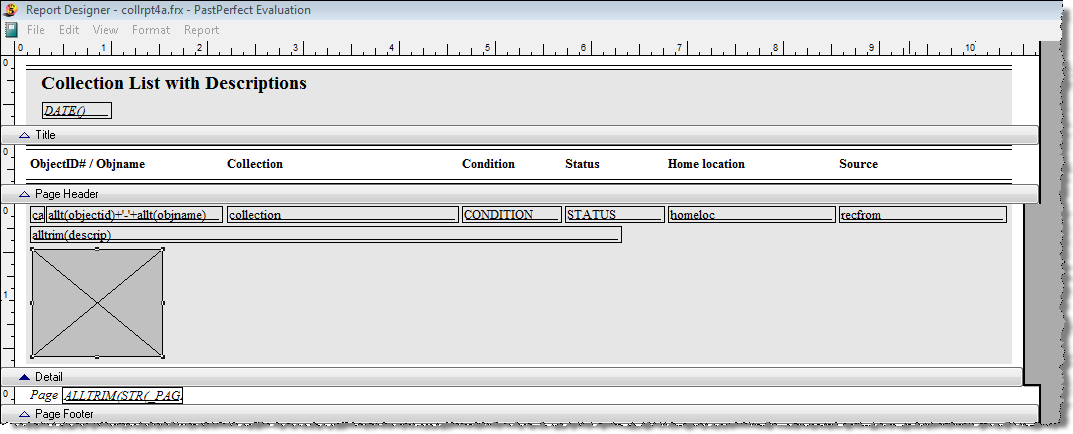
Report layout with image
- This report has alternating gray and white backgrounds for records. You will need to expand the gray rectangle that exists behind the field boxes so that it encompasses the image box you added. Click on the gray rectangle just beneath the field boxes to select it. Then left click on the selection dot in the center of the bottom edge. When your mouse is in the right place, you will see arrows pointing up and down. Hold your left mouse button down and slide the bottom of the gray rectangle down.
- Using your mouse, drag the Detail band up so it is just underneath
the gray background rectangle.
- From the File menu,
choose the Close option
and answer Yes when asked,
"Do you want to save changes to report?" Be sure that
the report is set to the Custom Layout you selected under Report
Layout Options (Step 1).
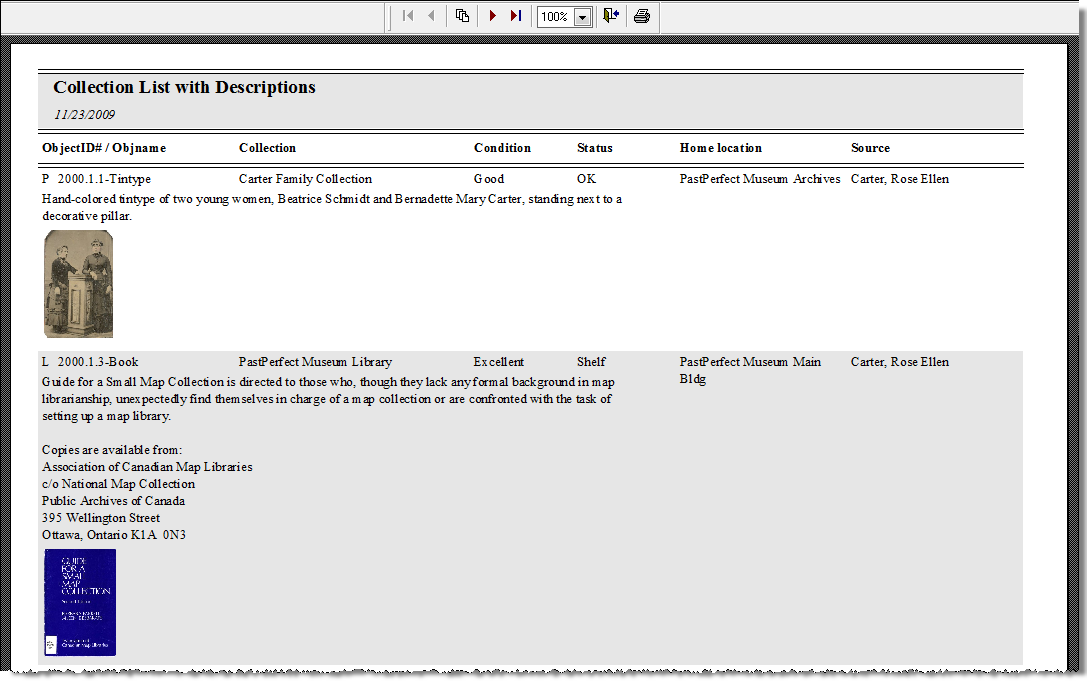
Preview of modified Collection List with Descriptions report
Adding a Logo Image
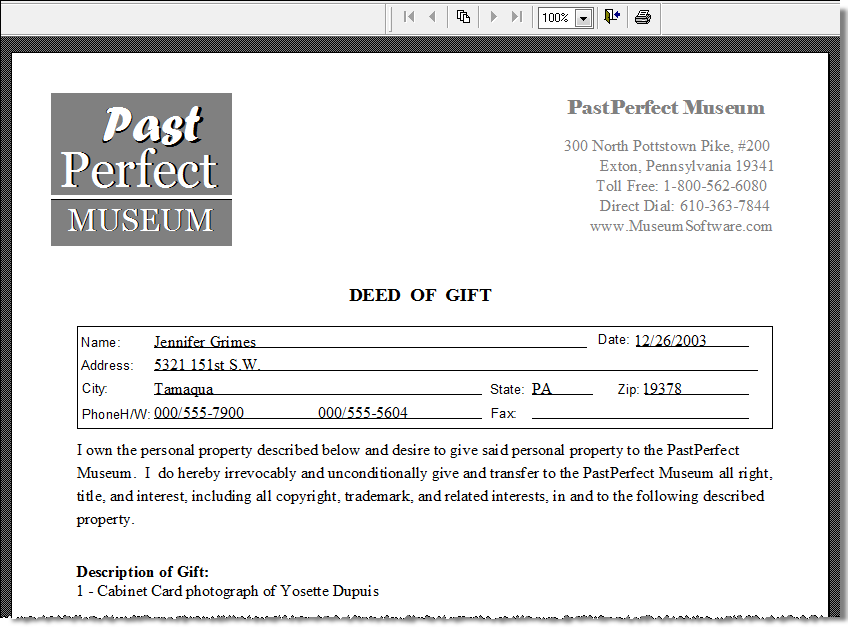
You may want to add your organization's logo to the Title or Page Header band of reports. Here are the steps for adding a logo image located on your hard drive to the Deed of Gift report.
- From the Reports menu, select Accession from Report Types and click once on the report Deed of Gift.
- From the Report Layout Options section, choose Custom Layout 1 or Custom Layout 2 and click on the Modify Selected Layout button. This will open the Report Designer screen.
- Enlarge the Report Designer screen to full size by clicking on the Windows Maximize button in the upper right corner. This is the center button between Minimize and the X for Close.
- Left click on the Picture/OLE Bound Control tool in the Report Controls toolbar and move your mouse to where you want the logo. Your cursor will be a plus sign. Holding your left mouse button down, drag your mouse to start drawing a box. As soon as you release your mouse, you will see a new window, the Report Picture screen.
- Use the Browse button
(button with three dots) to the right of the File
field to get to the Open
screen where you can navigate to the logo image on your hard drive.
Locate the Image, then select it and click OK.
Report Picture screen
- Choose Scale picture, retain shape at the Report Picture screen to keep your desired image size and retain the image's proper proportions.
- Click OK to exit the Report Picture screen. You should see your logo image. You may enlarge or shrink the image using one of the selection dots at the corners.
- From the File menu,
choose the Close option
and answer Yes when asked,
"Do you want to save changes to report?" Be sure that
the report is set to the Custom Layout you selected under Report
Layout Options. The figure below is a preview of the report with
the logo image added.
Preview of report with logo image
Data Grouping
By grouping records on your report, you can view certain objects or contacts together as a subgroup and perform calculations on the subgroups' fields. Let's say that you want to find the total number of photographs kept in each storage box to estimate the number of acid free photograph boxes you need to order as you process the collection in the coming year. To do this, we will first create a simple Photos Report Maker report, then modify its layout to group by the field Home/Container, which is the sixth location field. For detailed information on creating Report Maker reports, please see Chapter 18 - Report Maker.
- Choose Report Maker from the Main Menu.
- Choose the Photos Report Type and click Create New Report.
- Enter a Report Name, such as Photos Box Count, complete the other fields as needed and click Next.
- In the Build Filter Statement screen, select the field Object ID from the drop-down menu.
- From the Condition drop-down menu, select Is not empty, click Add to Statement, then click Next.
- At the Fields to Include screen, double click on the Object ID field from the list on the left. It will be added to the Fields to Include on Report. Also select the Home/Container field. Click Next.
- At the Select Sort Order Fields screen, choose to sort by the Home/Container field. Double click to move the field to the Fields to Sort by column. Click Next, then click OK.
- Exit from the Report Output Options screen. When asked if you want to save this report, click Yes. Then close out of Report Maker Reports.
- From the Main Menu, choose Reports, then the Photos Report Type.
- Click once on your Report Maker report *Photos Box Count. Select Custom Layout 1 or Custom Layout 2 and click Modify Selected Layout.
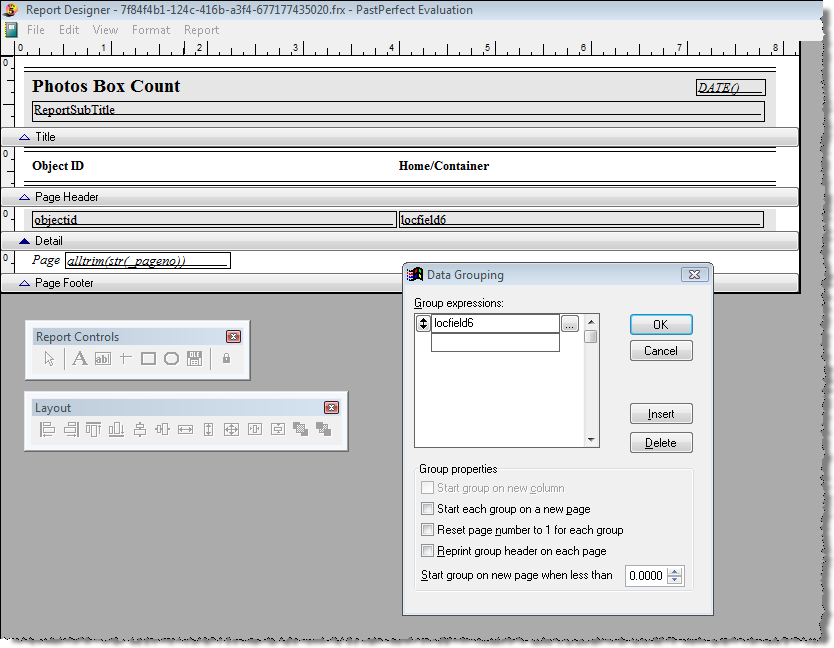
- Maximize the Report Designer screen, then click the Report drop-down menu and choose Data Grouping.
- In the first box (with opposing arrows to its left), seen below,
type the following and click OK:
locfield6
Data Grouping screen
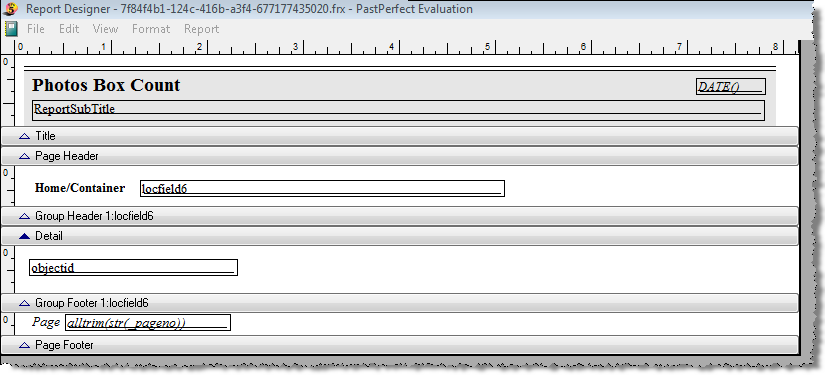
- You will see two new bands - Group Header 1: locfield6 and Group Footer 1: locfield6. Pull the Group Header band down to accommodate a field box.
- Using your mouse, move the locfield6 field box into the Group Header band, along the left side. You may want to delete the Object ID label in the Page Header band. You can do this by selecting it with your mouse and using the Delete key on the keyboard. Then move the Home/Container label to the left, above the locfield6 field.
- Pull the Group Footer band down to accommodate a field. Using
your mouse, move the objectid field box from the Detail band to
the Group Footer band, along the left side.
Report Designer screen
- Double click on the objectid field box and click Calculations. Choose Count and click OK twice to get back to the Report Designer screen.
- Delete the gray rectangle in the Detail band and pull that band up against the Group Header.
- Click the File menu
and choose Close. Be sure
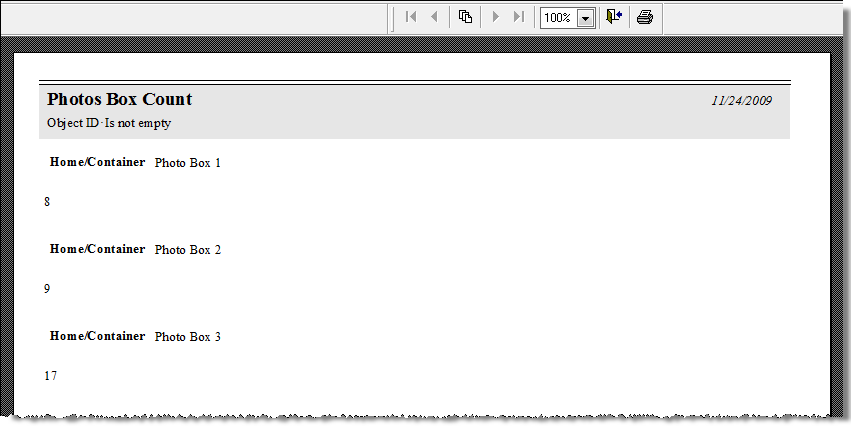
to save your changes. When you run and preview or print the report
you will see a report with the box names and the number of items
in each box.
Preview of Photos Box Count report
TIP: If you modify a predefined report to include Data Grouping, when running the report, you must choose the field for your Sort Order that you used to group your data. Otherwise the data will not be grouped properly.
Creating a New Label Layout
The PastPerfect Reports screen can be used to print and design labels. Some examples of labels are mailing labels, catalog cards, spine labels, and barcode labels. Modifying labels is similar to modifying reports, with a few exceptions.
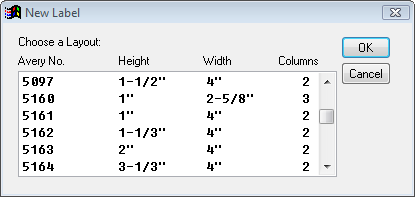
When you select a label from the Reports menu and choose a Custom Layout, an extra button is available in Report Layout Options. This button is named Create New Label Layout and will allow you to select a label design from a list of standard Avery labels. By clicking this button, you erase any customization you previously added, and create a new blank label.
Here is an example of how to design a Contacts mailing label using a new label style. By default, Contacts Label Style #1 and Style #2 both use Avery labels #5160, which measure 1" x 2 5/8" and print in three columns on the sheet. We will modify Label Style #2 to print on Avery labels #5163, which are 2" x 4" and print in two columns.
- First, select Contacts and Contacts Labels Style #2 from the Reports menu. Then click on Custom Layout 1 or Custom Layout 2.
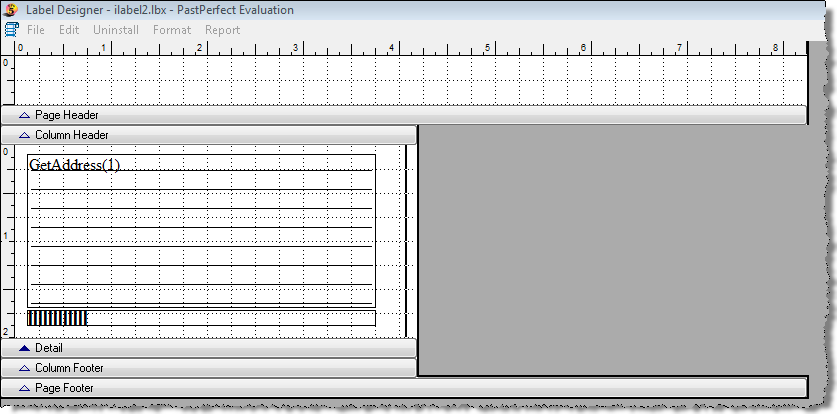
- So that you will not have to re-create the fields on the new label, you can open the old design, select the fields and use the cut and paste tools to transfer the fields. To do this, click on Modify Selected Layout to display the Label Designer screen. Click on Edit | Select All, then Edit | Copy. This will put the fields in the Windows Clipboard. Click on File | Close to return to the previous screen. It is not necessary to save the changes.
- Now, click the Create New
Label Layout button. When asked if you want to erase the
custom label and start a new one, click Yes.
You will be presented with a list of label styles and their associated
Avery numbers. Select Avery #5163 and click OK.
- The new blank label design screen will open. Make sure that
the gray Detail band is set to 2" and the label width is
4". Click on Edit
| Paste to transfer the
fields from the Windows Clipboard to the label. You will probably
need to rearrange the fields to fit this larger label.
New Label selection screen
- Finally, select File | Close and save your changes. Now when you use the custom layout selected for Contacts Label Style #2 you will get the new layout.