2: The Basics
This chapter will teach you how to use the most common functions of PastPerfect. Detailed instructions for specific sections of the program will be given in later chapters.
Starting PastPerfect
When PastPerfect was installed, this icon  was placed on the Windows desktop. To start PastPerfect, double click on the icon. You can also start the program from your Windows desktop by clicking Start | All Programs | PastPerfect Museum Software | PastPerfect Museum Software 5.
Main Menu
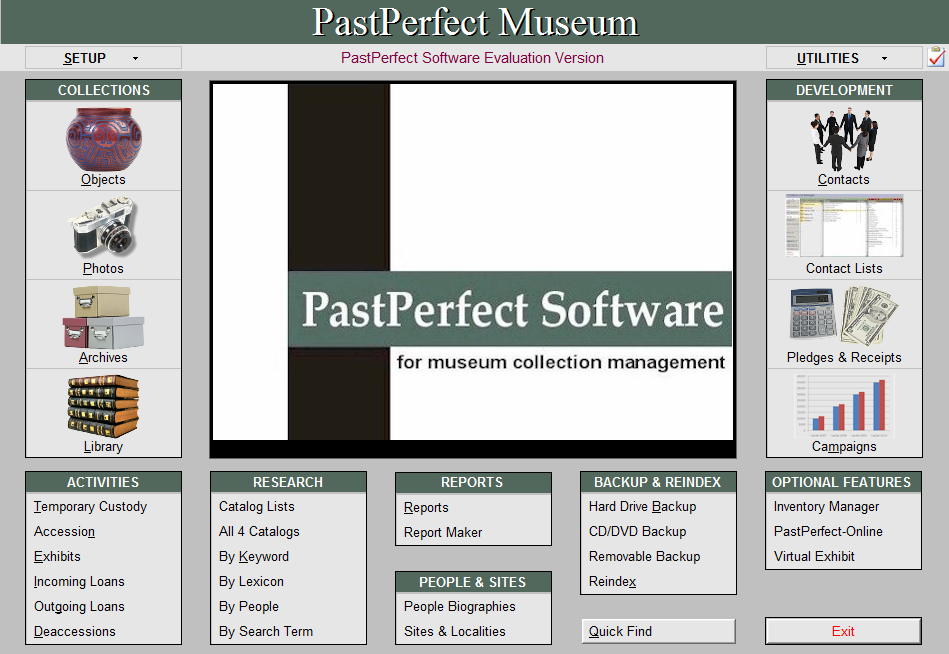
Each time you start PastPerfect you will arrive at the Main Menu, as seen in Figure 2-1.
This menu consists of the main collection catalogs on the left and the main development sections on the right. Activities, Research, Reports, People & Sites, Backup & Reindex, and Optional Features are listed at the bottom of the screen. Setup options are found by clicking the Setup drop-down menu on the top left, and Utilities functions are found by clicking the Utilities drop-down menu on the top right. The general To Do List and Multimedia Links are accessed by clicking the clipboard icon on the top right.
If you are using PastPerfect's security functions, some functions may not be available to all users. The label on a button is dimmed if it is restricted.
Basic Navigation Tools
These navigation buttons appear on many of the PastPerfect screens, including at the top of catalog records and contact screens. This User's Guide refers to these buttons as a group as the Navigation Bar. Smaller groups of these same navigation buttons appear on other screens.
Prior - Moves you backward to display the previous record. The "Sort by" setting described later controls the order in which you move through the records.
Next - Moves you forward to display the next record. The "Sort by" setting described later controls the order in which you move through the records.
Beginning of File - Moves you to the first catalog record, based on the "Sort by" setting described later. For example, if you have chosen to sort by the Collection field, and you click the Beginning of File button, you will see the record with Collection name that comes first when sorted alphabetically by Collection name.
End of File - Moves you to the last catalog record, based on the "Sort by" setting described later. For example, if you have chosen to sort by the Collection field, and you click the End of File button, you will see the record with Collection name that comes last when sorted alphabetically by Collection name.
Add Button - Begins the process of adding a new record. The Add New Record screen will be displayed. This screen has different options depending on which section of the program you have opened. Options may include Fill with Blank Data, Fill with Data from the Current Record, or Fill with Default Data, which can be specified on a default data record.
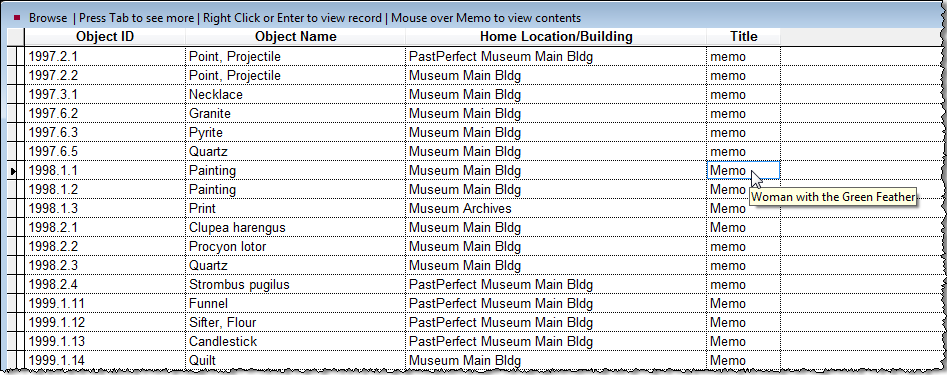
Browse Button - Displays multiple records on one screen in a tabular view. Each record occupies one row. Use the Tab key, Shift-Tab, or horizontal scroll bar to move right or left to view more fields. Use the vertical scroll bar, arrow keys, or Page Up and Page Down keys to quickly move to the desired record. Then right click with your mouse or press the Enter key on the keyboard to display the selected record. The "Sort by" setting described later controls the order in which the records are displayed.
Unlimited note fields are displayed with just the word "memo." If the word "Memo" is capitalized, the field contains information. To view the Memo field contents, hold your mouse over the word "Memo", or double click on the word "Memo" with the mouse.
The width of each column can be adjusted for optimal viewing. To make an adjustment, point the mouse to the vertical line that separates the column headings, then click and hold the left mouse button while dragging to the left or right. Or, double click on the vertical line separating the column headings to automatically resize the column to the width of the longest character string.
You may not want all fields to appear on the Browse screen. For example, if your object collection does not contain art objects, you can remove the Accessory field from the screen. Or you may wish to change the order of the columns. These changes can be made from the Main Menu | Setup | Browse screen. Please see Chapter 3 - Getting Started for details.
By design, when you are in Browse you cannot edit data or delete records. We recommend that you leave it this way; however, to accommodate times when you want to make changes in Browse, you can temporarily activate editing and/or deleting capability by going to the Main Menu | Setup | Browse screen and selecting the desired option at the bottom of the screen. Object ID and accession numbers cannot be edited in Browse.
Delete Button - Marks the current record for deletion. If the Delete button was clicked by accident, you may immediately click the Recall button to restore the record. Otherwise, records marked for deletion are moved to the Recycle Bin until a Reindex is performed. The deleted records can be viewed and restored to their original catalog by going to the Main Menu | Utilities | Recycle Bin. Records marked for deletion will be permanently removed during the Reindex process.
Edit Button - Click this button to change or enter additional data on the current record. When in Edit Mode, you will see the words "Edit Mode" on the top left of the catalog record. The background color of the field that is to be edited will change to light yellow. Not all fields may be edited from every screen. The background of uneditable fields will not turn yellow and you will receive a message saying "The control is read-only" if you try to edit one of these fields.
While in Edit Mode, you can use the standard Windows cut and paste features to move text to and from other Windows applications or other fields within PastPerfect. For example, you may have a document in MS-Word that describes one of your objects. Rather than retyping that text, you can copy it from MS-Word and paste it into the description field of the catalog record.
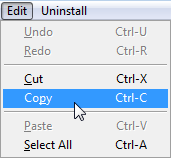
The copy and paste features may be accessed from the Edit menu at the very top left of the screen. Shortcuts using the Control key are also available: Ctrl-X to cut, Ctrl-C to copy, Ctrl-V to paste, and Ctrl-A to select all.
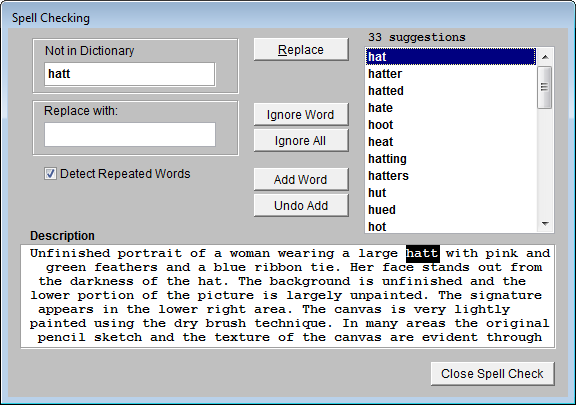
Spell Check Button - Click this button to check the spelling of entries in the current record. PastPerfect comes with a built-in dictionary, as seen in Figure 2-5. When a word is encountered that is not in the dictionary, you will be presented with the Spell Checking screen. The misspelled word is displayed at the top of the screen in the Not in Dictionary field. The field that contains the misspelled word is displayed at the bottom of the screen, with the misspelled word highlighted.
Available options are to replace the word with one from the dictionary, replace the word with one that you type in the "Replace with:" field, add the word to the dictionary, or ignore the word and continue checking.
To close the Spell Check screen and save your changes, click the Close Spell Check button.
You can select which fields are included in the spell check on the Main Menu | Setup | Spell Check screen described in Chapter 3 - Getting Started.
Find Button - Opens the Find screen that allows you to search for records with text in a selected field. The Instant Find section at the top of the screen allows you to search the fields that are pre-indexed for instant searches. To search an indexed field, select the field to search from the drop-down menu titled "by Indexed Field." Then enter the term you are looking for in the box to the right. This search is a "begins with" search, so the term should be the first word that would appear in the field. Click Find Now to instantly jump to the first record that matches your search criteria. Selecting a different Indexed Field also changes the order in which your catalog records are sorted. You will see the last field used for an Instant Find in the Sort By field at the top right of the catalog record once you close the Find screen.
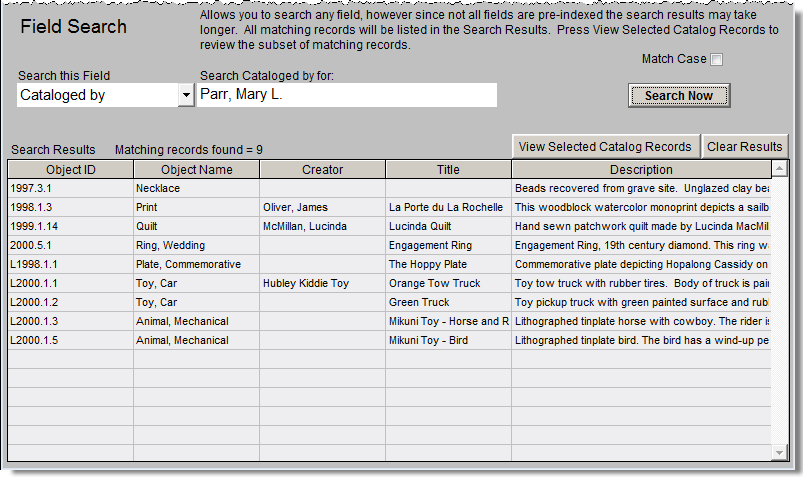
The Field Search section in the lower part of the screen allows you to search any field for a particular term. This search is a "contains text" search, so the term does not have to be the first word in the field. This is especially helpful when searching memo fields like Description or Provenance. To search, choose the field in the Search this Field drop-down list, then enter the term in the box to the right. If you want the search to be case sensitive, check the box for Match Case. Click Search Now to begin the search. Rather than taking you to the first matching record, all matching records are displayed in the Search Results grid. Clicking View Selected Catalog Records will take you to the database in a special mode viewing just those search results. To return to the Find screen from this mode, click the Find button. Clicking Return to viewing all records at the top right will allow you to view all records again.
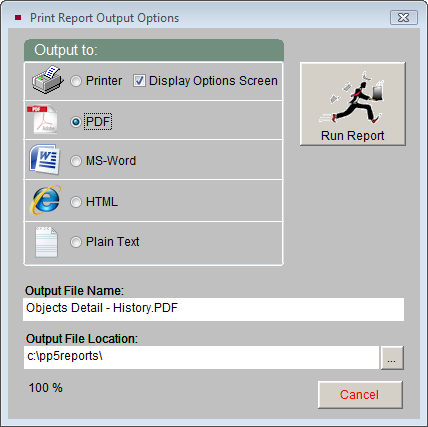
Print Button - Brings up a screen with reports or screens that may be previewed and printed. Once the report is selected and you click Print, you will see a Print Report Output Options screen, as seen in Figure 2-8.
You may select to send the report to the printer. If you have multiple printers connected to your computer or network, you will be able to choose the desired output destination if the Display Options Screen box is checked. This screen also gives the options to output the report to PDF, MS-Word, HTML, or plain text. If one of these options is chosen, the output file name and location will be listed at the bottom. Once the output is selected, click Run Report to print or generate the report. The default report location is a folder called "pp5Reports" on your local hard drive.
Exit Button - Closes the current screen and returns to the previous screen. You can also use the Escape key on your keyboard to activate this command.
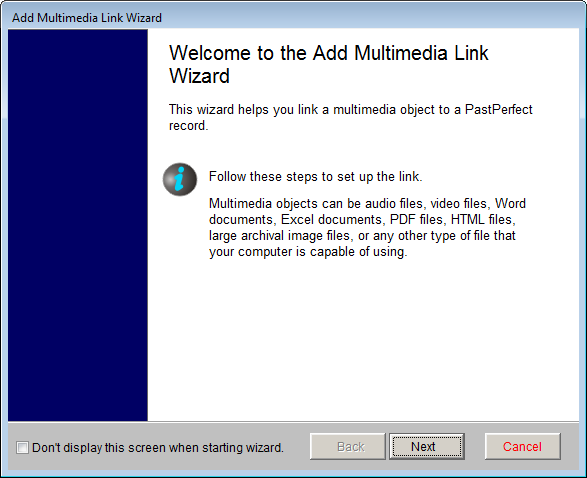
Multimedia Button - If you have purchased and installed the MultiMedia Upgrade, this button allows you to add new multimedia links to the record and view existing links. If no multimedia links exist for this record, the filmstrip icon will be gray. If a multimedia link exists, the filmstrip icon will be turquoise. Clicking this button when no links exist will bring up the Add Multimedia Link Wizard screen, seen in Figure 2-9, which will help you attach a file.
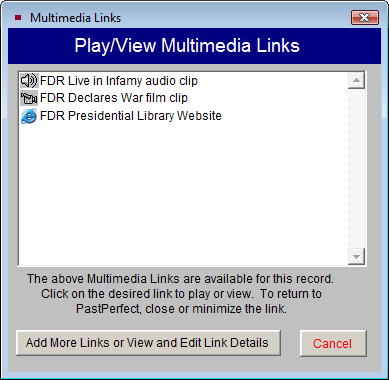
Once links have been set up, clicking this Multimedia button will allow you to view the links, edit or delete links, and add new links, seen in Figure 2-10.
Here are some other functions and buttons that are common to many screens:
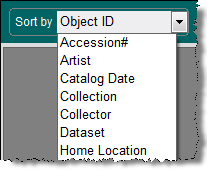
Sort by Function - Sort by allows you to choose the field by which your records are to be sorted. It changes the order in which records display when clicking the Prior, Next, and Browse commands.
View Accession Screen Button - Found on the Source subscreen in the Objects, Photos, Archives, and Library catalogs, this button displays the associated Accession record with information about the source or donor of the item. All features from the Accession screen are available, including a list of items in the same accession and the option to print the Accession record.
Query Button - The Query command appears on the Objects, Photos, Archives, Library, and Contacts screens and allows you to perform complex searches on your records based on the contents of selected fields. For more information about this command, please see Chapter 14 - Research.
Cancel Button - During editing, this cancels any changes you have just made. When adding a new record, this will cancel the entry. This button is used throughout the program to allow you to cancel a selected command before it is executed. You can also use the Escape key to activate this command.
Save Button - Saves the changes you have just made and exits Add Mode or Edit Mode. You may press the F2 key on your keyboard at any time during editing to activate this command.
Recall Button - Recalls a record that has been marked for deletion. This button will only appear immediately after clicking the Delete button on a record. Once you have left that record, you may recall deleted records by going to the Recycle Bin in Utilities.
Preview Button - Displays the selected report on the screen. From this display you will have the option to send the report to your printer, but you will not have all the options found on the Print Report Output Options screen. Close the preview and click the Print button to view the Print Report Output Options screen.
Export to Excel Button - Exports the list or report to Excel.
Browse Data Button - Displays the list or report in a Browse screen for you to view.
File Folder Icon - File folder icons indicate that more information may be available. Click the icon to open another screen displaying that information.
Plus Sign Icon - Plus sign icons allow you to add a new entry to a subset or list of records. Click the icon to open the Add screen.
Info Icon - This icon indicates that there is additional information. Click the icon to access that information.
Pushpin Icon - The pushpin icon allows you to create a mapping data file and open your mapping software to view the location. Mapping software must be installed for this feature to be functional.
To Do List Icon - Displays the To Do List for the catalog in which you are working. The To Do List icon will have a gray check mark if the record you are on is not on the To Do list. If the record is flagged to be on the list, the check mark will turn red.
Update History Button - Displays the date and time for each time a record is edited. Also records the name of the user who made the change. Security must be activated to track user names.
Keyboard access to buttons - Most buttons can be activated by pressing the Alt key and the button hot key at the same time on your keyboard. The hot key is the underlined letter on the button. For example Alt-F activates the Find button.
Sidebar Views and Actions
The left side of the catalog screens contains the Sidebar. The Sidebar has various screen views to display more fields for the record. Holding your mouse over a view button on the Sidebar will display that view on the lower portion of your screen. If you would like to hold that view on your screen, whether to read or edit it, left click on the view button. This will lock that view into place until you move your mouse over another screen view button. Depending on the catalog and the view you are in, the Sidebar may also contain action buttons that allow you to perform various actions for the record on the screen. Generally, action buttons are not available in Add or Edit Modes.
Function Keys
The function keys on the top row of your keyboard, F1-F12, provide single-key input of common words, phrases, or the current date. F1, F2, and F7 are reserved for specific use. F3-F6 and F8-F12 can be redefined as often as you like by going to the Main Menu | Setup | Function Keys. Each user can have his or her own function key assignments when users are created in the Main Menu | Setup | Security.
F1 Help - Use this key to view the Help screen. Click in the field, then press F1 to view the field description for the field.
F2 Save - Saves the changes you have just made and takes you out of Edit or Add Mode. Press the F2 key at any time during editing to activate this command.
F3 - F6 - User-defined.
F7 Authority File - Displays an associated authority file when adding or editing catalog records.
F8 Date - Can be assigned to enter the current date as defined by your computer's date setting.
F9 - F12 - User-defined.
Right Mouse button - In Browse mode, right clicking on a record closes the Browse window and displays the full screen for that record. Its use in Edit or Add mode can be defined to open the Copy & Paste menu, to access authority files, or both. See Chapter 3 - Getting Started for setup details.
Authority Files
PastPerfect uses authority files to help standardize and speed up data input and retrieval. Common entries can be entered into each file. Over 100 authority files are provided for fields such as: Author, Artist, Classification, Collection, Creator, Material, Medium, Object Name, People, Photographer, Places, Print Size, Storage Locations, and Subject.
Authority files are available when you add or edit catalog records, and in Find, Query and Research modes. When the cursor is in a field with an authority file, this reminder appears, usually near the top of the screen:
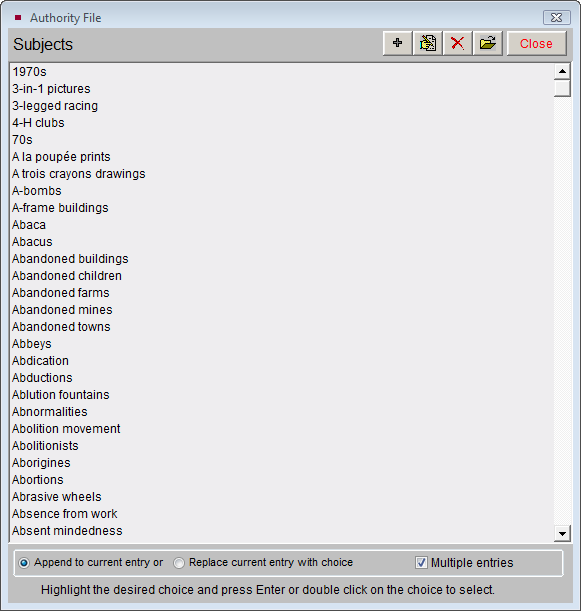
To access an authority file, press F7 on the top row of your keyboard or right click with your mouse in that field. A window will open displaying a list of entries. From here you may add to the list, edit the list, or select an item to put in your catalog record by double clicking on the selected item. Some authority files are pre-filled, like Subjects, which is populated with data from the Library of Congress Thesaurus for Graphic Materials I: Subject Terms (LCTGM I). Other authority files are unique to your organization and built from terms you add.
Some authority files are single entry, which means only one selection can be made from the list. Others, like the Subjects authority file, allow for multiple entries. You can choose either to append the newly selected entries to the existing entries in the field by clicking the radio button next to Append to current entry or to remove the existing entry and replace it with the selected entry by clicking the radio button next to Replace current entry with choice. If you place a check in the Multiple entries box, you can select more than one entry before exiting back to the catalog record.
Authority files may also be accessed for maintenance purposes under the Main Menu | Setup | Authority files. Authority files may be set as "Verified", thus restricting unauthorized users from saving data in those fields that is not contained in the associated authority file. If a user attempts to save a record where terms were used that do not come from the authority files, the user will be restricted from saving the record. Please see Chapter 3 - Getting Started for setup details.
The People and Search Terms authority files are unique. The People authority file is automatically populated with people's names as they are entered into the People field in catalog records. The People authority file is accessed for maintenance purposes by clicking the People Biographies button on the Main Menu.
The Search Terms authority file is similar to the People authority file in that it is also populated based on actual entries in the catalogs.
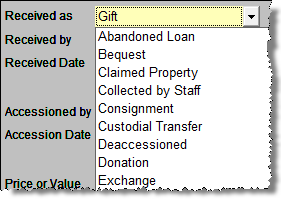
Combo Box Drop-Down menus
PastPerfect also provides drop-down menu authority control for fields such as Artist Role, Received as, and Rock Type. These menus allow you to select from a list of options. Unlike standard authority files, you must choose an entry that is on the list.
The down arrow at the right end of the field identifies drop-down menus. Click on the arrow to display the list of choices. The list of choices can be changed by going to the Main Menu | Setup | Authority Files.
Now that you are familiar with the basics, it's time to get started using PastPerfect.