Setting Up Labels and Envelopes
In addition to printing letters, PastPerfect gives you the ability to print mail merge labels and envelopes. There are six label styles you may choose from, in addition to an envelope. If the default styles do not give you what you want, you may modify the labels. The default styles are as follows:
Style #1 - This label includes the Name & Title, Company (if filled in), Address1, Address2, City, State, and Zip. Prints on an Avery 5160 mailing label, 1" x 2 5/8".
Style #2 - This label includes the Name & Title, Company (if filled in), Address1, Address2, City, State, Zip and barcode (with the Barcode Printing Upgrade). Prints on an Avery 5160 mailing label, 1" x 2 5/8".
Style #3 - Set up to be a membership card, this label includes the member's first name and last name, Address1, Address2, City, State, Zip, Home Phone, Date Joined and Membership Type. You may add your museum's name and logo. This card can be set up for any size paper, with the default being an Avery 5371 business card, 2" x 3 1/2".
Style #4 - This label is set to print the billing address. If you have selected to use an alternate billing address for a member, that alternate address will be used. If you have not selected to use an alternate billing address for a member, or the contact is not a member, the regular mailing address fields will be printed, as on Style #1. Use this label if you use alternate billing addresses for memberships or have created a User Defined List that includes only billing members. Prints on an Avery 5160 mailing label, 1" x 2 5/8".
Style #5 - This label is also set to print the billing address. Use this label if you use alternate billing addresses for memberships or have created a User Defined List that includes only billing members. Prints on an Avery 5160 mailing label, 1" x 2 5/8".
Style #6 - Similar to Style #4 and Style #5, this label is also set to print the billing address. Use this label if you use alternate billing addresses for memberships or have created a User Defined List that includes only billing members. Prints on an Avery 5160 mailing label, 1" x 2 5/8".
Envelope - The envelope includes the Name & Title, Company (if filled in), Address1, Address2, City, State, and Zip. It is designed to fit on a #10 envelope.
These labels and the envelope may be modified to use a different size label or envelope, or to include different fields. Each label and the envelope can have two custom layouts that you can rename. To modify the labels and envelope, click on Reports on the Main Menu, then click the Contacts under Report Types. You will see the Contacts Labels Styles #1-6 and Contacts Letter Envelope on the list of reports.
Contacts Reports screen
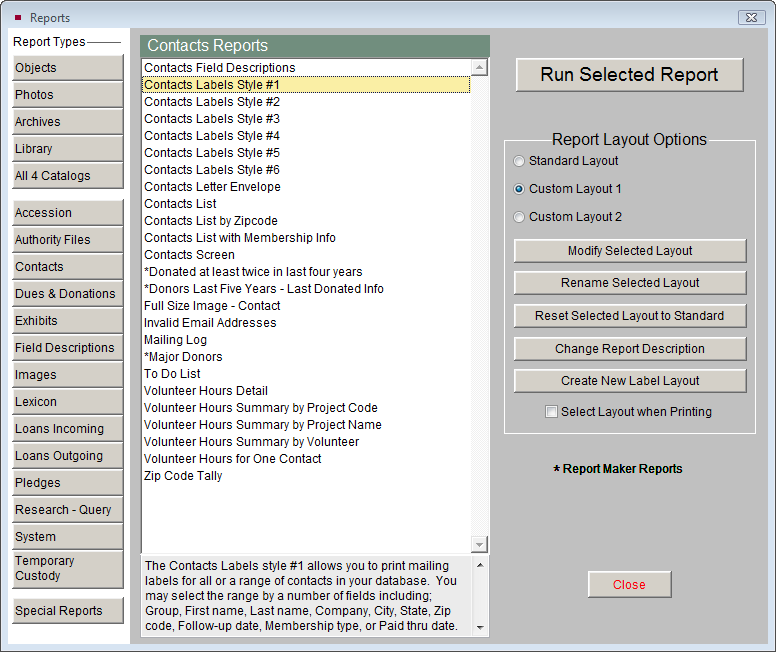
To modify a label, highlight the label style and select either Custom Layout 1 or Custom Layout 2 on the right. Then click Modify Selected Layout to open the Label Designer screen where you will make your modifications. Modifying labels and the envelope is similar to the report modifications discussed in Chapter 19 - Advanced Report Modifications.
Example Label Modification
To give you an example of what is possible with the labels, let's walk through an example. Your institution would like to change Label Style #1 to print the Paid Thru Date of members on labels, and change the font of the label. Here are the steps:
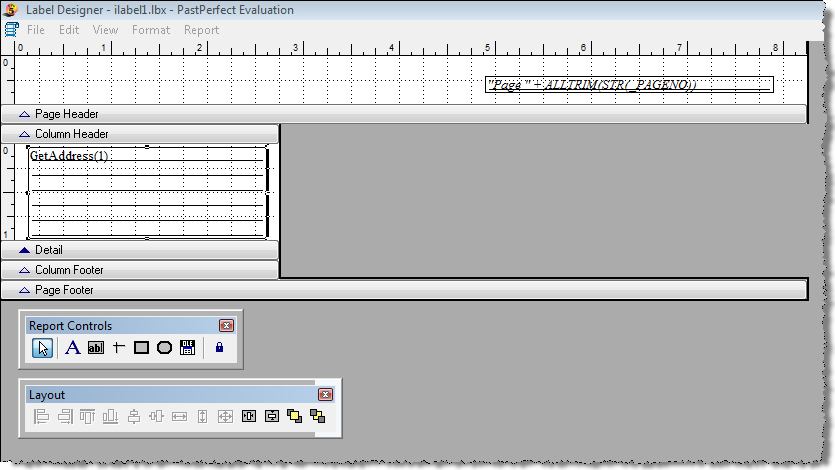
- Open the Label Designer screen for Label Style #1, using the steps above.
Label Designer screen
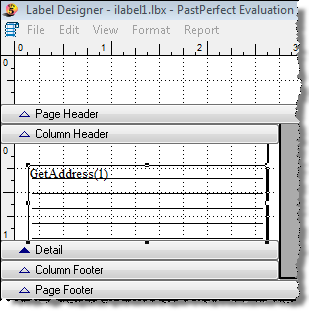
- To add the field for Paid Thru Date, you first need to make space on the label. To do this, make the box containing the address, GetAddress(1), smaller. Click on the box, then click on the handle (black dot) on the top edge of box. Hold the mouse button down and drag the mouse down. When you let go of your mouse, the box should be smaller.
Label with shortened address box
- To insert the Paid Thru Date field at the top of the label, find your Report Controls Toolbar. If you do not see it on the screen, go to View at the top and click Report Controls Toolbar. On the toolbar, click the ab button, then move your mouse to the space above the GetAddress(1) field.
Label with "ab" button

- Click and draw a box with your mouse. When you let go, the Report Expression screen will appear.
In the Expression line, type in the field name for the Paid Thru Date field, which is "nextdue".
Report Expression screen
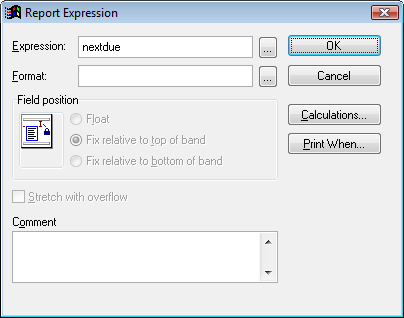
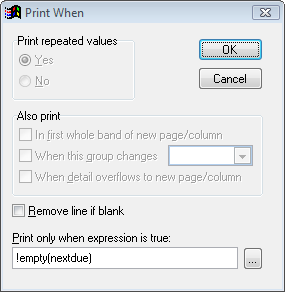
- Click the Print When button to open the Print When screen. In the field Print only when expression is true, type in "!empty(nextdue)" as below. This will prevent the empty date field from printing if you use this label for non-members.
Print When screen
- Click OK on the Print When screen, then click OK on the Report Expression screen to close the windows.
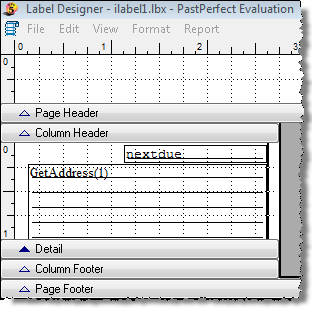
- The nextdue field box will appear on your label. You may move the field to the appropriate location on your label by clicking on it and using the arrow keys on your keyboard. Make sure the field does not overlap any other fields. You may also want to make the field longer, by clicking on one of the center handles (small black boxes) on the left or right edge and dragging it out. You may also do this by holding down the Shift key and Right Arrow key on the keyboard at the same time.
Label with nextdue field
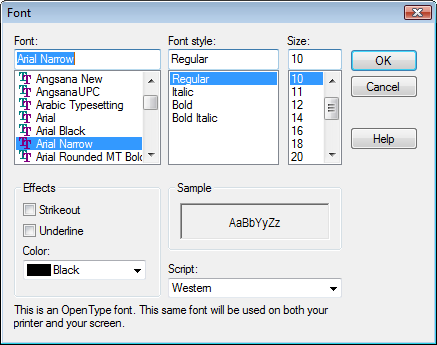
- Lastly, let's say you want to change the font of the entire label. Click Edit at the top and click Select All. This will select all the fields on the label. Then go to Format at the top and click on Font. You will see the screen below. Choose the font and font size. Be sure to choose something small, so the text still fits on your label. Click OK to make the change.
Font Screen
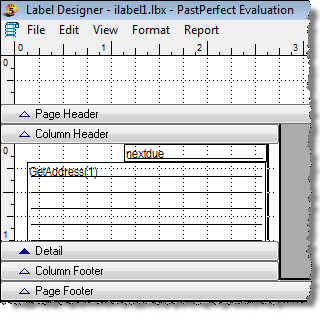
- Make sure your fields fit on your label without overlapping. They may touch so that there is a dark line in between the fields. If the fields overlap, they will not print.
Label with new font
- Once you are happy with the layout, click File at the top and Save, then click File again and click Close. As long as you have this label set to use this custom layout, it will print the label with these changes. You may rename the custom layout you modified by clicking the Rename Selected Layout button on the Reports screen. When printing your label, be sure to select Style #1. The labels should look like this sample.
Preview of modified labels

Adjusting Label Paper for your Printer
Another common modification for labels is adjusting the label page so it prints out with the labels aligned properly. Each printer picks up label paper differently, so you may find your labels are too high or too low on the page. Here are the steps to make adjustments.
- Open the Label Designer screen by clicking on Reports on the Main Menu, then the Contacts button, then highlighting the desired label style and clicking Custom Layout 1 or Custom Layout 2. Click Modify Selected Layout.
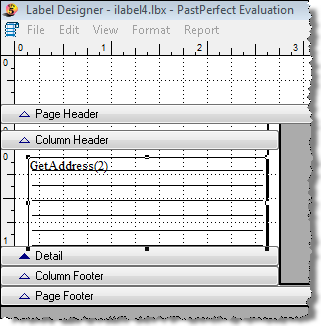
- If your labels are printing too high on the page, so that the tops of the labels are getting cut off, click on the Column Header band and drag it down a small amount. You may also move the GetAddress(2) field on the label down as far as possible. Do this by clicking on the field. Then use the down arrow on your keyboard to move the field down. Make sure the bottom of the field does not go below the Detail band.
Label with Column Header moved down
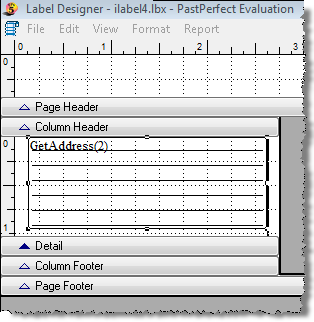
- If your labels are printing too low on the page, so that the bottoms of the labels are cut off, click on the Page Header band and drag it up a small amount. You may also move the GetAddress(2) field on the label up as far as possible. Do this by clicking on the field. Then use the up arrow on your keyboard to move the field up. Make sure the top of the field does not go behind the Column Header band.
Label with Page Header and address field moved up
- Once you have made your modifications, save your changes by going to File and Save, then File and Close. Do a test print of your labels by going to Contact Lists and printing a page on regular paper, then holding the label paper up to it and see if the label text fits within the labels. If not, go back and make further adjustments. This process can take a few tries to get the labels lined up properly. Once they are set, continue to use the selected Custom Layout for the label.
Adjusting Envelopes for your Printer
Each printer feeds envelopes differently. Using the default envelope setup, you may find that your printer does not properly print envelopes. They may be printed in the wrong direction, or the address prints in the wrong location. An easy way to fix this is to change the paper size within the envelope's report designer.
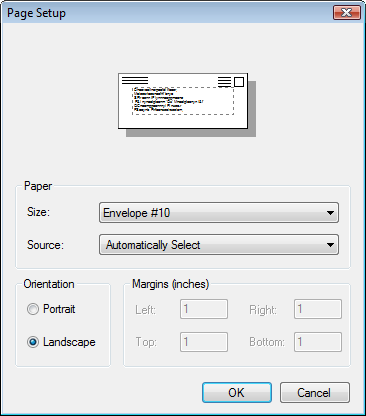
On the Main Menu, click Reports, then click Contacts. Highlight the Contacts Letter Envelope and click Custom Layout 1 or Custom Layout 2. Then click Modify Selected Layout. On the Report Designer screen, click File at the top and click Page Setup. On the Report Page Setup screen, click the Page Setup button. Change your paper size to Envelope #10, or the appropriate size envelope. Your screen may look something like figure below, although different printers will show different screens. Click OK, then OK again to close the windows. To save your changes, go to File and Save, then File and Close. Once this envelope is set up correctly, continue to use the selected Custom Layout.
Page Setup screen with Envelope #10 size
NOTE: The Temporary Custody Thank You Letter Envelope and the Accession Thank You Letter Envelope may require adjustments to print properly as well. These forms are also modified in the Main Menu | Reports area of the program.