Backup
Backup & Reindex utilities on the Main Menu
The Backup utility is the most important! It allows you to save up to thirty PastPerfect data backups onto your hard drive. The data is compressed into a zip file to conserve disk space. Your data can also be saved on removable media such as CD, DVD, flash drive, or external hard drive for off site storage. Data, images, and multimedia files can be burned to a CD-R or DVD-R to create progressive backups. By placing just one backup on a CD or DVD and using a new disc for each backup, you create an archive of backups. Should you need to restore data from an older backup, you have those files saved. For the cost of discs and a few minutes of your time, you have peace of mind in knowing that your PastPerfect data may be recovered in the event of complete hardware failure.
We highly recommend that you back up your PastPerfect data every day that you work in the program. The process takes just a few minutes and someday, if disaster strikes, it will save you hundreds of hours. We also urge you to perform backups to removable media at least once a week. The hard drive backup is great for quick recoveries. However, if your hard drive fails, it will be of no use. The best way to ensure the safety of your valuable data is to back it up to removable media (CD, DVD, or external drive) and store it somewhere safe, away from your site.
If you are using PastPerfect in a network environment, it is suggested that all other users close out of PastPerfect while you make a backup, although it is not required. Your backup will still be made with the most recent copy of the data available.
Hard Drive Backup
To start the backup to your hard drive, click Hard Drive Backup in the Backup & Reindex section on the Main Menu. You will see the screen below. Click the Backup Data to Hard Drive button. The data will be compressed into one file named "pp5backup.zip." By default this file will be placed in the C:\pp5\Backup folder on your local hard drive. When the backup is complete, the PastPerfect Backup screen will display the date, time, and file size.
Hard Drive Backup screen
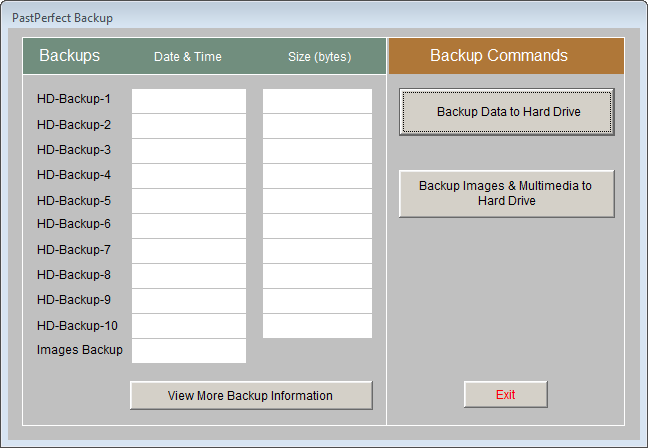
In a network environment with PastPerfect data residing on the file server, having each workstation back up the data to its own hard drive provides security against data loss. The backup will contain all the data on the server, not just data entered at the workstation.
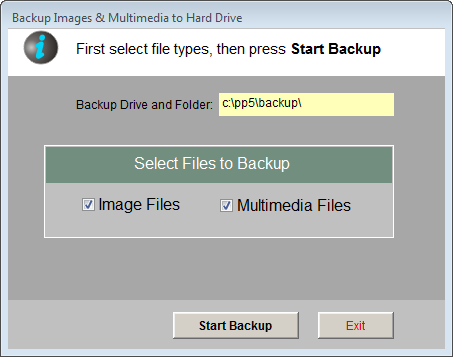
Backup Images & Multimedia to Hard Drive screen
NOTE: All letters are backed up when you back up Multimedia files. They are not included in the data backup.
When you click Backup Images & Multimedia to Hard Drive, you may select either Image Files, Multimedia Files, or both, as seen above. PastPerfect will make a copy of the images and/or multimedia files and paste them in the specified drive and folder. Please note that if your data, images and multimedia files are on the local hard drive, and you make an image/multimedia file backup to the hard drive, you will have two copies of these files, which may take up more hard drive space than you want. We advise making image and multimedia backups to a removable medium (CD, DVD or external drive). If you are in a network environment with PastPerfect data, images and multimedia files on a file server, making image and multimedia backups to a workstation hard drive, in addition to a removable medium, is a good idea in case of server hard drive failure.
The PastPerfect Backup screen shows the ten most recent data hard drive backups and the last image/multimedia file backup. When you click the View More Backup Information button, the Backup Log screen will open, seen below. You have access to the dates, times and sizes of data hard drive backups numbered 11 through 30 on this computer. You can also see the most recent network-wide backups of data, images and multimedia files to hard drive, removable drive and CD/DVD, as well as a Backup Log.
Backup Log screen

It is possible, but not recommended, to change the destination folder for hard drive backup files. The change can be made on the Main Menu | Setup | Workstation Settings screen.
CD/DVD Backup
PastPerfect can back up your data, images, and multimedia files directly to a CD or DVD. CDs and DVDs are stable media, and it is highly recommended that you regularly use this option if possible. Please be sure that your computer or workstation is equipped with a CD or DVD recordable drive. You will also need a blank CD-R or DVD-R disc. We do not recommend using CD-RW or DVD-RW discs, because if you overwrite the existing backup on the disc, you cannot keep an archive of backups.
To set up your CD/DVD backup settings, please go to Main Menu | Setup | Workstation Settings. In the Workstation Drives section, please use the drop-down menu to choose the drive letter this computer has assigned to the CD or DVD recordable drive. Please also check the box next to Computer has a CD or DVD Burner. Then click Exit. You are now ready to start making CD or DVD backups.
CD/DVD Backup screen

To start the process, click CD/DVD Backup from the Main Menu. The screen shown above will appear where you can select the types of files to back up. PastPerfect calculates the size of the files for you, so you can judge if all image and multimedia files will fit onto one CD or DVD. For example, if you have 700 MB of available space on CD, and your data backup, images and multimedia files combined are 1 GB in size, you will need to uncheck folders in the Image and Multimedia Files lists to make the backup size smaller. The unchecked folders may be selected and backed up to another CD after you create the initial backup.
Once you check the Space on CD/DVD using the option in the upper right of the screen, compare it to the file sizes, and select the files to back up, click the Start Backup button. You will be asked to insert a blank CD or DVD. Please insert the CD or DVD and click OK. You will see a progress bar at the bottom of the screen as the backup files are created and the session is closed. The process takes a few minutes, and PastPerfect will let you know when it is complete.
Removable Backup
PastPerfect also gives you the ability to back up your data, images, and multimedia files to a removable drive. A removable drive may be an external hard drive, USB flash drive, or Zip drive. You can use one of these media for backups in addition to regularly backing up to CD/DVD.
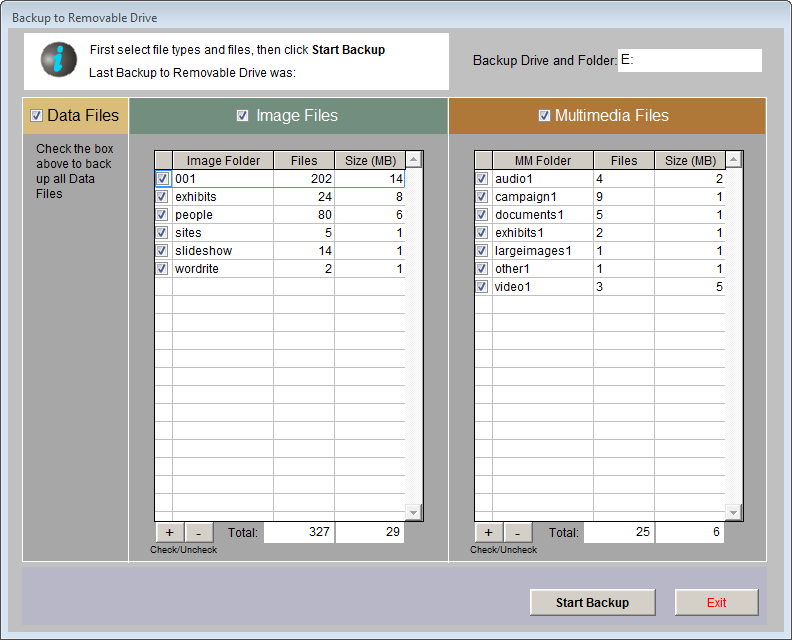
Removable Drive Backup screen
To backup to a removable drive, please first go to the Main Menu | Setup | Workstation Settings screen to select the Removable Drive letter assigned by your computer to the removable drive from the drop-down menu. The setup process is complete, and you are now ready to start making backups to removable media. Click Exit to go back to the Main Menu.
To start, click the Removable Backup button in the Backup & Reindex section. Taking into account the size and available space on your flash drive or external hard drive, select the files to back up and click Start Backup. This process may take several minutes, particularly for image and multimedia backups.
NOTE: Making backups to the same media multiple times will overwrite existing files of the same name. For this reason, we recommend weekly backups to a new CD or DVD.