Export Data
The Export function is helpful because it enables you to transfer your PastPerfect data to other programs. It is important that you are able to extract your data whenever you want.
To start, go to Utilities on the Main Menu and click Export. The Export screen will appear, shown below.
In the Export Data from this Table section, select the PastPerfect data table from which you want to export data - Objects, Photos, Archives, Library, Accession, or Contacts.
Export Data screen
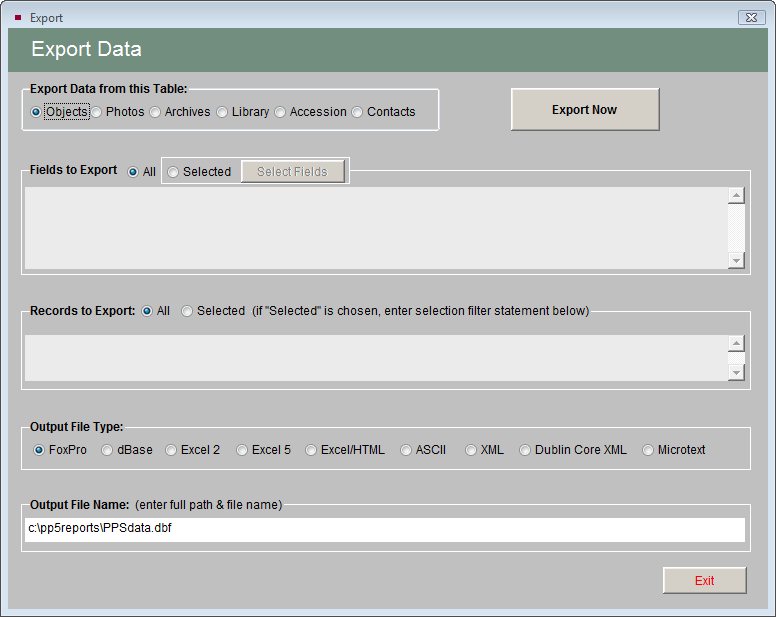
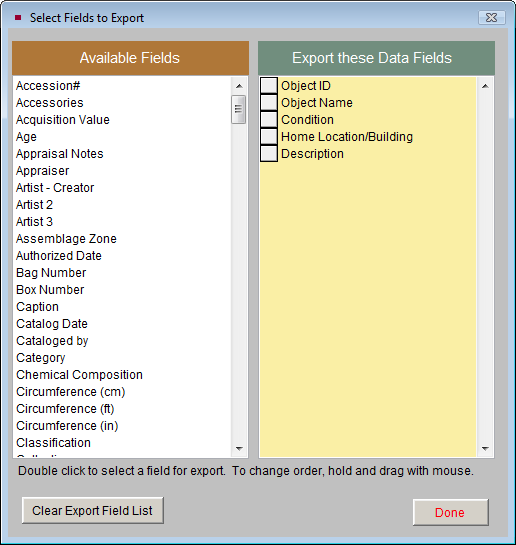
Next, in Fields to Export, choose to export All data fields or just selected data fields. To export selected fields, choose the Selected option and click the Select Fields button. Double click on the fields in the Available Fields column on the left, adding them to the Export these Data Fields column on the right.
For example, to export just the Object ID, Object Name, Condition, Home Location, and Description fields for items in your Objects Catalog.
Select Fields to Export screen
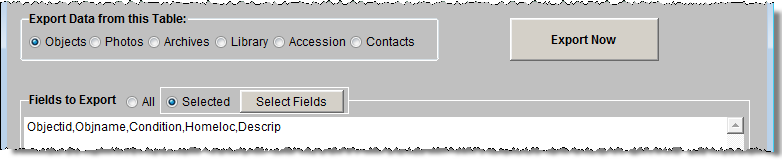
Click Done to return to the Export screen. In the Fields to Export section, the chosen field names will be separated from each other by commas with no spaces.
Selected Fields to Export
Next, choose which Records to Export. You can export either All records from the catalog or Selected records based on a Boolean logical statement that you enter in a filter statement. Filter statements must use the field names as listed on the Field Description reports, which is not always the same name as those listed on the catalog screen. For example, to export only the items accessioned in 2004, you would enter the following filter statement, as seen below.
accessno="2004"
Selected Records Filter Statement

Multiple conditions can be included in a filter statement linked with the word "and" or the word "or." For example, you could enter the statement
accessno>"2000" and accessno<"2005"
to export all catalog records for accessions within the years 2001 to 2004. Or you could enter the following statement to export only catalog records with Home Locations of Storage Building #1 or #5.
homeloc="Storage Building #1" or homeloc="Storage Building #5"
TIP: Generally you will select records to export based on the fields you selected to export. After you select fields from the Available Fields list and click Done, PastPerfect provides the field names in the Fields to Export section. You can also find field names in the Main Menu | Reports | Field Descriptions. Field names are in the brackets before the colon and in all capital letters.
Filter statements are case sensitive. Therefore, in the above example a statement of [homeloc="Storage BUILDING #1"] would not produce the same results. If you want to avoid the case sensitivity, use the special UPPER command. For example, the statement
UPPER(homeloc)="STORAGE BUILDING #1"
will export all records with that Home Location, regardless of the case of the entry.
Once you choose the fields and records to export, you need to specify the Output File Type. Please choose one of the following: FoxPro, dBase, Excel 2, Excel 5, Excel/HTML, ASCII, XML, Dublin Core XML or Microtext using one of the radio buttons.
NOTE: When exporting data to Excel, each field is limited to 254 characters. In most cases this won't be a problem, except for data in unlimited memo fields like Description and Notes. If you want to export data that is longer than 254 characters, please choose the Excel/HTML option. This export creates an HTML (.htm) file that is opened in Excel. To save this file as an Excel file (.xls), please use the Save As option in Excel.
PastPerfect provides an Output File Name that makes it easy to find your exported files. We would recommend using the default path, but you may enter a full path name for another location on your computer or network. If you use the default c:\pp5Reports as the destination, you will be able to find all files on your local hard drive in a pp5reports folder.
To complete the Export process, click on the Export Now button. A message will display indicating the number of records exported.