Creating a Virtual Exhibit
Virtual Exhibit is designed to be similar in structure to the Exhibits catalog of PastPerfect. You will create your new virtual exhibit and fill in its information. Then you will add catalog records to the exhibit, either one at a time or from a catalog list. The catalog records have VE Exhibit Label fields where you can enter data that will only show in your Virtual Exhibit website.
Once the exhibit record has been created and the catalog records chosen, you will select the data fields for export, name those fields for Web visitors, and make design choices for your website. You can choose the fields from each catalog that you want visitors to see online. Then you can select the exhibit and catalog record level page layouts and colors. The CSS for these pages may be modified to further customize the Web pages. Once the design choices are made, you are ready to create the HTML and upload your website.
Virtual Exhibit uses the same top Navigation Bar and navigation tools as the rest of PastPerfect software. Please see Chapter 2 - The Basics for detailed information.
For this User's Guide, we will create an example Virtual Exhibit site based on the data in the PastPerfect Evaluation program. The exhibit we will create will tell the story of the Rocky Pine Ranch, using items from the Rocky Pine Ranch Collection.
Adding a New Exhibit
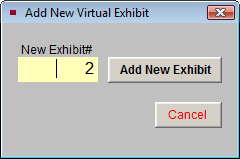
To begin, open PastPerfect and click on Virtual Exhibit on the Main Menu under Optional Features. Click the Add button in the Navigation Bar to start an exhibit. The Add New Virtual Exhibit screen will appear, as shown below. The number for this exhibit will appear in the New Exhibit# field. Click Add New Exhibit to create an exhibit with this number, or enter the number you want to use. We advise allowing the program to number the exhibits sequentially.
Add New Virtual Exhibit screen
The new exhibit record will be displayed on the screen. Click the Additional Exhibit Information button under Screen View to begin entering information for the exhibit.
Additional Exhibit Information
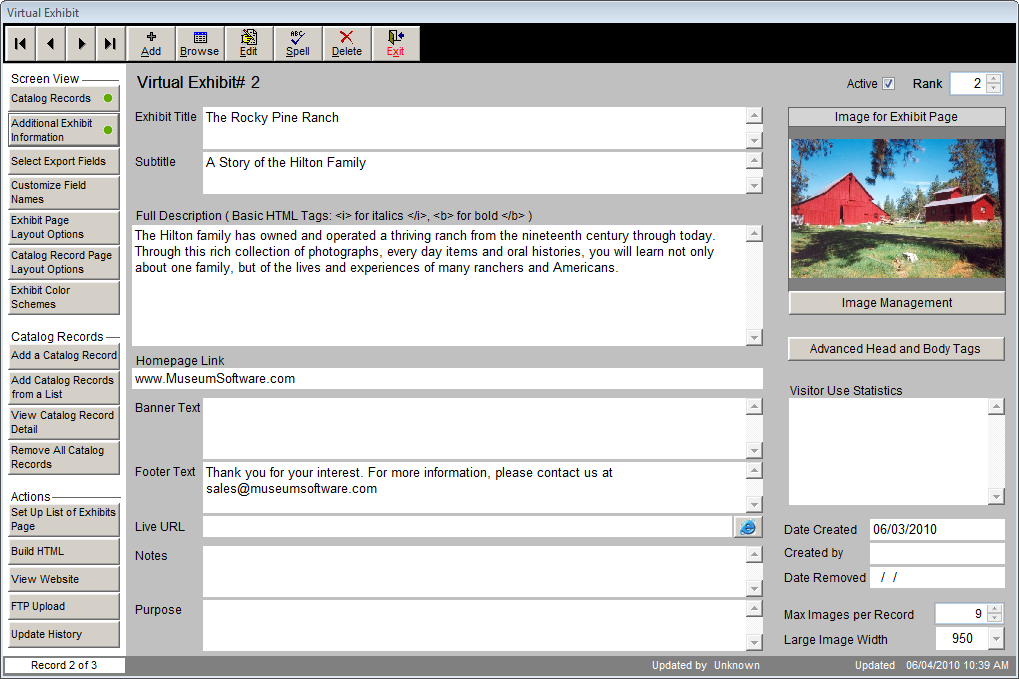
Enter a title for the exhibit in the Exhibit Title field. This title will display on the website on the List of Exhibits page and at the top of every page for this exhibit. You may also enter a Subtitle to give further description to the title. The subtitle will display after the title on the website.
In the Full Description field, enter a description of the exhibit. The description should explain to visitors the exhibit's purpose and entice them to view it. The description will display on the List of Exhibits page on the website, and on the first page of the exhibit itself.
TIP: You can format the text within your description using HTML tags. For example, if you want text to appear in italics, place the text within the HTML tags <i> and </i>.
If you would like a link to your institution's main website to appear on your exhibit, enter the URL in the Homepage Link field. The link will be a clickable link that displays as "Museum Home Page" at the top of every exhibit page.
In the Banner Text field, type in the text that you would like to have at the top of each page in the exhibit. This text is often the name of your institution. If you have a logo or banner image on your institution's main website, you can include a link to that image here, so the same image appears at the top of your Virtual Exhibit Web pages.
Similarly, in the Footer Text field, type in the text that you would like to have at the bottom of each page in the exhibit. This text is often the contact information for your institution, your institution's hours, or copyright information.
Use the Live URL field to record the Web address for your website. This field is for your reference, so you know how to access the website for this exhibit.
You may use the Notes and Purpose fields to enter any additional information about the Virtual Exhibit and its purpose. This information will not appear on the website.
The Visitor Use Statistics field may be used to track the number of visitors to the website. If you use a program to count the number of visitors, you may enter the script here for your reference. This information will not appear on your website.
For a new exhibit, enter the date and creator's name in the Date Created and Created by fields. When you decide to remove the exhibit from your website, enter that date in the Date Removed field.
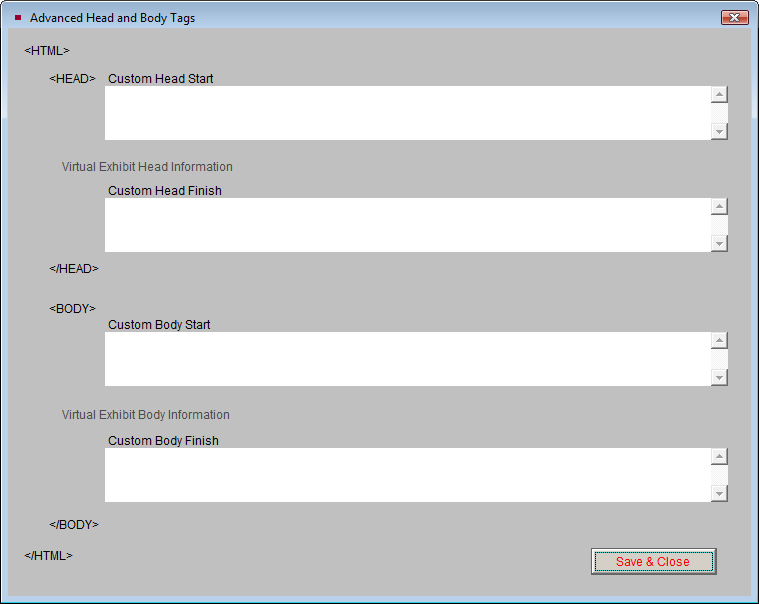
The Additional Information screen view has a button for Advanced Head and Body Tags. Clicking this button will reveal the screen below. This section can be used to customize your website using HTML.
The Custom Start and Custom Finish fields give users with an advanced understanding of HTML and CSS a way to include content and formatting on the Virtual Exhibit pages. These fields can be used to add scripts for analytics or meta tags for page authoring. As these fields will be inserted into the HTML at the start and end of the Head and Body sections of the webpage, proper HTML formatting must be used. Once you have made changes to this section, click Save & Close.
Advanced Head and Body Tags
At the bottom right of the Additional Exhibit Information screen are two fields that you can use to adjust the images in your exhibit. The first field is Max Images per Record which controls the number of images that will display for one record. For example, if you attach many images to one catalog record in PastPerfect, you can limit the number of images that display on your Virtual Exhibit record by adjusting this number. If you set it to 25, no more than 25 images for one record will appear on the website, even if there are more than 25 images attached to the record in PastPerfect. Limiting the number of images per record can reduce the amount of time it takes for your Web pages to load and prevents visitors from being overwhelmed by the quantity of images on their screen.
The field for Large Image Width controls how many pixels wide the large images will appear on your website. Virtual Exhibit produces these Web sized large images and thumbnails from the images attached to PastPerfect catalog records. Setting the Large Image Width to the lowest number of 450 means your created website images will only be 450 pixels wide, which is approximately 1/4 to 1/3 of a modern computer screen. Images at this size are suitable for viewing but are small for printing. If you are concerned about your images being copied or distributed, using this low setting can be a deterrent for people trying to copy your images. Setting the width to the highest number of 1150 means your images will be 1150 pixels wide. No matter which size you choose, you can protect them using Virtual Exhibit's watermark feature.
At the top right of the Additional Exhibit Information screen are two more fields. The Active check box designates whether an exhibit is active or not. If the box is checked, then the exhibit is set as active. It will be included when the HTML is built, so it will appear on your website. If you do not want the exhibit included on your website, uncheck the box. Setting exhibits as not active allows you to save sites that are under construction, and keep exhibits that were previously on your website in case you want to include them on your site again.
The other field at the top is the Rank designation. Rank determines the order that the exhibit appears on your website. You may have as many exhibits as you want in your overall Virtual Exhibit site. The exhibits will all appear on the List of Exhibits screen. Change the Rank to adjust the order in which the exhibit appears in the List of Exhibits.
Once you are finished entering this information, click Save at the top of the record.
The last step in setting up the general exhibit information is to add an image to the exhibit. This image represents the entire exhibit. It will appear in the List of Exhibits on your website and as the main image on the exhibit's home page. To add the image, click the Image Management button. Use the options under Acquire New Image to attach your image, then click Exit. For more information about attaching images, please see Chapter 26 - Multimedia.
Adding Catalog Records
The next step is to choose the items that you want to include in this exhibit. Click the Catalog Records button at the top of the Sidebar to view the grid that will list the catalog records included in the exhibit. Catalog records can be added to the exhibit either one at a time or from a catalog list. Please note that you cannot be in Add Mode or Edit Mode to add items.
TIP: Each catalog record can appear in as many Virtual Exhibits as you would like.
Adding Records One at a Time
To add records one at a time, click the plus sign button at the top right of the grid or click Add a Catalog Record in the Catalog Records section of the Sidebar. This screen appears:
Add Items to Virtual Exhibit
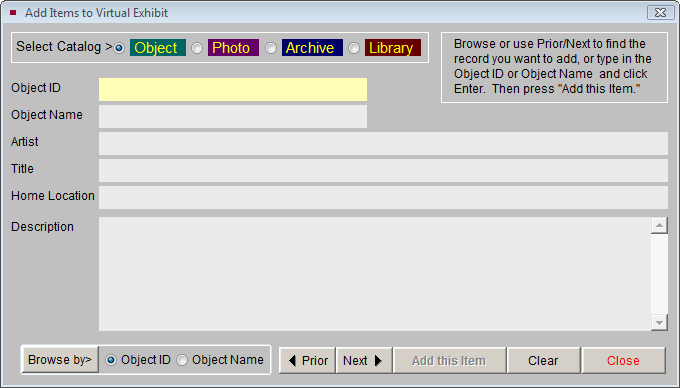
This screen allows you to add items from the Objects, Photos, Archive, or Library catalogs to the exhibit. Choose the catalog to search by clicking on the appropriate radio button. Using the Prior, Next, and Browse buttons, locate the item you wish to add. When you have found it, click Add this Item.
When you are finished adding items, click Close to return to the exhibit screen. The new items will now be on the list at the bottom of the screen.
Adding Records from a Catalog List
If you have a group of records that you want to put on a Virtual Exhibit, you can create a catalog list in PastPerfect with those records. Please see Chapter 15 - Catalog Lists for more information about creating lists. To put all the records from a catalog list on a Virtual Exhibit, click the Add Catalog Records from a List button in the Sidebar. You will be presented with a list of all the catalog lists.
Select Catalog Record List Detail
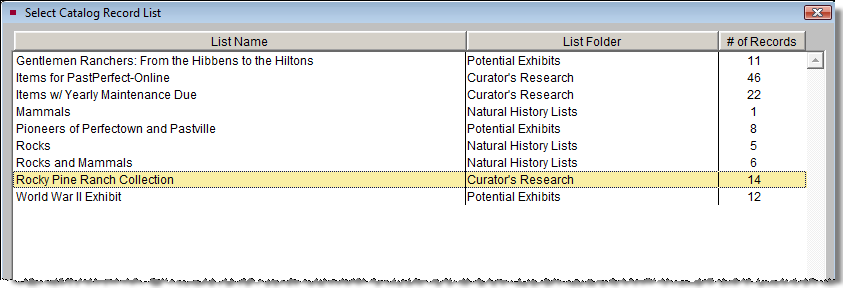
Double click on the list you want. For this example, we will choose the "Rocky Pine Ranch Collection" list. You will be asked if you want to add the records to the exhibit, click Yes. A message will tell you that the records have been added to the exhibit. You will see the new items on the list at the bottom of the screen.
Viewing and Editing Catalog Records
To view the catalog records you selected for the exhibit, click View Catalog Record Detail on the Sidebar, or click the file folder icon on the right above the list of items.
Using Virtual Exhibit Catalog Record Fields
The catalog record you see below has fields at the top that allow you to identify the item, such as the Object ID and Description. These fields cannot be edited on this screen. The five fields at the bottom, Custom HTML and the Virtual Exhibit Label fields, may be edited here and viewed on your website, but are not seen on the item's catalog record in PastPerfect. You can use these fields to tell the story of how the items in the exhibit relate to each other or the exhibit subject matter as a whole. To enter text in these fields, click the Edit button at the top.
Virtual Exhibit Catalog Record
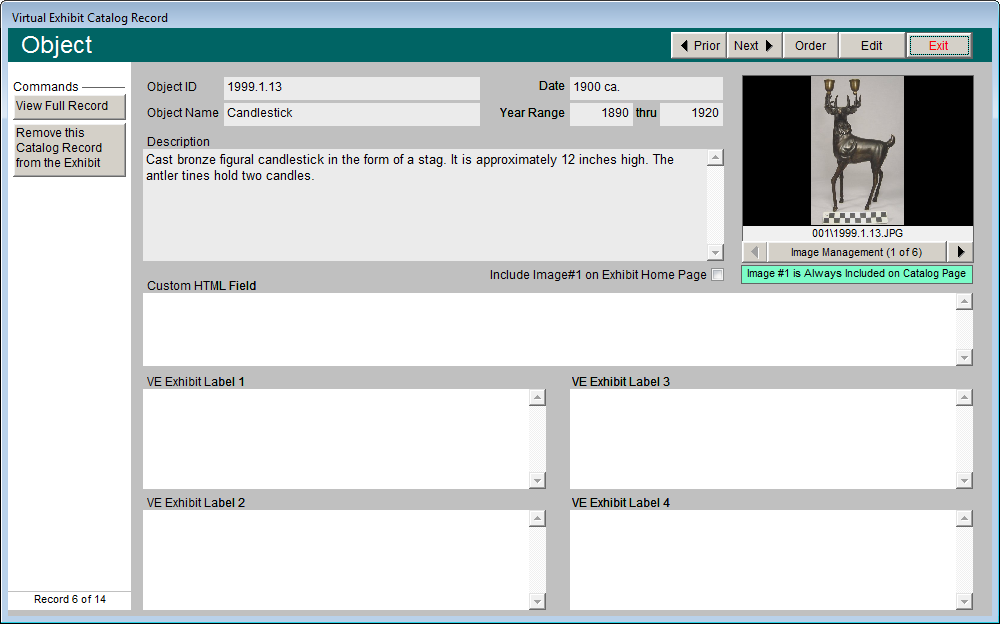
The Custom HTML field can be used to connect online media files and resources to your catalog record. Examples of media files are an audio clip from an oral history record or a video clip of an item in your collection. To connect these files to your record, enter the HTML link to the online location of the file into this field. When your Virtual Exhibit is uploaded to the Web, this link will become active. Using the Custom HTML field allows you to create a link to the online file without modifying the existing catalog record in PastPerfect.
The VE Exhibit Label fields 1 through 4 give you additional space to enter data that you would only want to use in your Virtual Exhibits. For example, if you have an exhibit geared towards children, you could enter a description of the items in wording appropriate for children. Then instead of including the PastPerfect catalog record Description for items on the exhibit, you would use the VE Exhibit Label 1 field. The descriptions for the items on your website would be the child-friendly version. Another example would be if you wanted to include information in other languages on your website. You could enter a Spanish or French version of information about the items in one of the VE Exhibit Label fields.
Changing the Order of Records on Exhibit
You have the option to change the order that the records will appear in the Virtual Exhibit. To set the order, click the Order button at the top of the screen.
Catalog Record Display Order
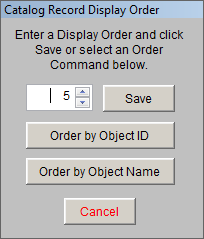
To change the order for one record at a time, enter the order number for the record in the number field. If you would like to put the records in Object ID order, click the Order by Object ID button. If you would like the put the records in order alphabetically by Object Name, click the Order by Object Name button. After making your choice, click Save. You can see the new order by clicking the Prior and Next buttons, or exit from the Virtual Exhibit Catalog Record screen and take a look at the list on the Catalog Records screen view.
Choosing Images for your Record and Exhibit Pages
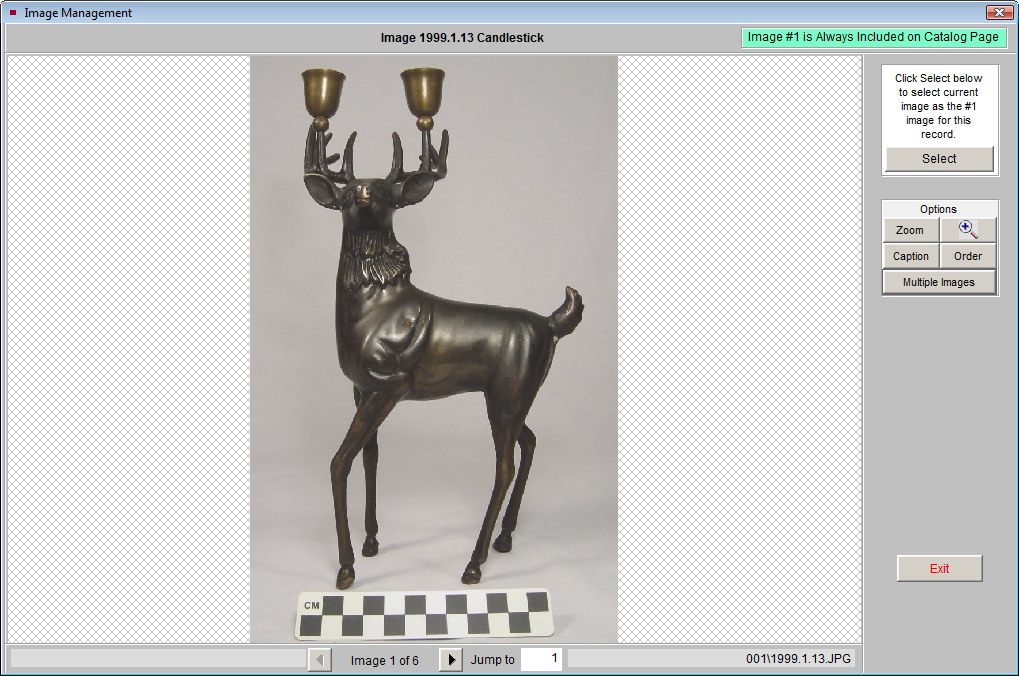
Virtual Exhibit gives you a number of choices for images on your website. If you have more than one image attached to a record, you can choose the images from that record that will appear on the exhibit. Click the Image Management button to view the images in a larger screen.
The image that is set to Order #1 will be the main image for the record page. This image will appear on the website. If you want to set a different image to Order #1, click the Prior or Next arrow buttons at the bottom to find the image you want. Then click the Select button at the top right to set it as #1. To change the order of the other images, click the Order button under Options. To exclude an image from appearing on the website, uncheck the box next to Include this image on catalog record page at the top of the screen. If you have multiple images, you can view them at the same time and make your selections. Click the Multiple Images button under Options, click on an image, and then use the Include check box to include or exclude the image from the exhibit.
Image Management
On the main Virtual Exhibit screen, you attached an image to the Exhibit Home Page using Image Management. You can include additional images on this page by selecting catalog records' first images. To add images, please be sure you are on the View Exhibit Catalog Record screen and navigate to the record(s) using the Next and Prior buttons at the top. On the record screen, click Edit and check the box Include Image #1 on Exhibit Home Page. Click Save, then move to the next record.
NOTE: Watermarks may be applied to images when you build the HTML for your website.
Removing Catalog Records from the Exhibit
You may decide that you want to remove certain records from your Virtual Exhibit. To do this, click the View Catalog Record Detail button in the Sidebar. Use the Prior or Next buttons at the top to find the record you would like to remove. Once you have found the record, click the Remove this Catalog Record from the Exhibit button in the Sidebar. You will be asked if you are sure you want to remove the record. If you are, click Yes. The record will no longer be on the exhibit.
You may also decide that you want to remove all the records from the Virtual Exhibit. Rather than deleting them one at a time, you can click the Remove All Catalog Records button in the Sidebar on the Virtual Exhibit screen. This will take all the records off the exhibit.
Selecting Export Fields
For each catalog (Objects, Photos, Archives, and Library), you choose the fields that will appear on your website. By selecting the fields, you share the information that you feel is important and fits with the theme of the exhibit. Click the Select Export Fields button on the Sidebar to begin.
Select Fields to Include in Exhibit
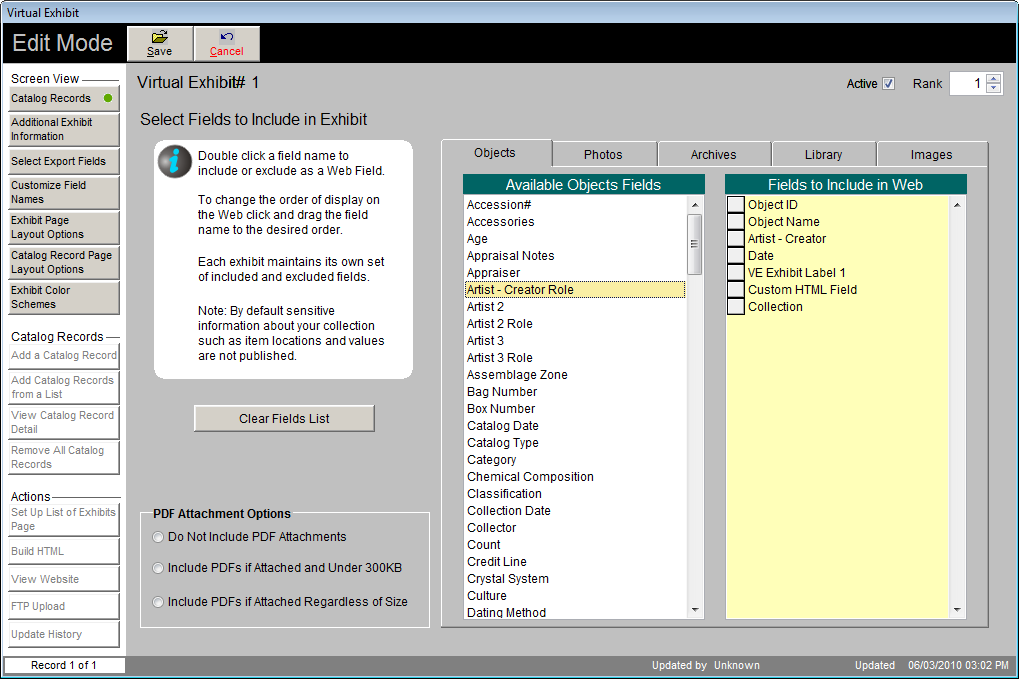
This screen above has five tabs, one for each catalog and one for Images.
You may choose different fields for each catalog and for your images.
Each tab has a column for Available Fields on the left and Fields
to Include on Web on the right. The Available Fields are the fields
you can choose from, and the Fields to Include on Web are the fields
that have already been selected to appear on your website.
To make changes to the list of fields to include, click the Edit button at the top of the screen. To include a field, double click on it in the list of Available Fields. To remove a field, double click on it in the list of Fields to Include on Web. To remove all fields, click the Clear Fields List button.
Common fields to include are: Object ID, Object Name, Date, Title, Artist, Creator, Author, Photographer, Search Terms, Subjects, People, and Images - Caption.
NOTE: Fields that contain sensitive data, such as locations and values, are not available to be exported.
To change the order in which the fields will appear on your website record pages, click on the gray box to the left of the field, hold your mouse button down, and drag the box up or down so the list is in the order you want.
TIP: Select all of the fields you want to include in your Virtual Exhibit catalog record pages first, then set the order of the fields.
You may also choose the Virtual Exhibit Custom HTML field and VE Exhibit Label fields, if you have used these fields for the selected catalog records. These fields are specifically designed to be included on your website and may be accessed from the View Catalog Record Detail screen. This screen also has options for including PDF attachments on your website. If you have attached PDF files to catalog records as multimedia links, you can make those PDF files available on your website. If the PDF file has information you want to make public, such as a typed transcript of a handwritten letter, including it on your website may enhance the Web visitor experience. However, some PDF files may be very large in size and take a long time for Web visitors to download. You may want to exclude those PDF files from your website. Using the PDF Attachment Options, you may select Do Not Include PDF Attachments to exclude all PDFs from your exhibit; select Include PDFs if Attached and Under 300 KB to include only smaller PDF files; or select Include PDFs if Attached Regardless of Size to include all PDF files. Click Save when you are finished.
Customizing Field Names
Customize Field Names
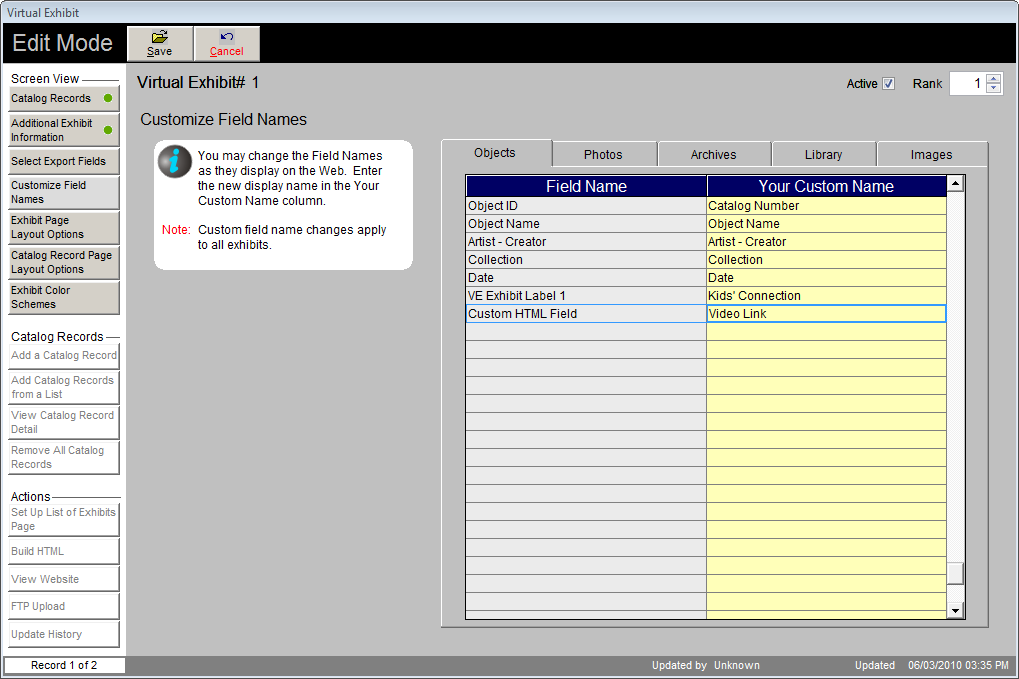
You can name the selected data fields for your Virtual Exhibit Catalog Record Pages. Click the Customize Field Names button from the Sidebar to open the screen seen in above. This screen has five tabs, one for each of the catalogs from which you chose your fields to include on the website. In the Field Name column, you will see the fields you chose. In the column on the right, labeled Your Custom Name, are the field names that will appear on your website. To change the field names, click Edit at the top, then in the right column enter the field names you want Web visitors to read when they view your site. Then save your changes. The custom names will be the same for all of your exhibits.