Figure 4-1
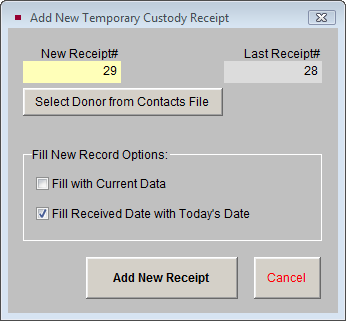
Add New Temporary Custody Receipt screen
What is Temporary Custody?
An accession is defined as one or more objects acquired at one time from one source constituting a single transaction between a museum and a source (Burcaw 1997).
When items come into your museum, you may not wish to accession them right away. Many institutions have a collections committee that meets regularly to consider new acquisitions. Other organizations must hold potential donations until a curator or other expert can examine them. For many reasons, possible donations may be held for consideration in a state of temporary custody. This allows your institution to analyze the proposed collection items to determine if they conform to your mission statement and can be cared for properly by your institution.
The Temporary Custody catalog in PastPerfect is designed to help you record and retrieve source information and to create temporary custody documents. PastPerfect's Temporary Custody screen records important information about incoming items and their source, prints a receipt for the potential donor, and tracks the items prior to your museum's decision to accession the items. Temporary Custody also tracks the eventual disposition of the items. If you decide to accept the donation, you may convert the Temporary Custody receipt into an Accession record. If you choose to return the items, add the date and method of return to the receipt, and remove it from the Active file.
For occasions when you wish to accession items immediately, bypass the Temporary Custody procedure and enter source information directly in the Accession screen.
This chapter explains how to complete and use the Temporary Custody catalog.
The Basic Steps to Accept Items into Temporary Custody
To launch the program, please double click on the PastPerfect icon on the Windows desktop, then click once on Temporary Custody in the Activities menu to open the Temporary Custody screen.
If this is the first Temporary Custody receipt entered, the screen will display blank data fields. If you have already entered some receipts, the last viewed receipt will be displayed. Use the Browse button or the Find button to retrieve a particular receipt. To enter a new receipt, click the Add button.
Add a New Temporary Custody Receipt
Click the Add button at the top of the screen. The Add New Temporary Custody Receipt screen, shown in Figure 4-1, will appear. Assign a unique receipt number to this new Temporary Custody receipt. Receipt numbers may be up to eight digits long, but cannot include characters or punctuation. PastPerfect recommends assigning sequential numbers. Should you choose to accession the items later, you will be asked to assign an accession number in accordance with your museum's numbering policy.
After assigning the receipt number, we recommend using the Select Donor from Contacts File button to choose your source from the Contacts file. If the donor is not listed, exit from Temporary Custody and go to Contacts to add the donor. When you use the Select Donor from Contacts File feature, the source's information will be automatically entered into the Temporary Custody receipt. This saves you from entering data twice and links the Contact record with the Temporary Custody receipt.
PastPerfect enables you to save time by pre-filling data when adding new records. Under Fill New Record Options, if Fill with Current Data is checked, PastPerfect will copy all information, including the source's name and address, from the last viewed Temporary Custody record into the new receipt. Check this box only if you have not selected a donor name from the Contacts file and only if the donor for the new receipt is the same as the donor on the screen showing behind the Add screen.
If the Fill Received Date with Today's Date is checked, the program will fill the new record's Date Received field with today's date.
When you click the Add New Receipt button, PastPerfect will verify that the assigned receipt number has not already been used. If it has, you will receive a message asking you to assign a different number. When the receipt number is accepted, a new, blank record will appear. You will be in Add Mode and able to complete the record's fields.
To save your data, please click Save at the top of the screen. If you do not want to save your entry, click Cancel. Once you have saved the initial record, you can click Edit to change or add to the entered information.
NOTE
New Temporary Custody receipts will always be entered and displayed in the Active file. Using the Actions buttons in the Sidebar on the left, Active receipts may be Accessioned, Loaned, or Transferred to the Returned File. Buttons in Record View allow you to view receipts in just one of the files, Active, Accessioned, Loaned, or Returned, or to view all receipts. A green data light will appear on the button when there are records to view.
If you chose your donor from the Contacts file when adding your receipt, the Donor ID# and Name fields will be filled in with the Contact ID# for that contact. You may view the Contact record by clicking the file folder icon button to the right of the name.
The Temporary Custody screen includes 6 custom fields, which you may use if you have information that does not fit in the standard fields. By default, these fields will be called Field 1, Field 2, Field 3, Field 4, Field 5 and Field 6. Fields 1 and 2 are character fields, Field 3 is a date field, Fields 4 and 5 are numeric, and Field 6 is an unlimited memo field. You may rename the fields by going to the Main Menu | Setup | Custom Fields | Temporary Custody.
Print the Temporary Custody Receipt
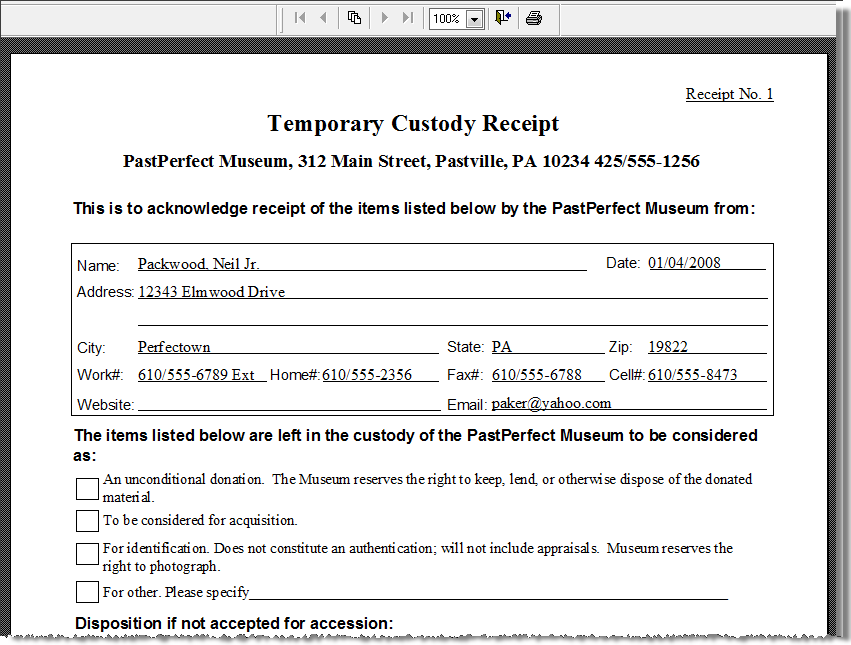
Once you are satisfied with the receipt, you can preview or print the Temporary Custody Receipt report using the Print button at the top of the screen. The Print Temporary Custody screen also has options for printing this receipt's thank you letter and envelope, as well as a blank receipt. The blank receipt may be printed and filled out by hand.
The Temporary Custody Receipt may be customized by going to the Main Menu | Reports | Temporary Custody | Temporary Custody Receipt | Custom Layout 1 or 2 | Modify Selected Layout. Please see Chapter 19 - Advanced Report Modifications for more information about editing layouts. The name and address of your institution that prints on the receipt may be changed by going to the Main Menu | Setup | Collections | Temporary Custody.
On the printed receipt, check the appropriate box to record the museum's reasons for holding the items in temporary custody, as well as the method of disposal, should the museum decide against accessioning the items. You may want to record the same information in the Temporary Custody screen's Notes field or in its user defined fields. Please be sure both the donor and the receiving agent sign the receipt. Finally, make a copy for the donor to keep.
Print the Temporary Custody Thank You Letter
You may also want to print a thank you letter or cover letter for the receipt. To edit or print the letter, click on the Thank You Letter button in the More Screens section in the Sidebar on the left. This will launch your computer's MS-Word program and enable you to personalize the letter for this receipt as well as print the letter and accompanying envelope. See Figure 4-4. You may print a Thank You Letter for up to four different donors. When finished, use the Close button at the upper right to return to the Temporary Custody screen.
The Thank You Letter is generated based on the data you entered on the Temporary Custody screen and the default letter text. To modify the default letter text, go to the Main Menu | Setup | Collection | Temporary Custody. If you have made modifications to the default letter or the Temporary Custody record, click the Rebuild Letter button on the Temporary Custody Thank You Letter screen to update the letter with those changes. Please see Chapter 22 - Letters, Labels & Emails, for more information about working with letters.
TIP
Not all printers are capable of printing envelopes. For those that are, different paper feeds may require you to adjust the envelope settings. To adjust the settings, please go to the Main Menu | Reports menu and select Temporary Custody | Thank You Letter Envelope | Custom Layout 1 or 2 | Modify Selected Layout.
When you are finished with the receipt, exit the Temporary Custody screen by clicking the Exit button at the top of the screen. It will remain in the Active file until you initiate the next step - returning or accessioning the items.
Accession, Loan, or Return the Items
The next step depends on whether the museum decides to accession the items held in Temporary Custody, keep them temporarily as an incoming loan, or return or dispose of them. Please find the receipt by using the Find button or Browse button. You can find a particular receipt by the receipt number, donor (Source), or type of acquisition (Received as, i.e., donation, purchase, exchange, etc.).
Another way to find receipts is to click Browse at the top of the screen. A list of Temporary Custody receipts will appear. Right click on the receipt you wish to view, or left click on the receipt to select it then press the Enter key on your keyboard.
To exit the Browse screen without choosing a record, just click the "X" in the upper right corner of the screen or press the Esc key on your keyboard.
Return Items
If items are to be returned or disposed of without becoming a loan or entering the permanent collection, click the Transfer to Returned File button in the Actions section on the Sidebar.
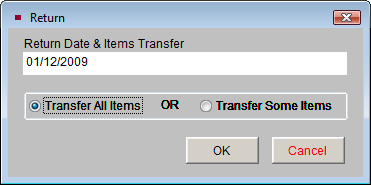
The Return screen will appear. In the field below Return Date & Items Transfer, please enter the return date. You will then be asked if you plan to Transfer All Items or Transfer Some Items. If you select Transfer All Items, the record will be stored and displayed in the Returned file.
Transferring Some Items to the Return File
Selecting Transfer Some Items and clicking OK will bring up the Partial Return screen. This screen, seen in Figure 4-6, allows you to choose which items you wish to keep and which items you wish to return to the donor. A list of all items in the description of your Temporary Custody receipt will appear in both columns. If you plan to keep a specific item or items, remove those items from the "Description of Items Returned" column. For items you plan to return to the donor, remove those items from the "Description of Items NOT Returned" column. In the end, both columns should no longer contain the same items.
Using this screen will create an additional record to track the returned item(s). The returned item(s) will be given the temporary receipt number plus point one (.1). The original temporary custody receipt retains the original receipt number but no longer shows the returned items on the receipt. The items you plan to keep will need to be accessioned or accepted as an incoming loan.
New Accession or Incoming Loan Screen
Should your museum agree to accept the items into the collections, you will click on the Accession or Loan button in the Actions section on the Sidebar. A screen labeled New Accession or Incoming Loan will appear, beginning the accession (or loan) process. Enter the accession or loan number and choose Transfer All Items or Transfer Some Items, then click OK.
If you selected Transfer All Items, the program will automatically create the new Accession or Incoming Loan record. For Accessioned records, the next screen will be the Update Donor's Name screen. This enables you to specify the source's name in the Deed of Gift form, Thank You Letter address, and Thank You Letter Dear field. Then you will see the new Accession or Incoming Loan screen where you can click Edit to enter additional information. The associated Temporary Custody record will be moved from the Active file to the Accessioned or Loaned file.
If you select Transfer Some Items and click OK, the Partial Accession or Incoming Loan screen appears. All items will appear in both the Description of Items Accessioned/Loaned and Description of Items NOT Accessioned/Loaned columns. For the items you plan to keep, please delete them from the "NOT Accessioned/Loaned" column. For the items you plan to return, please delete them from the "Accessioned/Loaned" column. Once you click OK, you will begin the Accession or Loan process. The items you plan to return will still be in the active Temporary Custody record, and you will need to transfer them to the returned file to complete the temporary custody process.
If you wish to cancel the transfer and return to the Temporary Custody screen, click on the Cancel button.
Multiple Donors
You can record information for up to three additional donors for a Temporary Custody receipt. A separate receipt and thank you letter may be printed for each donor.
To add another donor, click on the Add/View Additional Donors button in the More Screens section at left. Click Add from Contact File to select a donor from your Contacts database or type the donor information. If you add an additional donor, a green data light will appear on the Add/View Additional Donors button to indicate there are additional donors for this receipt.
PastPerfect Museum Software User's Guide
Temporary Custody
Figure 4-1
Add New Temporary Custody Receipt screen
PastPerfect Museum Software User's Guide
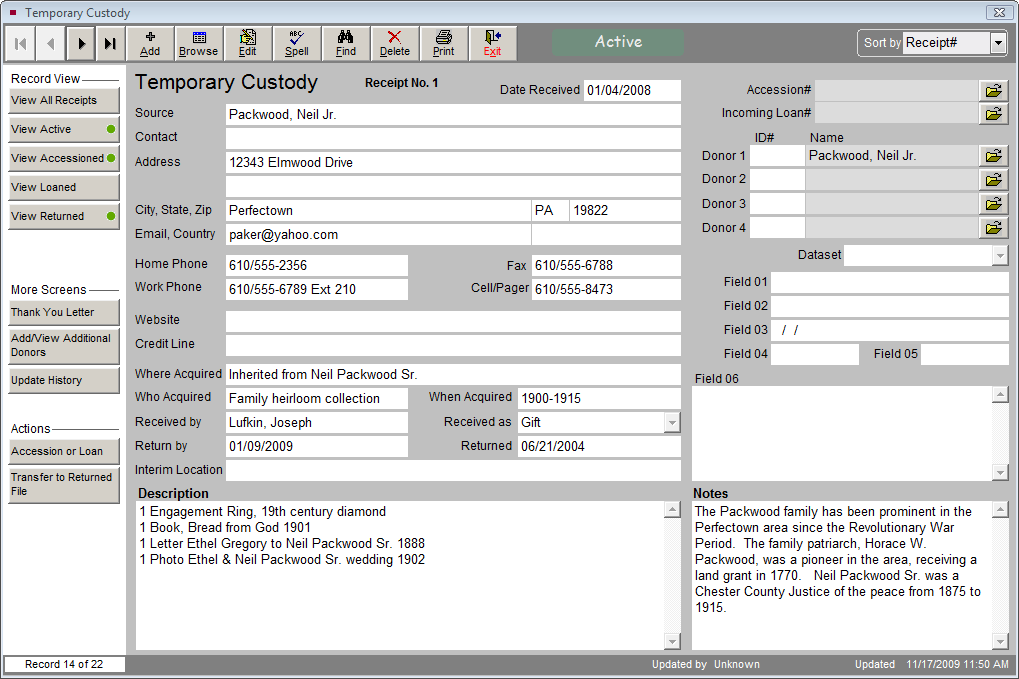
Figure 4-2 Completed Temporary Custody screen
Temporary Custody
Figure 4-3
Temporary Custody Receipt
NOTE
If you created your Temporary Custody record before adding the donor in the Contacts file, you can still link the Contact record to the existing Temporary Custody record. Go into the Contacts file and note the Contact ID# for the donor, then edit the Temporary Custody record. You will create the link by entering the Contact ID# in the Donor ID# field.
PastPerfect Museum Software User's Guide
Temporary Custody
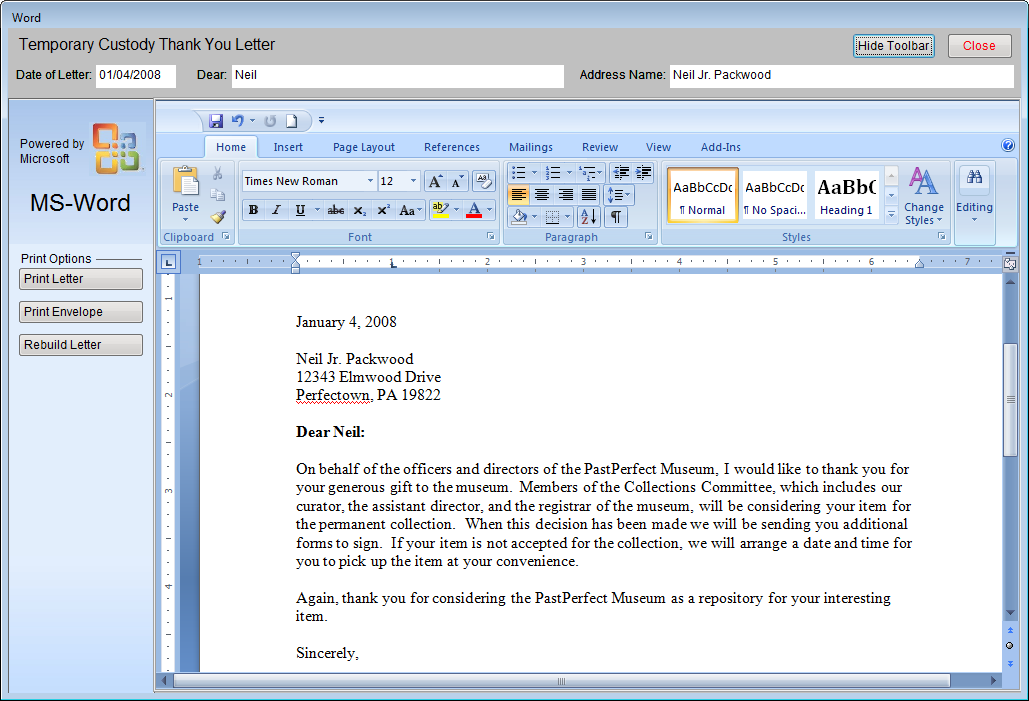
Figure 4-4 Temporary Custody Thank You Letter
PastPerfect Museum Software User's Guide
Figure 4-5
Temporary Custody Return screen
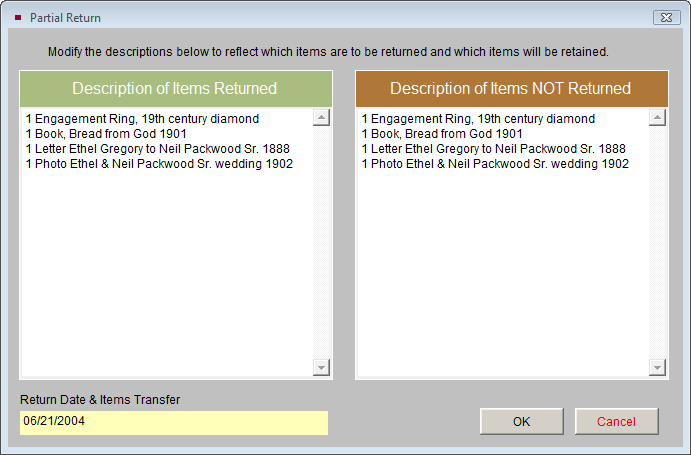
Leave the items to be returned in the Description of Items Returned column and delete the accepted items.
Leave the accepted items in the Description of Items NOT Returned column and delete the items to return.
Figure 4-6
Temporary Custody
Partial Return screen
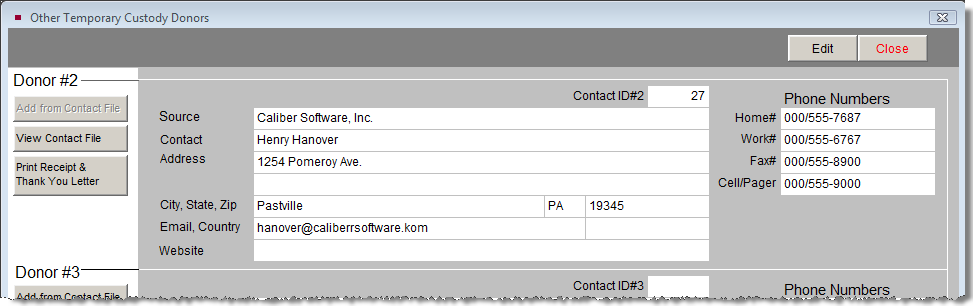
Figure 4-7 Other Temporary Custody Donor screen