The Oral History Screen View
Oral history interviews can be an important part of local history. They offer vibrant first-hand accounts of historic events both big and small. They are an excellent way to collect primary source information about people, events, communities, and social changes in both private and public affairs. Many oral histories are stored on tape or other media. The PastPerfect Oral History screen view contains the fields and forms necessary for cataloging oral histories.
Select the radio button for Oral History to set the catalog record's default view and click on the Oral History screen view in the Sidebar to reveal the oral history cataloging fields. This screen contains all the fields needed to catalog an oral history record.
Oral History Screen View

Scope and Content / Abstract - Use this field to describe the oral history. Record subject matter and the form of the item to enable users to judge its potential relevance. Give a brief summary of the content. This is an unlimited field so the entry may be as long as you like.
Recording Media - Enter the type of media upon which the original recording was made. This field is controlled by a drop-down menu with terms to select. You may add, edit and delete terms on the list by going to the Main Menu | Setup | Authority Files. You will want to select the Archives screen, then double click on the Recording Media field in the Combo Box column.
Media Quantity - Indicate how many videotapes, cassettes, reels, or other media are part of the oral history being described.
Restrictions - Enter any restrictions that may apply to the use of the oral history interview tapes, transcripts, or other facsimiles of the oral history interview.
Narrator's Name - The narrator is the person being interviewed. This field is controlled by the Experts authority file. Press F7 or right click in the field to access the authority file. This field may also be linked to a Contact record. Enter the narrator's Contact ID# in the ID# field to the right of the name, or click the file folder icon to the right of the field to view the list of all contacts and double click on a name to select it. Once an Id# is entered, you may jump to the Contact record by clicking on the file folder icon.
Interviewer - Enter the name of the person who conducted the oral history interview. This field is controlled by the Experts authority file. To access the file, press F7 or right click in the field. To add, edit, or delete entries in the authority file use the buttons at the top of the screen. For more information about the expert, click on the file folder icon to the right of the field.
Interview Place - Enter information about where the interview took place.
Interview Date - Enter the date of the interview.
Oral History Donor Release Form

Length of Interview - Enter the length of the interview in hours and minutes.
Date Donor Form Signed - Enter the date the donor signed the agreement giving your organization the rights to this interview.
View/Print Donor Release Form - It is important for the subject of the interview to understand that the information contained in the oral history interview may be published or broadcast for various purposes. Having the narrator review and sign the Oral History Donor Release Form will help clarify the legal conditions governing the use of the oral history.
Transcriptionist - Enter the name of the person who transcribed the oral history interview. This field is controlled by the Experts authority file. To access the file press F7 or right click in the field. To add, edit, or delete entries in the authority file, use the buttons at the top of the screen. For more information about the expert, click on the file folder icon to the right of the field.
Transcript Location - Enter the location of the transcript of the interview.
Transcription Date - Enter the date of the transcription.
Transcript Reviewed - Enter the date that the narrator reviewed and approved the transcript of the oral history interview.
Oral History Recording List

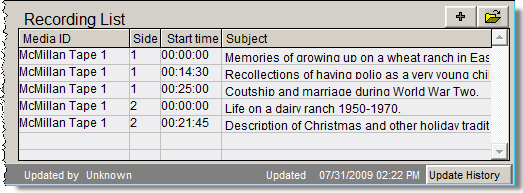
Oral History Recording List - To add to the Recording List, first make sure you have saved your new Archive record and are not in Edit Mode. Then click on the plus sign button above the Recording List. In the Recording List screen, seen above, you will be able to enter details from the recording including: Media ID, Side, Start Time and Subjects. To add, delete or edit entries on the Oral History Recording List, click the file folder icon button. This screen also enables you to preview and print the recording list.
If your PastPerfect system is equipped with the optional MultiMedia Upgrade, you may create links to audio or video files that allow you to play the audio (or video) while you are viewing the PastPerfect record. These files may be stored either on your hard drive or on other removable media. For details about multimedia links, see Chapter 26 - Multimedia.
Searching the Recording List
You may perform searches on the contents of the recording list using Query in the top Navigation Bar. The Query function allows you to search any field or combination of fields using a variety of conditions. The Query function is discussed in detail in Chapter 14 - Research. Press the Query button at the top of the Archives Catalog screen and click the "Oral History Recordings" radio button to begin a search using the recording list fields. You may add multiple statements joined by "and" or "or" to create your filter statement. Select the field from the field drop-down menu, select a condition from its drop-down menu, then enter a value. Click the Add to Statement button. Once you have built the filter statement, click Run Query to Select Records to see results from your Archives catalog.
As with all queries, results may be viewed as catalog records or as images in a light box. You can print the list, print a catalog card or other report, and export the list to Excel. Queries may also be saved and retrieved at a later time.