Image Options

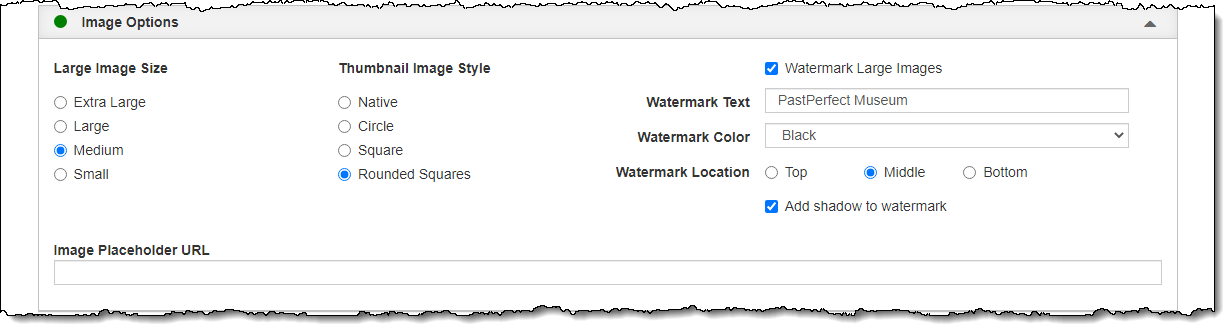
The options on this accordion affect how images appear on your public site. You choose the size of the large images that are shared, as well as the thumbnail style.


The large image is what you see when you click on a thumbnail from a record page or Random Images. These images are 96 dpi and can be Small, Medium, Large, or Extra Large. Small images will have a max dimension of 640 pixels on the longest side of the image. Medium has a max dimension of 960 pixels, Large has a max dimension of 1200 pixels, and Extra Large has a max dimension of 1440 pixels. Images smaller than the max dimensions will not be enlarged and will remain at their current size. Images larger than the max dimensions will be reduced in size to match the pixel dimension on their longest side.


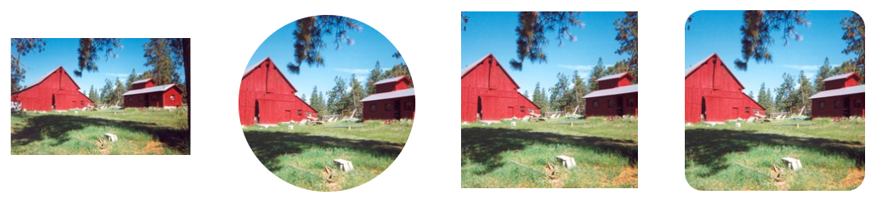
Thumbnail images display on catalog records, search results, and Random Images. You can select one of four image styles for thumbnails: Native, Circle, Square, or Rounded Squares. Selecting Native will display your thumbnails in their original proportions. The Circle, Square, and Rounded Square options are cropped in order to make them a consistent shape without creating image distortion; these stylized images give your site a more uniform appearance. Regardless of which thumbnail image style you select, the large image will always use the original proportions.


You can also apply a text watermark to the large images on your public site. Applying this watermark will not affect the images within PastPerfect.


Change Large Image Size

  1. Click "Edit" at the top of the Public Site Settings screen
  2. Click the Image Options Accordion to expand it
  3. Select the radio button next to the size you want images to display
  4. Click "Save" at the top of the screen

Change Thumbnail Image Style

  1. Click "Edit" at the top of the Public Site Settings screen
  2. Click the Image Options Accordion to expand it
  3. Select the radio button for the Thumbnail Image Style you want to use
  4. Click "Save" at the top of the screen

Add Text Watermark

  1. Click "Edit" at the top of the Public Site Settings screen
  2. Click the  Image Options Accordion to expand it
  3. Check the box for Watermark Large Images
  4. Type in the text you would like to appear as the watermark in the Watermark Text field
  5. Select the color of the watermark
  6. Select the radio button for the desired location of the watermark
  7. Check the box for Add shadow to watermark if you wish to add a drop shadow to the text
  8. Click "Save" at the top of the screen

Add Custom Image Placeholder
For Public Access records that have no attached images, you can upload a custom placeholder image to display instead of the default one.

  1. Go through the steps under Upload Images to upload the custom placeholder image you want to use
  2. On the Upload Images Accordion, copy the URL for the image
  3. Click "Edit" at the top of the Public Site Settings screen
  4. Click the Image Options Accordion to expand it
  5. Paste into the Image Placeholder URL field
  6. Click "Save" at the top of the screen