Selecting Records for Public Access
You can choose which of your PastPerfect records, images, attachments,
and URLs are displayed on your public site. Record types available for
public view include: Objects, Photos, Archives, Library, People, Sites,
Container List, Exhibits, and Images.
At the top of each record is a "Public Access" check box.
When it is selected, the label "Public Access" becomes
a hyperlink which takes you to that record on your public site.

Select Records for Public Access
Select Records Individually
- Locate the record you wish to include on your public site
- Click "Edit" at the top of the screen
- Put a check in the Public Access
check box
- Click "Save" at the top of the screen
Select Records from a Query Screen
- Filter or Search for the catalog record(s) you want to add
- Usw the check boxes to the left of each record to select which
records you want to share
- Click "Public Access"
- Click "Yes" on the confirmation message
Select Records using a Catalog List
- Click the list name hyperlink on the Catalog Lists & Inventory
Query screen
- Click "Edit" on the Catalog List screen
- Click the "Allow Public Access" button
- Click "Yes" on the confirmation message
- Click "Save" at the top of the screen
Remove Records from Public Access
Deselect Records Individually
- Locate the record you wish to remove from your public site
- Click "Edit" at the top of the screen
- Uncheck the Public Access
check box
- Click "Save" at the top of the screen
Deselect Records from a Query Screen
- Filter or Search for the catalog record(s) you want to remove
- Use the check boxes to the left of each record to select which
records you want to remove from your public site
- Click "Deny Public Access"
- Click "Yes" on the confirmation message
Deselect Records using a Catalog List
- Click the list name hyperlink on the Catalog Lists & Inventory
Query screen
- Click "Edit" on the Catalog List screen
- Click the "Deny Public Access" button
- Click "Yes" on the confirmation message
- Click "Save" at the top of the screen
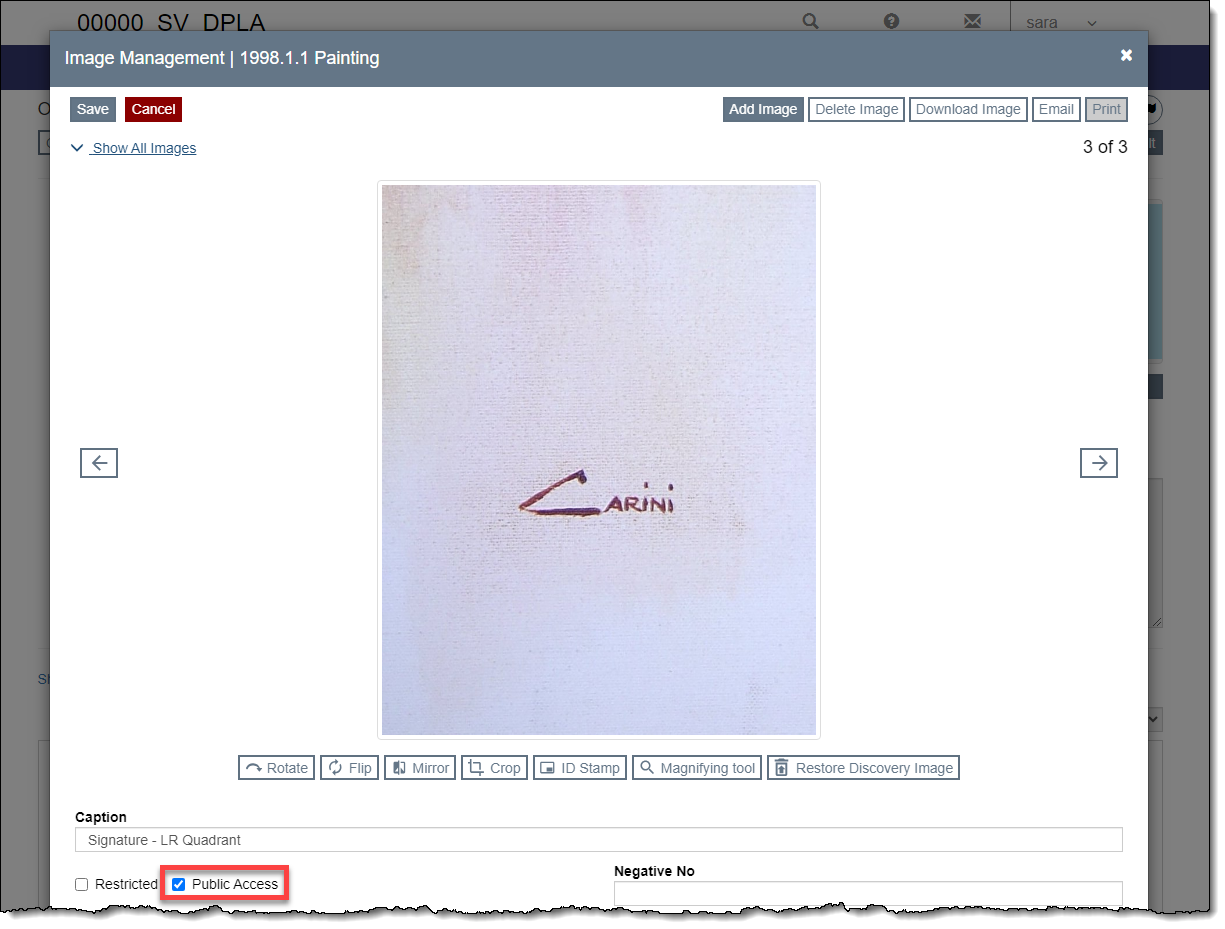
Images
When you select a record to be included in Public Access, all images
associated with that record are also selected with the exception of images
marked Restricted. It is possible to deselect individual images on the
Image Management screen so they do not appear on your public site.
Deselect Individual Image
- Locate the record that has the image you want to remove
- Click "Image Management"
- Click "Edit"
- Locate the image you want to remove from Public Access
- Uncheck the Public Access
check box
- Click "Save" on the Image Management screen
- Click "Save" at the top of the record screen
Attachments & URLs
The Attachments and URLs added to your records can be shared on your
public site. When shared, an Attachments
and/or URLs field will display
on the record with a hyperlink to view the file or the URL.
Select Attachment
- Locate the record that has the attachment you want to share
- Click "Edit" on the record screen
- Click the Attachments & URLs Accordion bar to expand it
- Put a check in the Public Access
check box
- The File Name will be used as the hyperlink text. If you want to
change this, hover over the row and click the Pencil icon on the right
end of the row, and then type into the Display Name field.
- Click "Save" at the top of the record screen

Select URL
- Locate the record that has the URL you want to share
- Click "Edit" on the record screen
- Click the Attachments & URLs Accordion to expand it
- Put a check in the Public Access
check box
- The URL will be used at the hyperlink text. If you want to change
this, hover over the row and click the Pencil icon on the right end
of the row, and then type into the Display Name field.
- Click "Save" at the top of the record screen