Tracking Outgoing Loans
To begin the process of creating an outgoing loan agreement, open the Outgoing Loans screen by clicking on the Outgoing Loans button in the Activities section of the Main Menu.
If you have no Outgoing Loan records, the screen will be blank. If you do have records, the last record viewed will appear on the screen. To create a new outgoing loan, click on the Add button in the Navigation Bar at the top of the screen.
Navigation Bar

Add a New Outgoing Loan
Clicking Add will open the Add New Outgoing Loan screen, seen below. Enter a number for the new loan in the New Loan# field. Duplicate loan numbers are not permitted. PastPerfect will display the last loan number used and suggest the next number. We advise that you allow PastPerfect to assign these numbers. The new outgoing loan record has a field for recording your organization's tracking number.
Add New Outgoing Loan screen
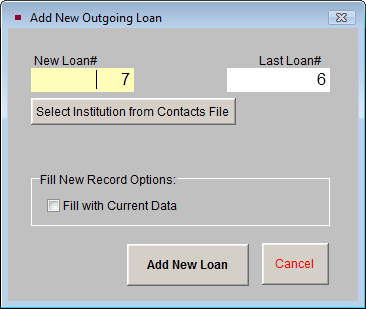
If the borrowing institution is in your Contacts file, you may click the Select Institution from Contacts File button to locate the contact and fill in fields with the contact's information automatically.
If Fill with Current Data is checked, PastPerfect will copy all information, including the borrower's name and address, from the last viewed record. Check this box only if you have not selected a new borrower from the Contacts file and only if the borrower for the new loan is the same as the one on the Outgoing Loan screen showing behind the Add screen.
Once you have clicked the Add New Loan button to create the new loan, enter information in each field, as shown. If you did not use the option to select your borrower from the Contacts file, fill in the name and address of the borrowing institution, along with a contact name and phone number. The Tracking# can be used to record the loan number from the borrowing institution or an in-house loan number. Fill in the Out Date and Due Date fields. The Returned and Renewal fields may be filled in later. The Total Value fields will be filled in automatically once you begin to add catalog records. They are totalled from each item's minimum and maximum value fields in the catalog records.
Outgoing Loan screen
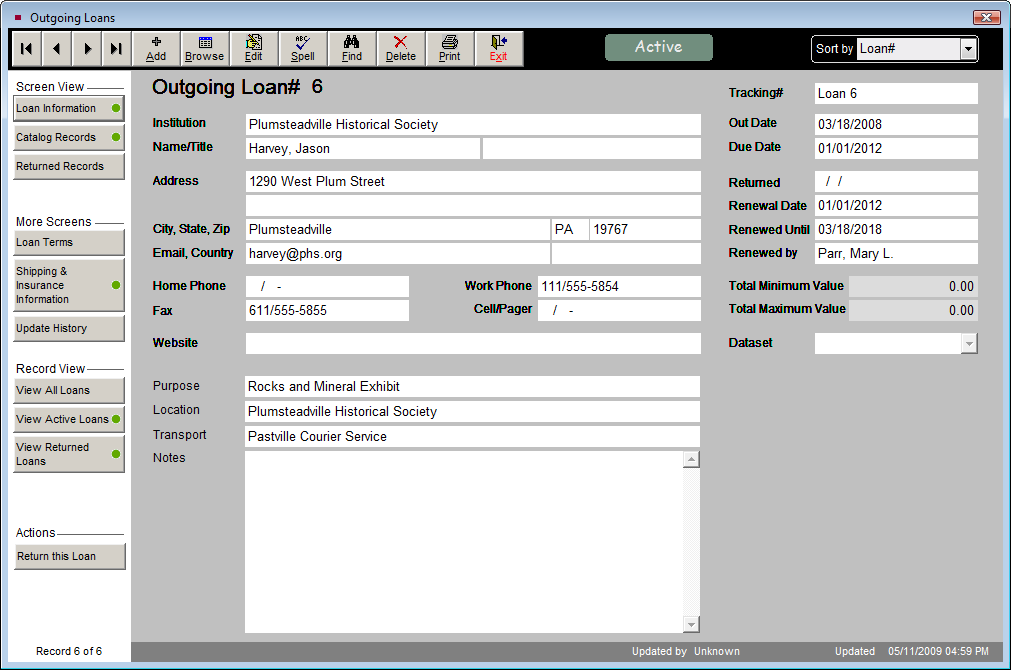
Click the Loan Information button in the Screen View section of the Sidebar to view more fields. Use the Purpose field to give a short description of the purpose of the loan. In the Location field, enter the location where the borrowed materials will be housed. The Transport field may be used to describe the method of transportation for the borrowed materials, including any special transportation requirements for the items in this loan. The Notes field can be used to record any additional information. Once the fields are filled in with as much information as needed, click the Save button in the Navigation Bar. A green data light will appear on the Loan Information button if data is entered in any of these fields.
Loan Agreement Terms, Shipping & Insurance
In the More Screens section of the Sidebar are two buttons, Loan Terms and Shipping & Insurance Information.
Loan Agreement Terms
Click on the Loan Terms button to view or compose the legal language defining this loan.
There are two radio buttons at the top of this screen, Default Terms and Custom Terms. If the Default button is selected, you will see the default loan agreement terms. Clicking the Custom radio button gives you a blank screen where you may type loan agreement terms that apply only to this loan.
Loan Agreement screen

Modifying the Default Loan Agreement Terms
If the Default button is selected, the loan agreement terms may not be edited from this screen. The default terms can be edited by going to the Main Menu | Setup | Collections | Outgoing Loans. On this screen, click in the Default Terms of Outgoing Loan field and enter your text. Your institution's name and address that appear on the Loan Agreement may also be changed on this screen. Changes made to the default terms will affect all loans using the default loan agreement terms. To save the changes, click the Exit button. Click the Outgoing Loans button on the Main Menu to return to the Outgoing Loans screen.
Printing the Loan Agreement Terms
When you return to the Outgoing Loans screen, you can print or preview the loan agreement terms by clicking the Print button in the Navigation Bar on the main loan screen and selecting Terms of Loan.
Shipping & Insurance Information
To enter information about shipping and the insurance carrier for the loan, click on Shipping & Insurance Information in the More Screens section of the Sidebar. You may add or edit information by clicking the Edit button at the bottom of the screen. If you add or edit information here, the insurance fields on the related catalog records will not be updated with this information. A green data light will appear on the button if you have entered shipping or insurance information.
Add Catalog Records to the Outgoing Loan
By clicking the Catalog Records button on the Sidebar, you can view a list of the catalog records included in the loan. This list displays as a grid on the bottom portion of the loan screen. At the top right of the grid is the plus sign button to add new items. Please note that you cannot be in Add Mode or Edit Mode to add items. When you click on the plus sign button, this screen appears:
Add Items to Loan

This screen allows you to add the items from the Objects, Photos, Archive, or Library catalogs to the loan. Choose the catalog to search by clicking on the appropriate radio button. Using the Prior, Next, and Browse buttons, locate the item you wish to add. When you have found it, click Add this Item.
When you are finished adding items, click Close to return to the loan screen. The new item will now be on the list at the bottom of the loan screen.
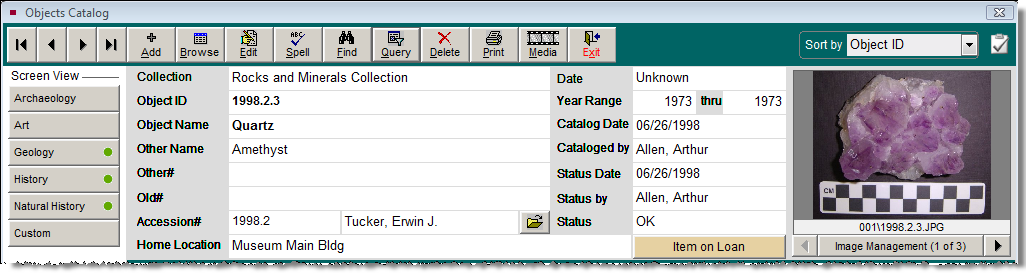
Once an item is placed on loan, a flag appears on the record in its respective catalog. The Item on Loan flag is located below the Status field on the right half of the screen. You may click this button to view the Outgoing Loan screen.
To change items on the list, click the file folder icon to display the screen shown below.
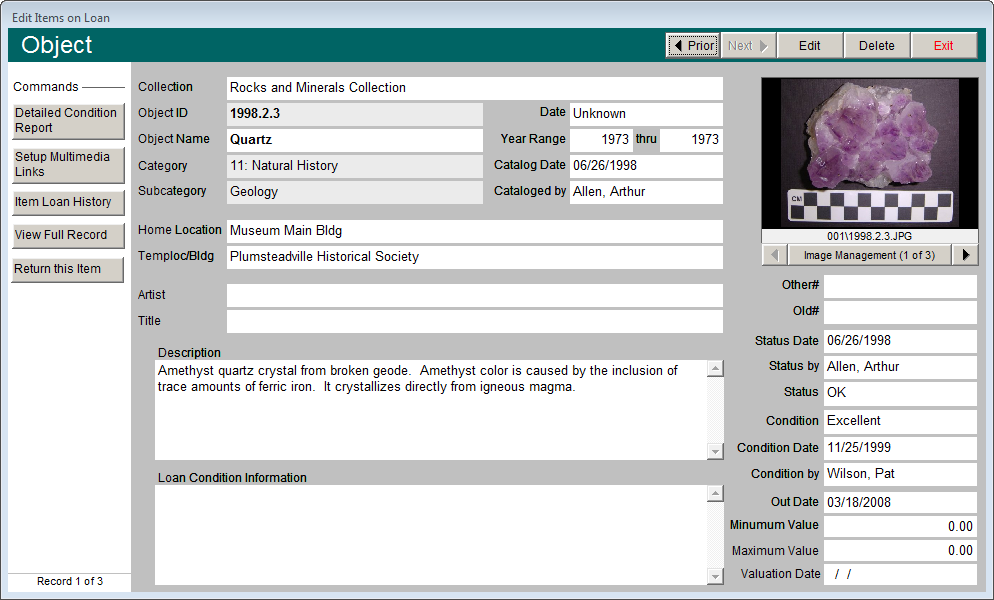
You may browse the items on loan by clicking the Prior and Next buttons at the top of the screen. If you need to change information on the screen, click the Edit button. To remove the catalog record from the loan without processing it as a returned item, click the Delete button.
TIP: Fill in the Loan Condition Information field with condition information specifically for the loan. This information will print out on the Loan Agreement Form.
The buttons on the left side of this screen present you with several options.
Detailed Condition Report - You can view existing condition reports and create a new detailed condition report for the item that is going out on loan. To create a new report, click on the Detailed Condition Report button and click the Add button to add a new report. See Chapter 6 - The Objects Catalog, for detailed instructions on creating a condition report.
Setup Multimedia Link - With the MultiMedia Upgrade installed, you may add multimedia links to the catalog record by using this function.
Item Loan History - This button reveals a list of past loans for the item.
View Full Record - Click this button to see the full catalog record in Objects, Photos, Archives or Library.
Return this Item - If an individual item has been returned while the loan is still active, you may return the individual item without affecting the whole loan. Type a return date in the Returned Date field and click Process Return. To view the Returned Items list, from the main loan screen click the Returned Records button in the Sidebar. Click the file folder icon on the right to view more details about the records, or to view the item's loan history.
Printing the Loan Forms
After catalog records have been added to the loan, you may print the Loan Agreement Form to be signed by representatives from your institution and the borrower. The Loan Agreement Form lists all the items on the loan, as well as the purpose, location, values, transport and insurance information and the borrower's contact information. To print the Loan Agreement Form, click the Print button in the Navigation Bar and choose the Loan Form option. You also have the option to print a blank Loan Form if you would like to fill in the form by hand. If you need to change the format of your loan form, an additional Loan Agreement Form may be set up under the Custom Loan Form. To include detailed information about each item, you may print the full catalog record report for each item on the loan, which is done by choosing the Detail Object List from the Print screen.
TIP: Customize the layout of the Loan Agreement Form by going to the Main Menu | Reports | Loans Outgoing | Outgoing Loan Form | Custom Layout 1 or 2 | Modify Selected Layout. You may also modify the Custom Loan Agreement Form by going to the Main Menu | Reports | Loans Outgoing | Custom Loan Form | Custom Layout 1 or 2 | Modify Selected Layout.
Returning the Entire Loan
When all of the loaned items are returned, you will want to record that on the loan screen. Click on the Return this Loan button on the Sidebar. You will need to enter a Return date and click Process Return to complete the operation. The loan will now be moved to the Returned Loans file. The catalog records on the loan will appear under the Returned Records Screen View. Returned loans will display a brown flag at the top of the screen.
Indicator displaying the number of Returned Records to view.

Viewing Returned Loans
The Outgoing Loan screen has separate views for seeing All, Active and Returned loans. To see only loan records that have been returned, click the View Returned Loans button in the Record View section of the Sidebar. An indicator will appear below the button telling you the number of Returned Records you are viewing. To view all Outgoing Loan records, click the View All Loans button in the Sidebar.
Record View Modes
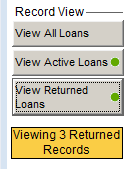
NOTE: Outgoing Loan records that have not been Returned are considered Active Loans. An Active Loan record will have a green flag at the top of the screen indicating that this loan is active. To view just the Active Loans, click the View Active Loans button in the Record View section of the Sidebar. An indicator will appear below the button telling you the number of Active Records you are viewing.