
In addition to catalog and collection reports, PastPerfect has numerous reports for your contacts. These cover membership lists, donations, dues and in-kind gift payments, campaign, prospect and pledge reports, as well as volunteer hour and project reports. Basic contact lists and volunteer reports are found by clicking the Contacts button under Report Types. The Dues & Donations report type is where you will find the campaign, prospect, donation, dues, in-kind gift and batch processing reports. Pledge reports are found by clicking the Pledges button.
Some reports, such as Donations by Fund or Date Range, take you to the Pledges & Receipts screen after you click the Run Selected Report button. To run the report from the Pledges & Receipts screen, click the Print Receipts button under Donations.
Donations by Fund or Date Range Report
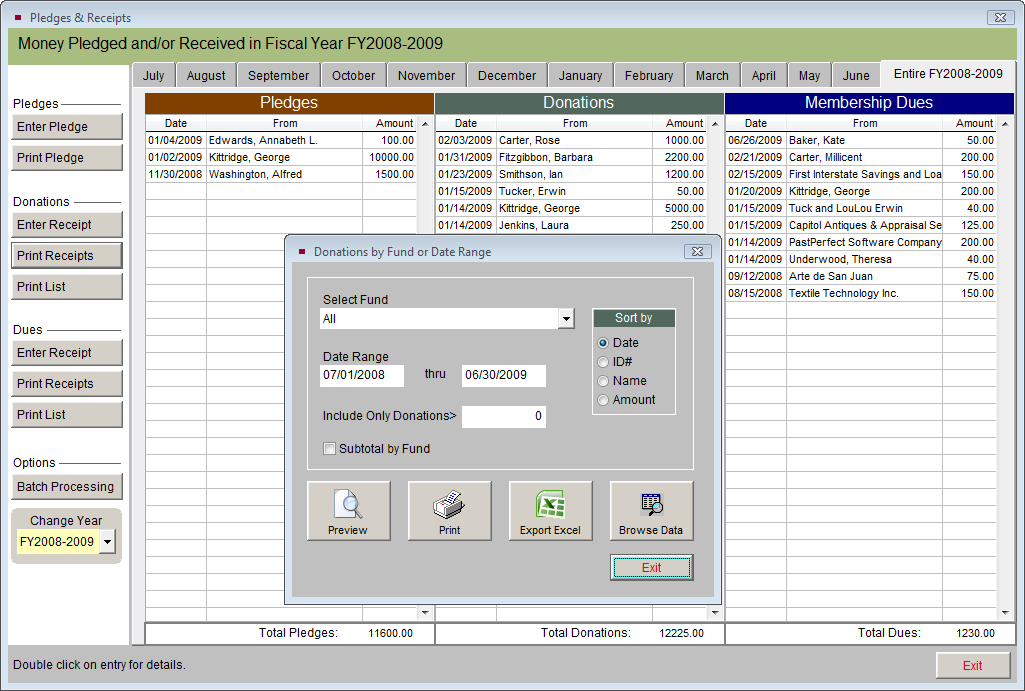
Many reports allow you to specify the ranges of records you want, then run the report immediately. For example, the Donations, Dues and In-kind Gifts report gives you options to choose the gift type (donation, dues, or in-kind gift) to include on the report, date range, gifts greater than a specified amount, campaign and campaign activity.
After making these selections, you may choose your Sort by field to set the order of the records on the report. To see your report, click Preview. Clicking the Print button will give you the Report Output Options described earlier in this chapter. The Export Excel button will export the report information to MS-Excel. You may browse the resulting records in table format by clicking the Browse Data button.
Donations, Dues & In-kind Gifts Report

On the right side of the Reports screen are the Report Layout Options. Every report, both predefined and Report Maker reports, has three layouts. The Standard Layout is selected by default and is the original layout for the report. There are also two custom layouts that you may modify and rename. By default they are named Custom Layout 1 and Custom Layout 2. Once a custom layout has been modified, you may set the report to use that layout by selecting the radio button next to the custom layout. Please see Chapter 19 - Advanced Report Modifications, for instructions on modifying reports.
Report Layout Options

To change the name of a custom layout, click the radio button next to the layout, then click Rename Selected Layout. Enter the new name of the report layout, such as "With Subtotals" if you have added subtotals to a report. Press Enter on your keyboard to save the new name.
If a custom report layout has been modified and you would like to remove all modifications, select the custom layout and click the Reset Selected Layout to Standard button.
The check box at the bottom of this section, Select Layout when Printing, gives you the option to choose the Standard Layout, Custom Layout 1 or Custom Layout 2 when previewing or printing a report. This can be useful if you need to switch between using multiple layouts for the same report.