Printing Contacts Mail Merge Letters
Print One Letter from the Contacts Screen
To send a letter to one individual, go to the Contacts screen for that individual and click the Print button at the top of the screen. Highlight the letter on the Letters on File list that you wish to send to this contact. Select the Dear Formal or Dear Casual greeting to be used, then click Print Letter. This will open your letter in MS-Word. Notice that the information from the contact record is now filled in automatically in the mail merge fields. You may edit the letter at this point. However, keep in mind that changes made here will only change this particular letter for this particular contact, for this printing. The mail merge letter on file and the default letter remain unchanged.
Contacts Print screen
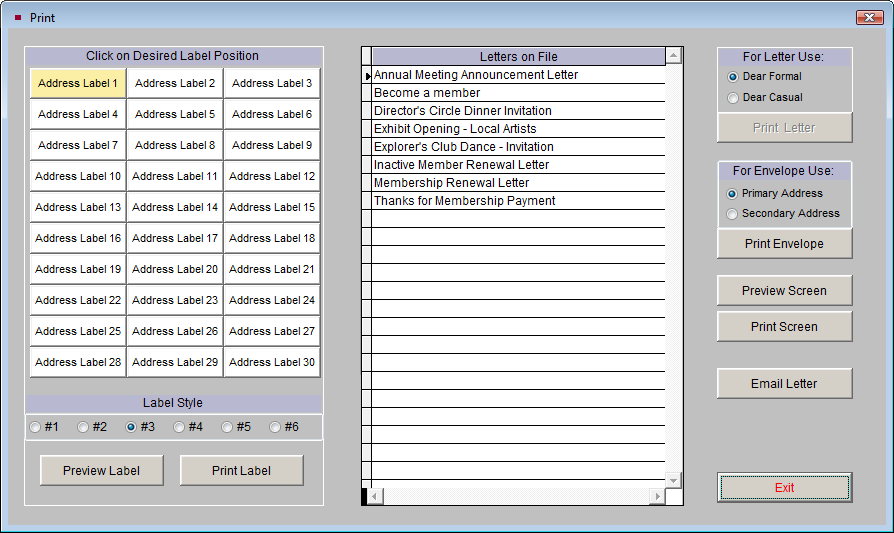
When the letter is ready to print, click Print this Letter on the Sidebar. Your printer dialog box will appear so you may print your letter.
Add Entry To Mailing Log
After printing letters or labels or sending an email, when you close the letter screen a dialog box will appear asking you if you would like to add an entry into the contact's mailing log. This allows you to track what you sent, when you sent it and who received it. It is suggested that you always add entries to the mailing log unless the mailing was sent as a test or duplicate. The date and time, type of mailing, recipient's name and description fields are filled in automatically.
To add the entry to the mailing log, enter your initials in the By field. If you want the notes included in the log, check the Also Include Notes In Contact Log Entry box. Enter any additional information in the Notes field. Then click Yes.
Print Multiple Letters Using a Contact List
To print a mailing for a group of contacts, select Contact Lists from the PastPerfect Main Menu. This will open the Contacts List Manager screen, which shows all the mailing lists, both User Defined Lists and Fixed Lists. Select the desired list and click View Selected List on the Sidebar.
TIP: To send a membership letter to one contact per membership, start by choosing the Billing Members Fixed List.
View Contact List screen
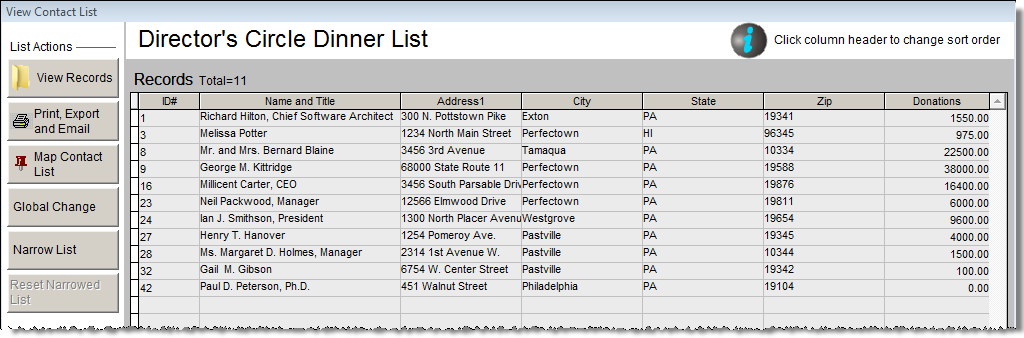
Clicking the View Selected List button will bring up the View Contact List screen which displays the contacts on the list on a grid as above. You may use the Narrow List button to target specific contacts on the list. See Chapter 21 - Contact Lists for more information on narrowing lists. Click the Print, Export and Email button on the Sidebar to continue printing.
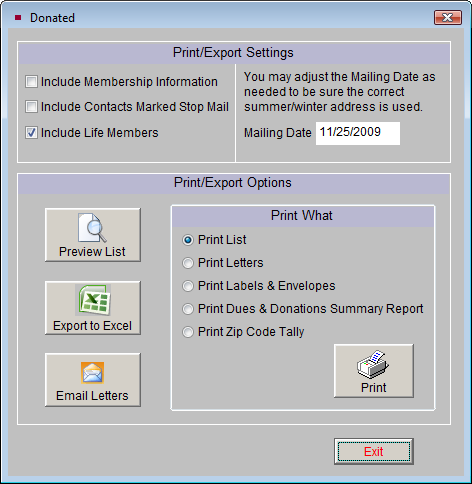
In the Print/Export Settings area, seen below, you may choose to exclude Life Members or contacts marked with Stop Mail from the mailing. To avoid mailing to contacts with Stop Mail checked, remove the check from the Include Contacts Marked Stop Mail box in the Print/Export Settings section. To exclude Life Members, remove the check from the box next to Include Life Members. Also, if you use primary and secondary addresses, to ensure you have the correct addresses, make sure the date in the Mailing Date field is the date you are sending the mailing.
Print/Export screen
Word screen

To print one of your Mail Merge letters, in the Print/Export Options section, click the radio button next to "Print Letters," then click Print. This will open MS-Word, as above. You have a few selections to make on this screen.
The Print Letter window shows you the titles of Mail Merge Letters in a drop-down menu. Click the down arrow to the right of the window to view your list of composed letters. Click on a letter to select it. The selected title will appear in the title window and the MS-Word document will display the selected letter.
Use Dear Formal or Casual - Select whether you want to print the letter using the Dear Formal or Dear Casual name for the selected letters. Click on the radio button to choose Formal or Casual.
Once you have selected your letter and your Dear type, you may print your letter using the Print Options.
Print this Letter - This option prints the letter without the merged data from the contact records. You will see the inserted field names, your letter text and formatting. This can be helpful if you want to print and review a test letter.
Print All Letters - This option merges data from the contact records into the selected fields and sends a letter for each contact on the list to your printer.
Print Selected Letters - This option allows you to go through the letters one at a time and decide to print or not print each letter, or specify a range of letters to print. This will also merge data from the contact records into your letters.
After your letters print, be sure to add the entry to the mailing log, so you can track the mailing later.