PastPerfect has the ability to send mass emails to your contacts for whom you have valid email addresses. To make use of this function, your computer must have an internet connection and you must have an active account with an SMTP email server. Your email account settings must be entered on the Setup Email screen, by going to the Main Menu | Setup | Contacts | Email | Email Setup. For more information about setting up your email, please see Chapter 20 - Contacts.
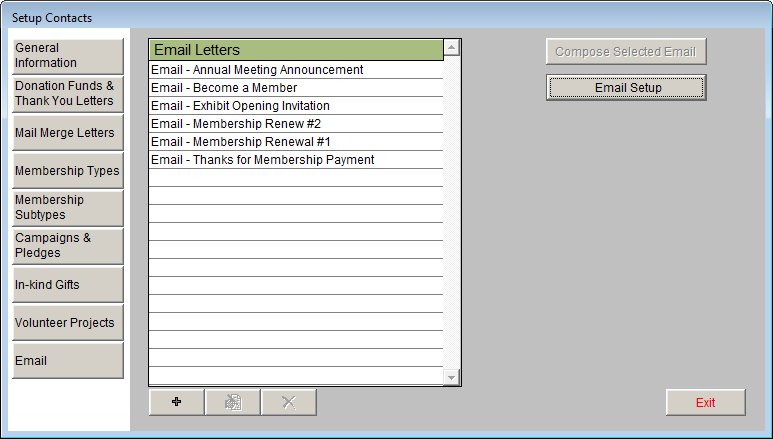
Email letters are composed on the Setup Email screen. Go to the Main Menu | Setup | Contacts, then click the Email button to bring up the following screen where you create your email letters.
Setup Contacts Email screen
To create a new email letter, click the plus sign button. Enter a name for the email letter and click Add. The new email letter will be added to the list. Highlight the email letter, then click the Compose Selected Email button and the Compose Email Text screen will appear.
Compose Email Text screen
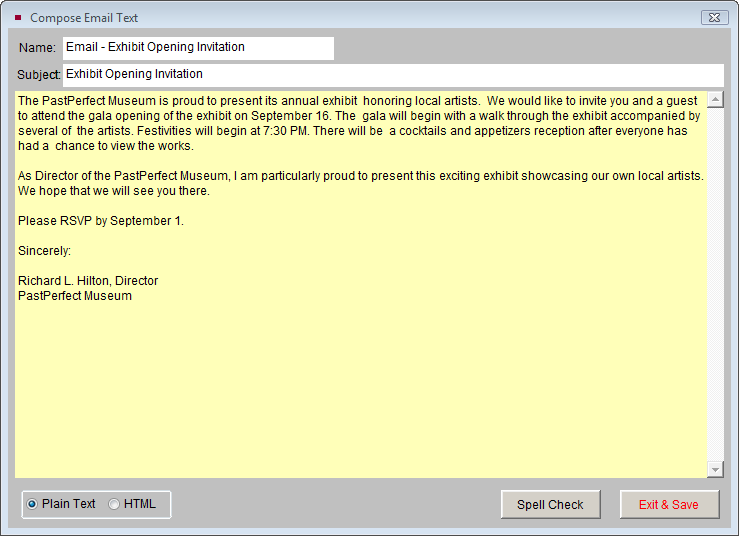
The name of the email letter will appear in the Name field at the top of the screen. This is just for your reference; recipients will not see this in their emails. The Subject field at the top of the screen is designated as the Subject of the email, which the recipients will see. By default the Subject will be filled in with the name of the email letter, so be sure to edit the Subject line appropriately if needed.
You have the option to compose your email in Plain Text format or HTML. Please choose the format for this email before you begin typing the text in the large white field. You do not need to add a "Dear" line to your email text as this can be added later. Attachments to your email, such as MS-Word documents or PDF files, may be inserted once you are ready to send your email to a Contact or a Contact List. Click Exit & Save to close the screen. Click Exit to close the Setup Contacts screen.
Like Mail Merge letters, labels and envelopes, you may send emails to one contact or to a list of contacts.
To send an email to just one individual, go to the Contacts screen. Select the contact you wish to email, then click the Print button at the top of the screen. On the Print screen, click the Email Letter button. Highlight the letter you want on the Email Letters list. Select Dear Formal, Dear Casual or None as the greeting to be used, then click Email Letter. This will bring up the Send Email screen.
Send Email to one contact
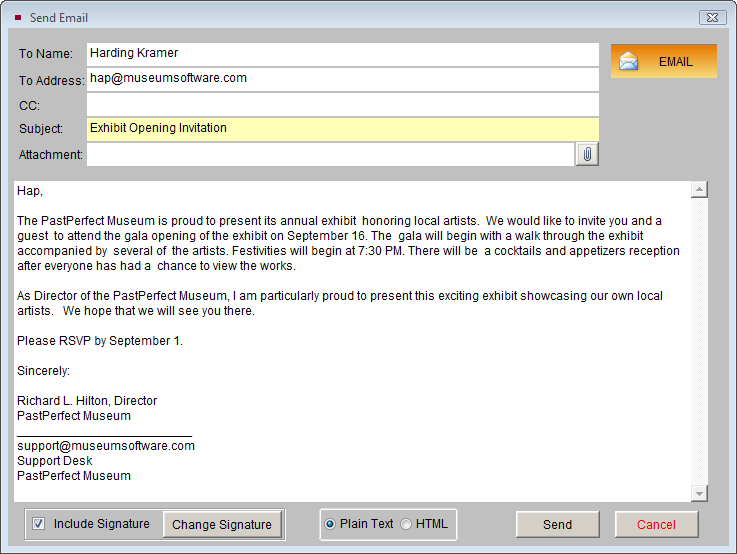
Notice that the To Name and To Address fields are filled in with data from the contact record. You may add another address in the CC line. If you want to attach a file to this email, you may do so here by clicking the paper clip button and locating the file to attach.
If you want to include, not include, or edit the signature line, you can make that change on this screen. Editing the email signature will affect the default email signature for all emails. You may also edit the email if needed. However, keep in mind that changes made to the email text will only change this particular email for this particular contact. The email letter on file remains unchanged.
When you are ready to send the email, click the Send button. You will see a message appear telling you if the email was sent successfully or not. You will also have the option to add an entry to the mailing log for this email. It is recommended that you add entries to the mailing log unless they are duplicates or sent for testing purposes.
TIP: If you want to send an individually written email to one contact, click the letter icon next to the email address on the contact record. This email will not be kept on file.
To send a mass email to a list of contacts, select Contact Lists from the PastPerfect Main Menu. This will open the Contact Lists Manager screen, which shows the User Defined Lists and Fixed Lists. Select the desired list and click View Selected List on the Sidebar.
TIP: If the list that you are emailing to has contacts without email addresses, you may still use the list. Emails will not be sent to those contacts. You may also create lists of just contacts with email addresses, using the Query builder to include only contacts whose email field is not empty. If you want to send an email to members with email addresses, and send a paper mailing to members without email addresses, you should create two lists. One list will be for members with email and the other list will be for members without email.
On the View Contact List screen, click the Print, Export and Email button on the Sidebar to continue.
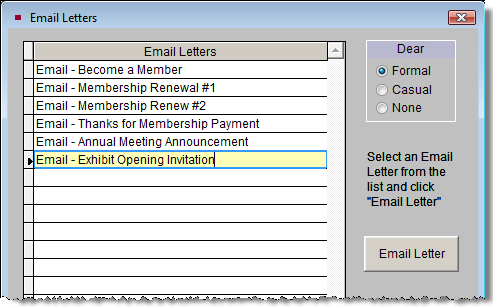
In the Print/Export Settings area, you may choose to exclude contacts from having an email sent to them. To exclude contacts with Stop Mail, leave the box next to Include Contacts Marked Stop Mail empty. To exclude Life Members, leave the box next to Include Life Members empty. In the Print/Export Options section, click the Email Letters button. On the next screen, choose your email letter and Dear style, then click Email Letter.
Email Letter selection screen
On the Send Multiple Emails screen, you will see an email addressed to the first person on the list.
Send Multiple Emails screen
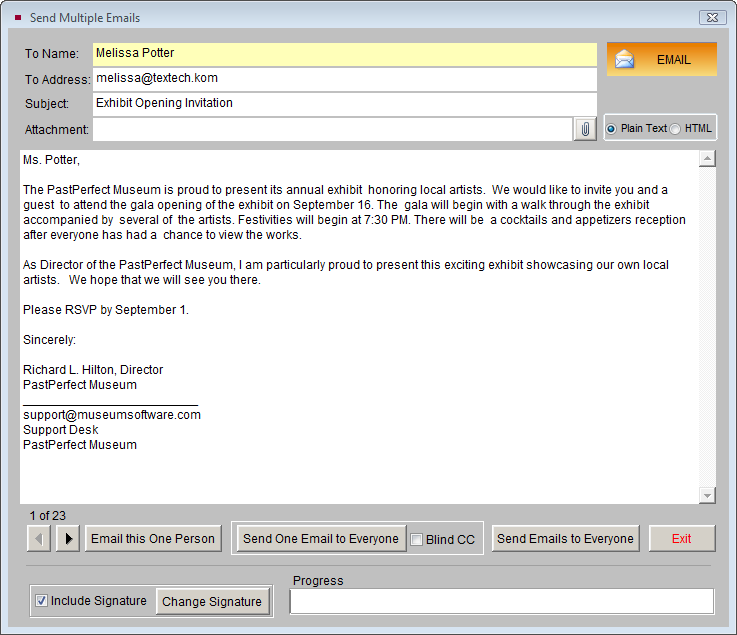
You may view the emails for the other contacts on the list by clicking the arrow buttons at the bottom of the screen. If you want to attach a file to this email, you may do so here by clicking the paper clip button and locating the file to attach. If you want to include, not include, or edit the signature line, you can make that change on this screen. These changes will affect the email sent to all contacts on the list.
You have three options for sending mass emails:
Email this One Person - This option sends the email to the contact shown on the screen. Use the arrow buttons to move to the next contact on the list and click the button again to send an email to that contact. Use this option if you want to send the emails one at a time, or if you want to personalize each email. You may skip over contacts using this option.
Send One Email to Everyone - This option creates one email with all the recipients in the "To" field. If you want to make the recipient list invisible, so that contacts cannot see the email addresses of the other recipients, check the Blind CC box. This option is often the fastest way to send out emails. However, if there is an invalid email address on the list, the email may not be sent. We suggest this option be used for lists of 25 or less recipients when you want to be able to respond to each other. If you make changes to the text of the email letter for the first recipient when using this option, that modified text will be sent to all recipients. Changes made on other email recipients' screens will be ignored.
NOTE: An invalid email address is one that contains a space, does not have an @ symbol, or does not have a proper extension such as ".com." An email address can be incorrect but still have a valid format.
Send Emails to Everyone - This option creates a separate email for each contact on the list. Contacts will not see the recipient list in the "To" field of the email. This option may take longer to send emails, since it requires a separate email for each contact. However, if there is an invalid email address on the list, you will be able to skip over it and continue sending to the rest of the list. If you make changes to the text of the email letter when using this option, it will affect only the email sent to the recipient on whose email you made the change.
Once you choose an email option, the Progress bar will begin to move, indicating that the emails are being sent. Depending on the number of emails you are sending, this process may take a few minutes.
NOTE: Your email provider or antivirus software may have limitations on the number of emails you may send in a period of time. These limitations are set to prevent spam. You may need to contact your email service provider to see what the limits are, or temporarily turn off your outgoing email virus scanning. To avoid going over these limits, break up your email list into multiple lists and avoid attaching large files to your email.
After sending your emails, be sure to add the entry to the mailing log, so you can track the mailing later.