Multimedia Links
The MultiMedia Upgrade allows you to enrich your collections data with the power of video, audio, MS-Word documents, Excel spreadsheets, PDF files, HTML Web pages, and any other file that your computer can open. The easy-to-use Wizard allows you to find and attach multimedia links directly to catalog, accession, exhibits, sites, and contacts records .
To link Word documents and Excel files, your computer must have MS-Word and MS-Excel installed. These programs may be purchased separately from Microsoft. The software required for linking to audio, video, PDF and HTML files is either included with Windows or available as a free download from the Web. PastPerfect multimedia linking is not limited to the file types listed above. In fact, you can set up a link to any file that can be opened with your computer's existing software. For example, if you are using WordPerfect instead of MS-Word, you may link WordPerfect files to your records. You could even set up a link to a PowerPoint presentation or a custom application file specific to your organization.
If you attach links to other types of files, please make sure that each computer where the files will be viewed has the appropriate program to view or open the files.
When an established link is selected, the linked file or document will be opened with the software designated in Windows to run that file. Therefore, different computers may display and run files differently.
Making the Link
To create a multimedia link from a catalog, accession, exhibits, sites, or contacts record, click on the Media button in the Navigation bar at the top of the record's screen.
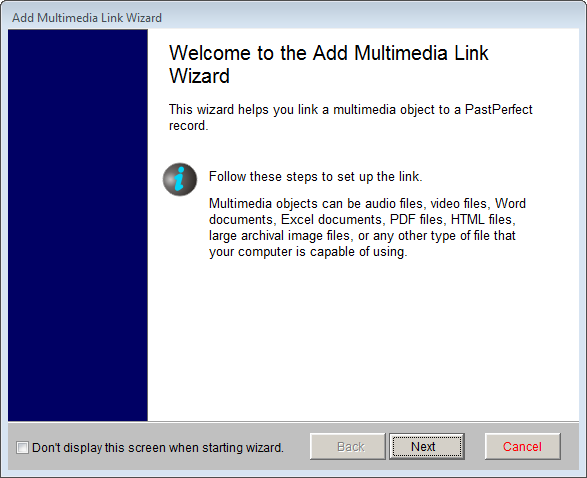
This will open the Add Multimedia Link Wizard. Click Next to start the wizard.
On the next wizard screen, select the file type of the file you want to link and click Next. If you have a microphone plugged into your computer it is possible to record your own 60 second audio file by choosing Audio File, then clicking the Record Audio Clip button.
Select Type of MultiMedia File screen

The next wizard screen depends on your selection of media type. Let's assume you chose audio file on the last screen.
Select the media location where you want the final file to reside. Even if the file is currently on CD, you may want to transfer it to your hard drive for easier access. If you choose media type "Hard Drive," the file will be copied to the appropriate multimedia folder as specified on your Setup Network screen. By default the setting is pp5\multimedia\audio1.
If you choose a media location of CD, DVD, or Removable Media, you will be asked to insert the media whenever you want to view or play the link.
Select Media Type/Location screen
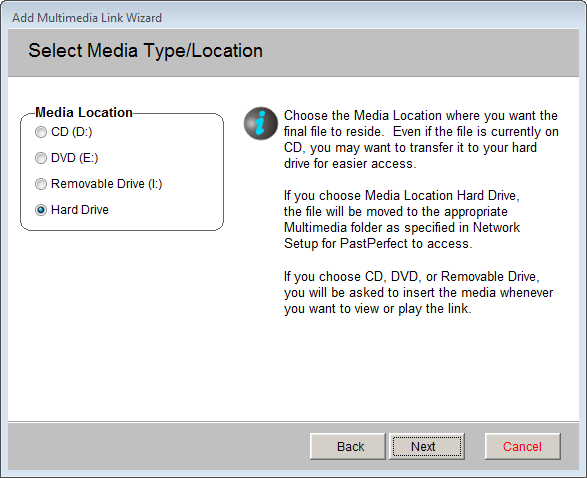
For this example we are going to attach an audio file that currently resides on a CD. Since the file is not large and we want it to be easy to access, let's select "Hard Drive" as the media location. With this selection the wizard will copy the file from the CD to the hard drive.
Click on Next to open the next wizard screen shown below. On this screen you must locate the file name and path for the audio file you want to link. To do this, click on the button Click Here to Locate File to search for the file on the CD. Once you locate the file, double click on it and the file name will be entered on the wizard screen.
Locate MultiMedia File screen
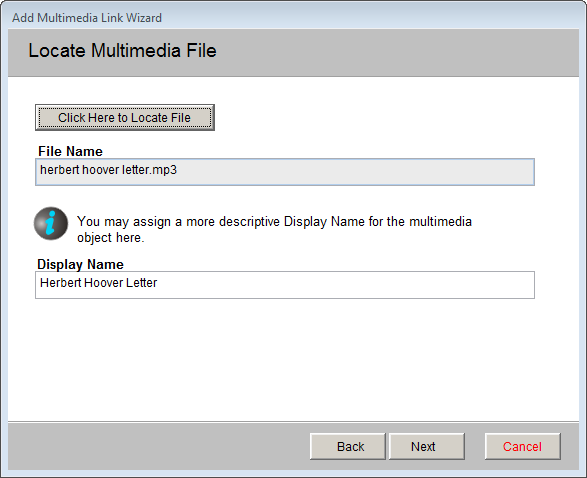
The file name without its extension will be automatically entered as the Display name for the file. You may want to change this to something more descriptive.
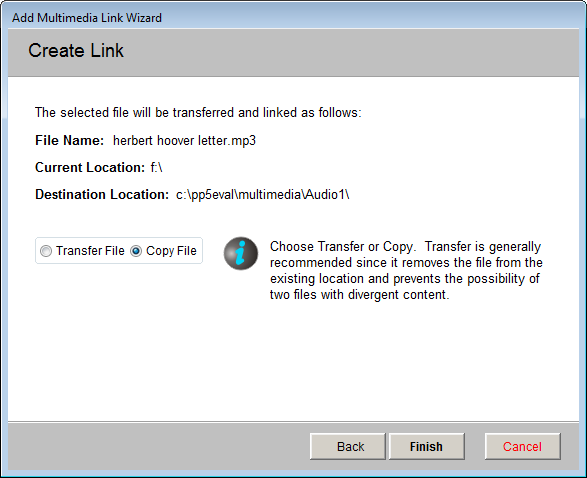
Click Next to display the final wizard screen. Here you must choose if you want the file to be copied or transferred. Since the original file is on a CD and you cannot erase it, you should choose Copy File. Transfer is useful when moving files from one computer to another via flash drive.
Create Link screen
Click Finish to complete the link. You will be returned to the catalog record screen. Notice the filmstrip on the Media button has changed from gray to turquoise, indicating a link is present.
Playing or Viewing the Linked File
Now when you click on the Media button, it will open the Play/View Multimedia Links screen. Click on a media file to play or view the file.
There is no limit to the number of multimedia files that can be linked to a single record.
Play/View Multimedia Links screen

Multimedia Metadata
PastPerfect provides a screen, where you can record information about each linked file. This can be particularly useful for audio and video files.
To edit or view this metadata, click on the button Add More Links or View and Edit Link Details from the Play/View Multimedia Links screen.
This screen displays the file name and location of the media file at the top of the screen. In the section for Removable Media Information, if the file is on removable media such as CD or DVD, you can enter the storage location of that media. In the Load Message field, you can create a message that will display instructions for locating the CD or DVD.
In the Content Information section, you may record the person or group that created the file in the Creator field. In the Title field, enter the title of the file.
For digital audio and video files, there are fields where you can record the date the file was created, the file size, file type, sampling rate used to record, hardware and software used to create the file, and other relevant notes on the digitalization process.
Multimedia Link Information screen
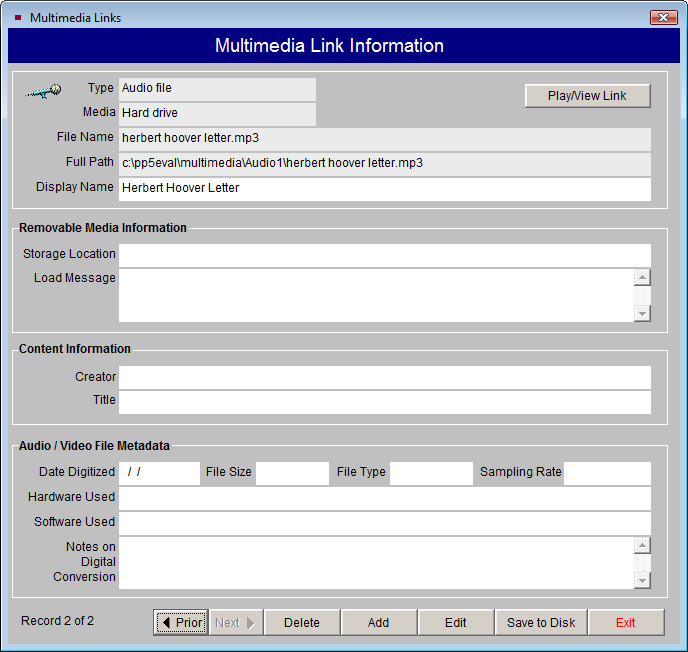
The buttons at the bottom of the screen allow you to view the Prior and Next multimedia links, Delete the multimedia link on the screen, Add a new multimedia link, and Edit the information on the screen. The Save to Disk option allows you to save the multimedia file to your hard drive or to a removable drive. This can be useful if you want to have a copy of the file to use outside of PastPerfect.
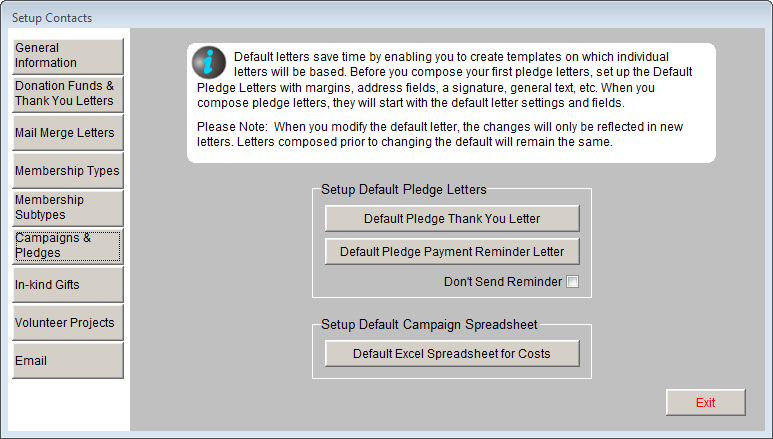
Excel Spreadsheets in Exhibits and Campaigns
In addition to linking multimedia files to catalog, accession, exhibits, sites, and contacts records, with the MultiMedia Upgrade and MS-Excel you can create Excel spreadsheets for tracking detailed information about exhibits and campaigns.
To start, you should set up default spreadsheets so that each time you enter a new exhibit or campaign you do not have to start with a blank sheet. This will save time by sharing common elements and layout parameters.
To define these default Excel spreadsheet files for your exhibits, click Setup on the Main Menu, then click Collections. Click the Exhibits button, then click the Setup Default Cost and Revenue Excel File button. To define the Excel files for your campaigns, click Setup on the Main Menu, then click Contacts. Click the Campaigns & Pledges button, then click Setup Default Excel Spreadsheet for Costs.
Setup Campaigns & Pledges screen
When you open the default Excel file, MS-Excel will open a blank spreadsheet. Create and save a generic spreadsheet for campaigns and exhibits.
Now when you add a new campaign or exhibit, the default spreadsheet will be used to start a new Excel file. You can add information to it, specific for that new record. To do this for an exhibit record, click the Track Details in Excel button under Actions on the Sidebar. To do this for a campaign, click the Excel Spreadsheet for Costs button on the campaign screen.
Image and Multimedia File Backups
Please see the Backup section in Chapter 25 - Utilities for instructions on how to back up your image and multimedia files. Much time and effort goes into creating these files, so it is important that you develop a backup routine to make sure your files are stored safely.