Adding Barcodes to a Label
PastPerfect comes with barcode labels already designed for printing Objects, Photos, Archive, and Library record labels. You may use this layout or modify it to meet your needs. Start by clicking Reports on the Main Menu, then choosing either Objects, Photos, Archive, or Library under Report Types. Click once on the Barcode Labels report, then choose either Custom Layout 1 or Custom Layout 2. Click Modify Selected Layout to open the Label Designer screen.
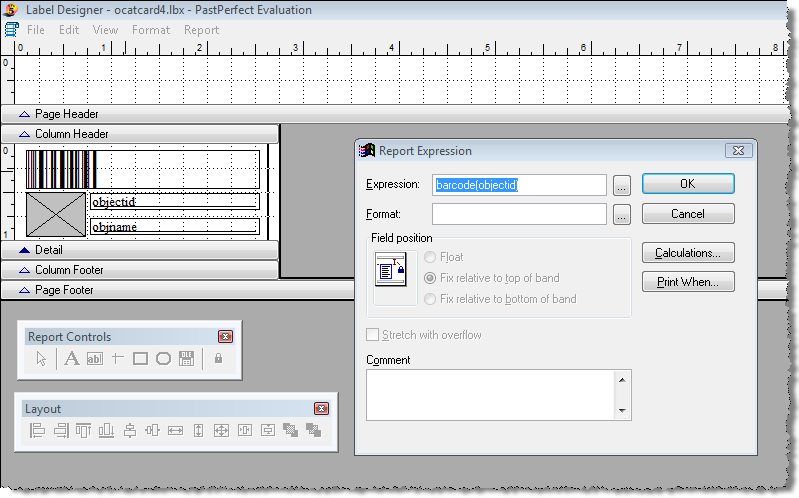
Much like placing a standard field on a report or label, as described in Chapter 19 - Advanced Report Modifications, you can use the Field tool of the Report Controls toolbar to place a new field on the label. This will open the Report Expression dialog box. This dialog box allows you to enter or view the name of the field that will be printed. If you want the field printed in barcode format, enter the field name inside parentheses preceded by the word "barcode."
For example, to print the Object ID as a barcode, enter "barcode(objectid)" in the Expression field. We suggest using the Object ID as the barcode field because it is a unique number, but in fact you can print any field in barcode format as long as its characters are available in the barcode format you have selected. Code 128 and Extended Code 39 are good choices because they support both upper and lowercase letters and numbers.
Barcode Printing
Select a matching font. The final step in the setup is to select the proper font for printing the code. First, click on the barcode field in the Label Designer screen and then select Font from the Format drop-down menu at the top of the screen. When you installed PastPerfect, barcode fonts were added to your computer's font list. Please select one of the fonts that match the barcode format you choose on the Setup Barcode Printing screen. The Setup Barcode Printing screen displays the list of compatible fonts for each format.
Font screen
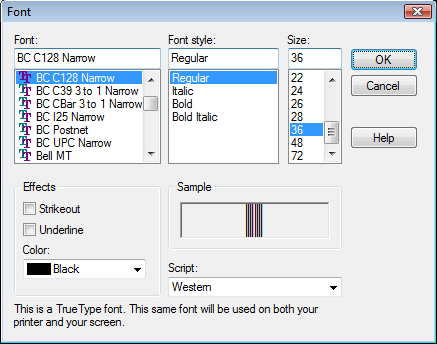
Also on the Font screen you can select the size of the font. The larger the font size the better. For best performance we recommend at least 36 points.
To save your changes, click File, then Save. To close the Label Designer, click File and Close. Be sure to select your Custom Label 1 or Custom Label 2 on the Report screen.
You can now print barcode labels for one record at a time by using the Print button at the top of a catalog record. Chose Barcode Labels as the Card Type to print. You can print barcode labels for multiple records at one time from the Reports menu by choosing the appropriate catalog under Report Types, and choosing the Barcode Labels report.
TIP: You may also print barcode labels for items in search results and on catalog lists. With the Barcode Printing Upgrade, Barcode Labels are one of the report choices in the Print List menu on the Query and View Lists screens.
Barcode printing is not restricted to the catalog labels or even labels in general. You can print barcodes on any label or report by adding the barcode field and selecting the appropriate font.
Printing PostNet Labels
PastPerfect comes with predefined POSTNET labels already set up as Contact Labels Style #2. You can use these as they are, modify them, or create your own labels. The process is identical to creating barcode labels, except that you enter the field expression preceded with the word "postnet." For example, the entry would be "postnet(zip)." Be sure to set the font to BC Postnet.
Please see www.museumsoftware.com for more information about printing Intelligent Mail barcodes.