Add a New Temporary Custody Receipt
Click the Add button at the top of the screen. The Add New Temporary Custody Receipt screen will appear. Assign a unique receipt number to this new Temporary Custody receipt. Receipt numbers may be up to eight digits long, but cannot include characters or punctuation. PastPerfect recommends assigning sequential numbers. Should you choose to accession the items later, you will be asked to assign an accession number in accordance with your museum's numbering policy.
Add New Temporary Custody Receipt screen
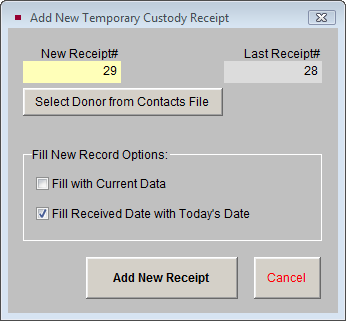
After assigning the receipt number, we recommend using the Select Donor from Contacts File button to choose your source from the Contacts file. If the donor is not listed, exit from Temporary Custody and go to Contacts to add the donor. When you use the Select Donor from Contacts File feature, the source's information will be automatically entered into the Temporary Custody receipt. This saves you from entering data twice and links the Contact record with the Temporary Custody receipt.
PastPerfect enables you to save time by pre-filling data when adding new records. Under Fill New Record Options, if Fill with Current Data is checked, PastPerfect will copy all information, including the source's name and address, from the last viewed Temporary Custody record into the new receipt. Check this box only if you have not selected a donor name from the Contacts file and only if the donor for the new receipt is the same as the donor on the screen showing behind the Add screen.
If the Fill Received Date with Today's Date is checked, the program will fill the new record's Date Received field with today's date.
When you click the Add New Receipt button, PastPerfect will verify that the assigned receipt number has not already been used. If it has, you will receive a message asking you to assign a different number. When the receipt number is accepted, a new, blank record will appear. You will be in Add Mode and able to complete the record's fields.
Completed Temporary Custody screen
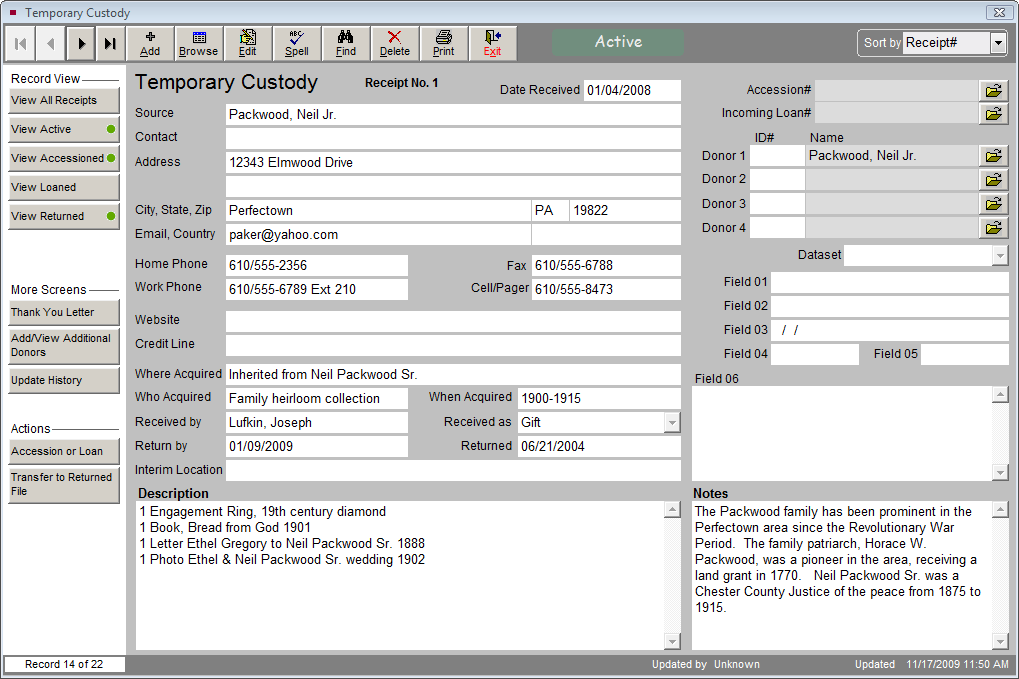
To save your data, please click Save at the top of the screen. If you do not want to save your entry, click Cancel. Once you have saved the initial record, you can click Edit to change or add to the entered information.
NOTE: New Temporary Custody receipts will always be entered and displayed in the Active file. Using the Actions buttons in the Sidebar on the left, Active receipts may be Accessioned, Loaned, or Transferred to the Returned File. Buttons in Record View allow you to view receipts in just one of the files, Active, Accessioned, Loaned, or Returned, or to view all receipts. A green data light will appear on the button when there are records to view.
If you chose your donor from the Contacts file when adding your receipt, the Donor ID# and Name fields will be filled in with the Contact ID# for that contact. You may view the Contact record by clicking the file folder icon button to the right of the name.
NOTE: If you created your Temporary Custody record before adding the donor in the Contacts file, you can still link the Contact record to the existing Temporary Custody record. Go into the Contacts file and note the Contact ID# for the donor, then edit the Temporary Custody record. You will create the link by entering the Contact ID# in the Donor ID# field.
The Temporary Custody screen includes 6 custom fields, which you may use if you have information that does not fit in the standard fields. By default, these fields will be called Field 1, Field 2, Field 3, Field 4, Field 5 and Field 6. Fields 1 and 2 are character fields, Field 3 is a date field, Fields 4 and 5 are numeric, and Field 6 is an unlimited memo field. You may rename the fields by going to the Main Menu | Setup | Custom Fields | Temporary Custody.
Print the Temporary Custody Receipt
Once you are satisfied with the receipt, you can preview or print the Temporary Custody Receipt report using the Print button at the top of the screen. The Print Temporary Custody screen also has options for printing this receipt's thank you letter and envelope, as well as a blank receipt. The blank receipt may be printed and filled out by hand.
Temporary Custody Receipt
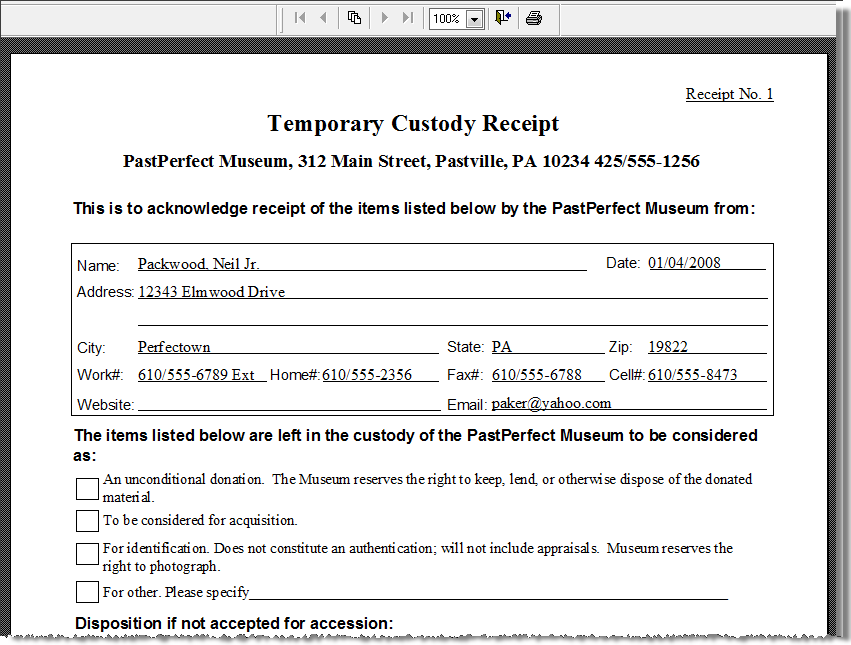
The Temporary Custody Receipt may be customized by going to the Main Menu | Reports | Temporary Custody | Temporary Custody Receipt | Custom Layout 1 or 2 | Modify Selected Layout. Please see Chapter 19 - Advanced Report Modifications for more information about editing layouts. The name and address of your institution that prints on the receipt may be changed by going to the Main Menu | Setup | Collections | Temporary Custody.
On the printed receipt, check the appropriate box to record the museum's reasons for holding the items in temporary custody, as well as the method of disposal, should the museum decide against accessioning the items. You may want to record the same information in the Temporary Custody screen's Notes field or in its user defined fields. Please be sure both the donor and the receiving agent sign the receipt. Finally, make a copy for the donor to keep.
Print the Temporary Custody Thank You Letter
You may also want to print a thank you letter or cover letter for the receipt. To edit or print the letter, click on the Thank You Letter button in the More Screens section in the Sidebar on the left. This will launch your computer's MS-Word program and enable you to personalize the letter for this receipt as well as print the letter and accompanying envelope. You may print a Thank You Letter for up to four different donors. When finished, use the Close button at the upper right to return to the Temporary Custody screen.
Temporary Custody Thank You Letter
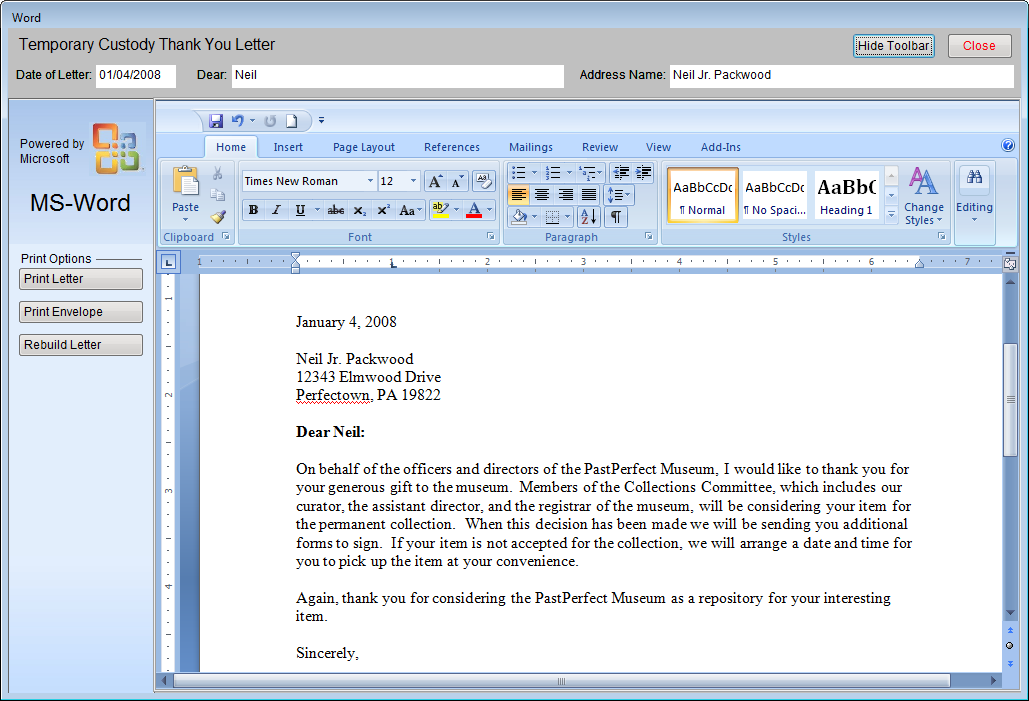
The Thank You Letter is generated based on the data you entered on the Temporary Custody screen and the default letter text. To modify the default letter text, go to the Main Menu | Setup | Collection | Temporary Custody. If you have made modifications to the default letter or the Temporary Custody record, click the Rebuild Letter button on the Temporary Custody Thank You Letter screen to update the letter with those changes. Please see Chapter 22 - Letters, Labels & Emails, for more information about working with letters.
TIP: Not all printers are capable of printing envelopes. For those that are, different paper feeds may require you to adjust the envelope settings. To adjust the settings, please go to the Main Menu | Reports menu and select Temporary Custody | Thank You Letter Envelope | select Custom Layout 1 or 2 | Modify Selected Layout.
When you are finished with the receipt, exit the Temporary Custody screen by clicking the Exit button at the top of the screen. It will remain in the Active file until you initiate the next step - returning or accessioning the items.