Step 6: Complete the Deed of Gift and Thank You Letter
On the Accession screen, use the Thank You Letter button to display and print a letter to the donor. Thank you letters for additional donors can be displayed and printed by clicking the Add/View Additional Donors button. The Deed of Gift button will allow you to edit or print a Deed of Gift form.
The Deed of Gift form and Thank You Letter are prepared automatically from donor information entered when adding the Accession record and from information contained on the Default Deed of Gift form and the Default Thank You Letter. These default forms may be accessed by going to the Main Menu | Setup | Collection | Accessions. The steps for modifying the form and letter are below.
Modifying the Default Deed of Gift
On the Accession screen in Setup Collections, the top part of the screen holds the information for your Default Deed of Gift, as seen below.
Default Deed of Gift fields

Click in the first box and enter the name and address of your institution. The second box is for the default legal text of your Deed of Gift contract. By using the Default Legal option, you can enter text for your standard Deed of Gift. Place a dot in the Default Legal radio button before entering this text. This text will appear on all new Deed of Gift forms when you have the Default Legal option selected. You also have a Custom Legal option, which you can use if the Default Legal wording does not apply for an accession. The third box is for the Footer, which appears above the last signature line on the Deed of Gift form. In this example, we used it for the statement confirming receipt of the gift.
The Default Received as field at the bottom of this screen allows you to enter a default term for this field. Click Exit to complete your modifications.
NOTE: You may have noticed some text that appears on the Deed of Gift form does not appear on the screen for modification. It is possible to customize that text as well as modify the layout of the form. Go to the Main Menu | Reports | Accession | Deed of Gift | Custom Layout 1 or 2 | Modify Selected Layout.
Modifying the Thank You Letter
The Accession screen in Setup Collections also has a button for Setup Default Thank You Letter. This will open the Default Thank You Letter screen in MS-Word.
Default Thank You Letter
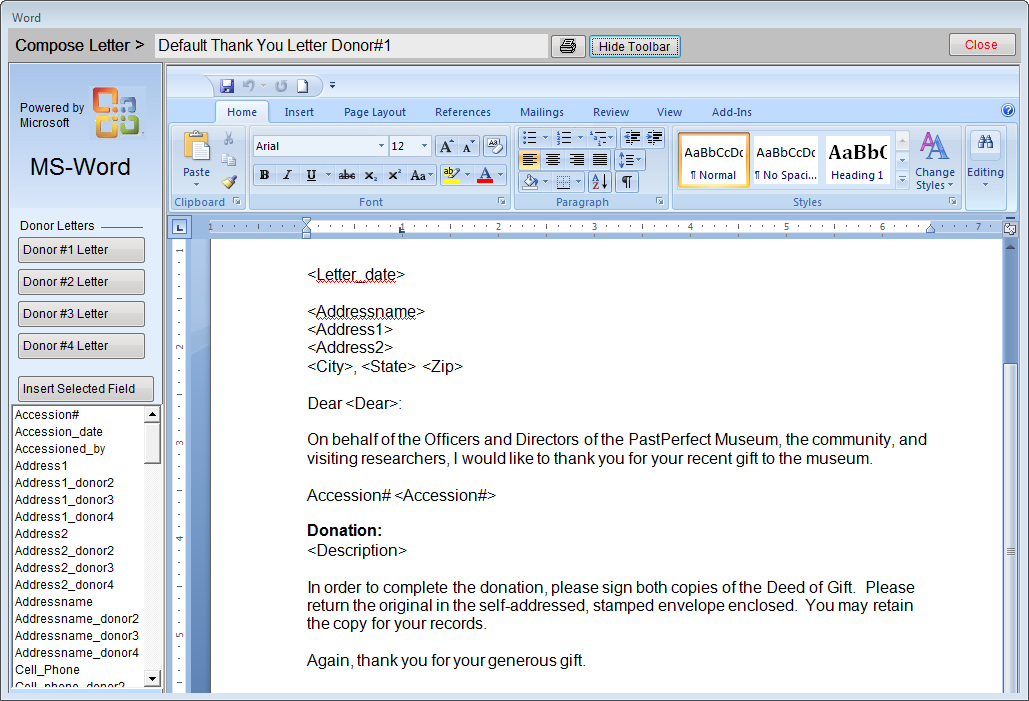
Four default letters can be composed, one for each donor. Click on the appropriate donor button on the left side of the screen to select a letter. The default body text appears in the document to the right. Click on the screen and type to edit the text. The letter that you see is a mail merge letter which means that you can include fields that will be replaced by data from the Accession record. These mail merge fields must be chosen from the list of available fields on the left. They will appear in angle brackets such as <Letter_date>, <Address1>, <City>. To insert a field, first place your cursor in your letter where you want the field to be inserted, then click on name of the field you want and click the Insert Selected Field button.
Please see Chapter 22 - Letters, Labels & Email, for more information about working with letters. Click Close and save your changes, then return to the Setup Collections screen. Then click Exit to return to the Main Menu.
View and Print the Deed of Gift
Return to the Accession screen by clicking the Accession button on the Main Menu. To view the Deed of Gift, click on the Deed of Gift button.
Deed of Gift

At the top of the screen you can record when the Deed of Gift was sent and when it was returned. To edit the check boxes and dates, click the Edit button at the top. There may be times when you'd like to change the legal text for one Deed of Gift without changing the default settings for all future Deeds of Gift. To do so, click the Custom Legal radio button, and click Edit. Type in the custom legal text and click Save. Your changes will affect this Deed of Gift form only. To make changes to the default data, you must follow the procedure outlined above. The text box at the bottom is for the In Memory Of information if the donor wishes to acknowledge someone in this way. The text in the footer comes from the default form and cannot be modified here.
When you are ready to print the Deed of Gift, you can click Preview to view the document first. Proofread the document, and then click the printer icon to print. If you need to make changes before printing, exit from the preview and click on the Edit button. Then click the Print button at the top to print.
View and Print the Thank You Letter
To print a Thank You Letter for a completed accession, click on the Thank You Letter button on the Accession screen. You should now see an MS-Word document with the mail merge fields replaced with data from the Accession record. Proofread the document. You may edit and personalize the letter here if desired. Changes made here will not affect the Default Thank You Letter form.
Thank You Letter

The Rebuild Letter button will rebuild the Thank You Letter based on the most current data from the Accession screen and the default Thank You Letter text.
The Print Envelope button will print an envelope for the letter. Since not all printers handle the printing of envelopes, and those that do often require different formats, this option may require adjustments to the envelope layout to print properly. You can set up the envelope to print with your printer from the Reports menu by going to the Main Menu | Reports | Accessions | Thank You Letter Envelope | Custom Layout 1 or 2| Modify Selected Layout.
Multiple Donors
The Accession record will allow you to record information about three additional donors. A separate Deed of Gift and Thank You Letter may be printed for each donor.
To add another donor, click on the Add/View Additional Donors button to open the screen below.
You can type in the donor information or click Add from Contact File to select a donor from your Contacts file. If you add an additional donor, a green data light will appear on the Add/View Additional Donors button to indicate there are additional donors.
Other Donors
