Time Saving Features
The Add screen's Fill New Record with section has options that enable you to save time by pre-filling data when adding new records. If Current Data is selected, PastPerfect will copy all information from the last viewed Objects record (the one you see behind the Add screen) into the new record. When using Default Data, you add a new record with information copied from the Default Data Record. You can make the last viewed Objects record your Default Data Record using the Set Current Record as Default Data Record button. This screen also includes options to Go to Default Data Record (as had been set previously) or Create a New Blank Default Data Record for the Objects catalog.
Default Data Record
The Objects catalog's Default Data Record saves you time by pre-filling fields when you add new catalog records. If, for example, you are cataloging archaeological items in a single collection, you may want to create a default data record with your name as the cataloger in the Cataloged by field, a radio dot in the Archaeology Object Type, and the collection's name in the Collection field. When new records are added, the Cataloged by, Object Type, and Collection fields will be pre-filled with the default data.
Add New Catalog Record, Default Data Options
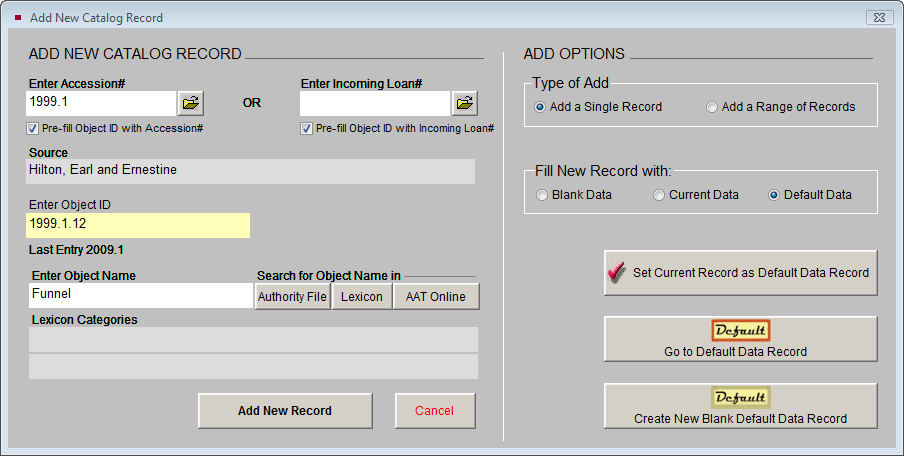
The Default Data Record may be changed at any time from the Add New Catalog Record screen. If you have just completed a record that will be a good starting point for new records, you can set the last viewed record as the Default Data Record, select Default Data from the Fill New Record With section and add the first new record. Once the new record is complete and saved, you can add the next record using the same Default Data Record. If another Objects record is a good starting point for adding records at another time, you can navigate to that record, go to Add, and set it as your current Default Data Record. You can also create a new blank Default record from the Add screen at any time. If you are using the Security feature in PastPerfect, each user will have his or her own Default Data Record. The Default Data Record you choose will pre-fill any new Object records you add from the Accession catalog, if you choose the option to Fill with Default Data on the Add Item to Object Catalog screen from the Accession catalog. Notice the default indicator on the screen below. This is the record that will be copied when fill with default is selected.
Default Object Record
Function Keys Setup Screen
The function keys on the top row of your keyboard, F1-F12, provide single-key input of common functions, words or phrases. F3-F6 and F8-F12 can be redefined as often as you like from the Setup Function Keys screen accessed from the Main Menu. F1 is used to access Help, F2 is reserved as the Save key, F7 is reserved for accessing authority files, and F8 is usually set as today's date.
To enter or change data in the function keys, click on the Setup drop-down menu from the Main Menu and choose Function Keys. Enter the word or phrase as you wish it to appear when the function key is pressed.
Setup Function Keys
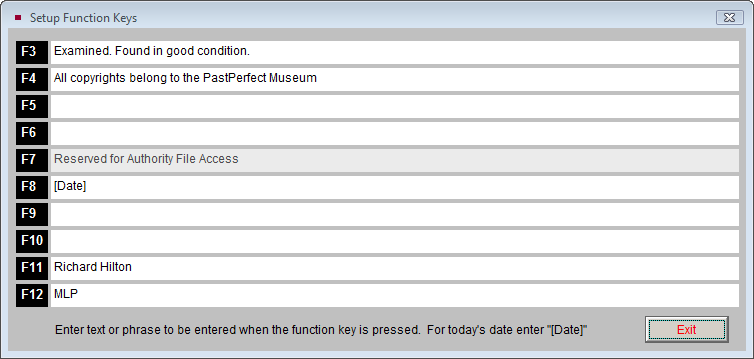
If you are using Security, each user will have his or her own function key assignments. More information about function keys can be found in Chapter 3 - Getting Started.
Authority Files
PastPerfect uses authority files to help standardize data input. Frequently used terms can be saved in each file. Authority files are provided for many fields including: Accessories, Artist, Cataloged by, Classification, Collection, Collector, Condition, Creator, Culture, Event, Found, Made, Material, Medium, Object Name, Other Name, Owned, People, Place of Origin, Repatriation Type, School, Search Terms, Site, Status, Subjects, Technique, Used, all location fields, most natural history fields, most geology fields, and most custom fields.
 Authority files are available whenever you add or edit catalog records. When the cursor is in a field with an authority file, an authority file flag appears, usually at the top left of the screen.
Medium Authority File screen
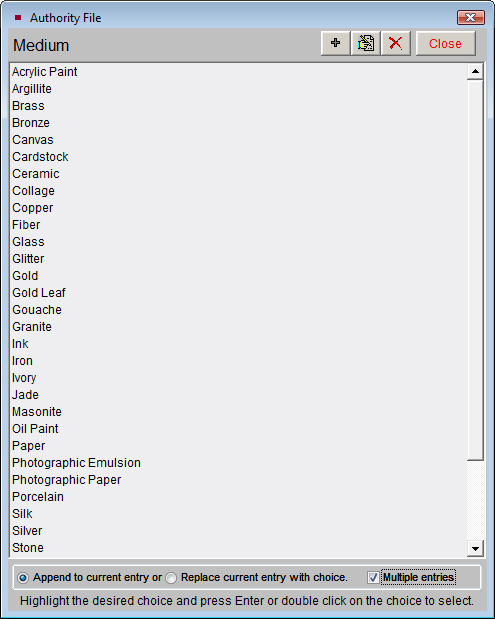
By pressing the F7 function key or right clicking with your mouse, you will open a window displaying the list of terms. From here, you may add to the list, edit the list, or select an item for that field by double clicking on the selected item. Authority files may also be accessed for maintenance purposes by going to the Main Menu, clicking on Setup, then clicking on Authority Files.
Some authority files, such as Collection, Artist and Natural History Class, are single entry. With these, you can enter one term to fill the field. Other authority files, like Medium, can be single or multiple entry, as seen in Figure 6-9. To allow for multiple entries, select the radio button next to Append to Current Entry on the Authority File screen. Multiple entries are added to the field separated by a forward slash, as in: Wood/Metal/Glass, or by carriage returns in the People, Subjects, Classifications, and Search Terms screens . To select multiple entries without exiting the screen, check the box Multiple Entries.
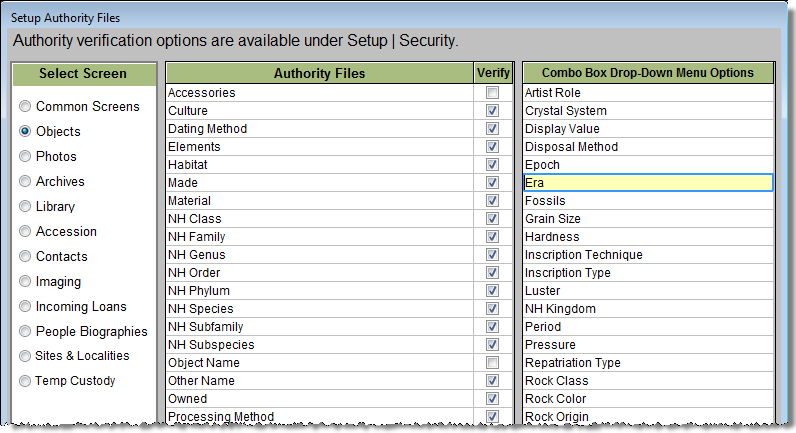
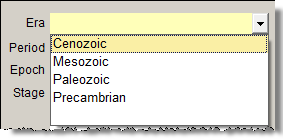
Combo Box Drop-Down Menus
The Appraisal Reason, Artist Role, Crystal System, Dataset, Display Value, Disposal Method, Epoch, Era, Flag Reason, Fossils, Grain Size, Hardness, Inscription Technique, Inscription Type, Luster, Natural History Kingdom, Period, Pressure, Repatriation Type, Received as, Rock Class, Rock Color, Rock Origin, Rock Type, Sex, Stage, Surface Process, and Temperature fields allow you to select entries from a drop-down list.
Era Drop-down menu
To add, edit, or delete entries in combo box drop-down menus, go to the Main Menu | Setup | Authority Files. Select the Objects Screen at left, or Common Screens for fields that appear in more than just the Objects catalog. Then from the Combo Box column on the right, highlight the list you want to edit and double click, or click the Next > button at the bottom of the screen. You may add, edit, alphabetize or delete entries. Please note that deleting entries from combo box menus will not affect already entered data, but will cause the fields with those entries to appear blank in catalog record(s). Unless you are certain that the entry is not used, it is recommended that you keep the term in the drop-down menu.
Authority File Editor screen