Other Views
In the Sidebar beneath Screen Views are the Other Views. These are a series of buttons that access subscreens providing additional information about the object. All four catalogs have subscreens with fields for Appraisal, Condition, Lexicon, Location, Notes & Legal, People-Subjects-Classification-Search Terms, Relations, Source, and Lists. The Objects catalog adds Dimensions, Repatriation, and Inscription/Maker's Mark subscreens. With the Virtual Exhibit Upgrade, you will also be able to access the Virtual Exhibit subscreen.
Whenever fields in a subscreen are populated, a green data light will appear on the button. If no fields within the subscreen are populated, the green data light will not appear.
Appraisal Subscreen
The Appraisal subscreen provides fields for recording appraisal information, detailed insurance information, and value information for each object including: Appraiser, Value Date, Acquisition Value, Minimum Value, Maximum Value, and Appraisal Notes. Appraisal Histories are also viewed from this subscreen.
Appraisal subscreen
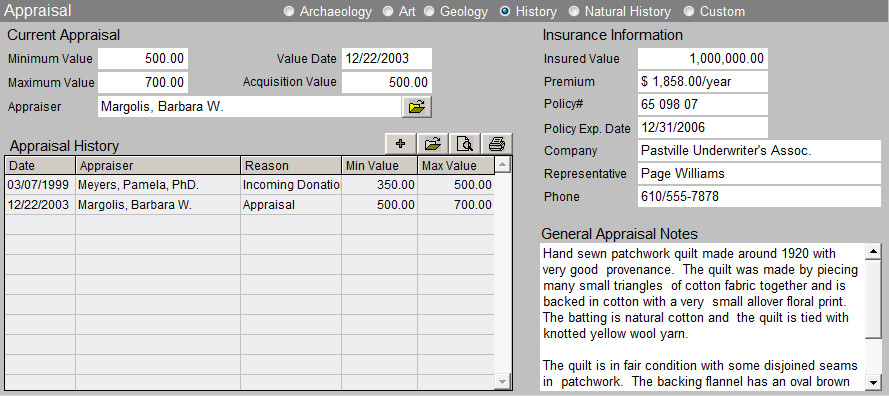
The Appraiser field is populated with the name of the person who last appraised the object. This field is controlled by the Experts authority file. With the cursor in the field, press F7 or right click in the field to view entries in the authority file. Double click on your choice to select the name of the person who appraised the item. Click on the file folder icon to the right of the field to access additional information about this expert. To add, edit, or delete names on this Experts list, go to the Main Menu | Setup | Authority Files. Make sure you are viewing the Common Screens authority files, highlight Experts and click the Next> button at the bottom of the screen. You will then have the option to add, edit, and delete names on the list or use the file folder icon to view more information about this expert.
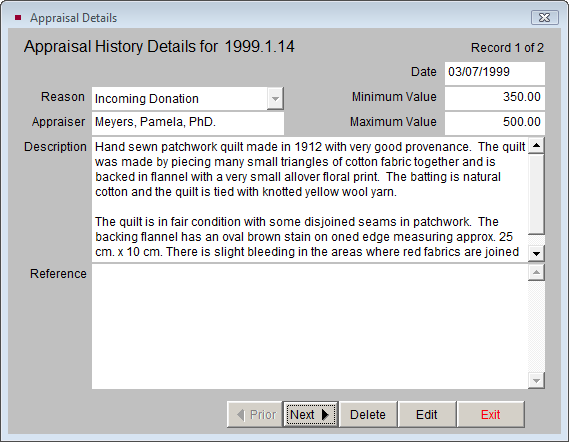
PastPerfect keeps an appraisal history for each object. Whenever you enter a new appraisal, the last appraisal will be archived in the appraisal history file. To view an old appraisal, highlight the selected appraisal from the list and click the View Appraisal Details, Edit or Delete button (file folder icon) to view the appraisal in full. To add a new appraisal, click on the Add New Appraisal button (plus sign). You can also preview and print the appraisal history using the Print Preview Appraisal History and Print Appraisal History buttons.
Appraisal Details screen
The right side of the Appraisal subscreen is devoted to information about the insurance policy covering the object. In many cases, the same policy covers multiple items, so this information can be recorded in the Default Data screen and repeated for a number of items.
Condition Subscreen
The Condition subscreen provides all the fields needed to keep track of both the condition of an item as well as any required routine maintenance scheduling.
Condition subscreen
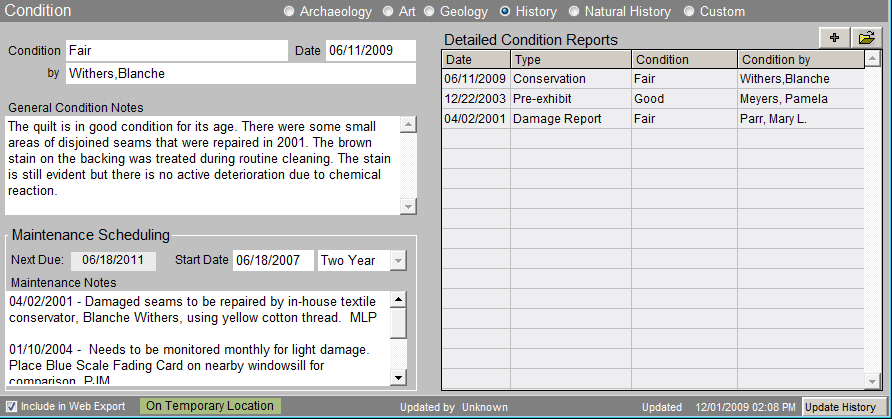
This subscreen begins with a one word description of the condition, then the condition date, person observing the condition, and general condition notes. The observer may be entered from the Users authority file in the Condition by field.
Maintenance Scheduling - Allows you to enter the maintenance start date, maintenance cycle, detailed notes and maintenance history for each item. PastPerfect allows you to schedule items in your collection for routine maintenance. The maintenance cycle can be set for daily, weekly, monthly, quarterly, semiannually, yearly, every two years, every five years, or never. PastPerfect calculates the interval from the maintenance start date and automatically includes objects on the Maintenance Due report. You decide the appropriate interval for the treatment and cleaning for each item in your collection, and when to generate maintenance reports.
The Condition Report screen allows you to create detailed condition reports for each item. The table on the right shows a list of condition reports that have already been created. To view a report, select the desired report and click on the file folder icon. The following screen will appear:
Detailed Condition Report
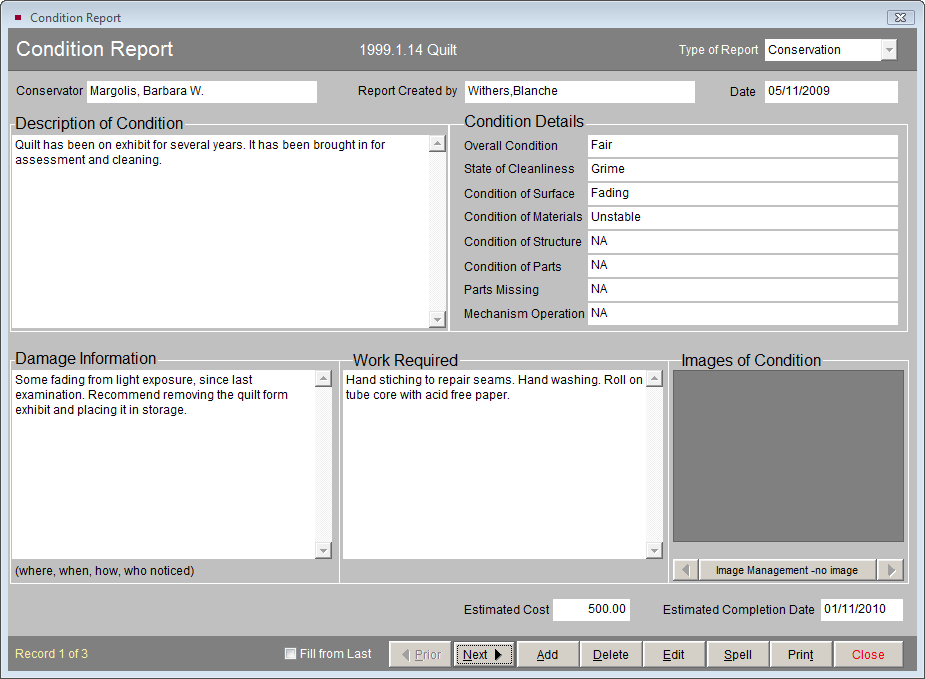
To add a new Condition Report, click on the Add (plus sign) button.
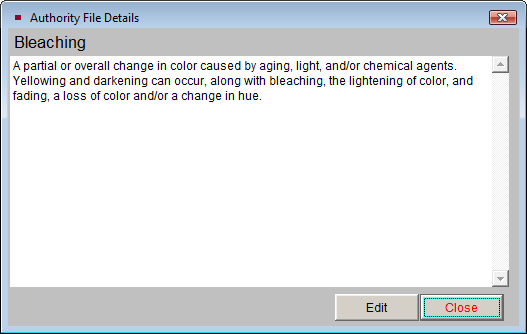
Condition Terms Authority File - All fields in the Condition Details section of the Condition Report (except for the last two) are controlled by an authority file of condition terms. Click Edit and with the cursor in the condition field, press F7 or the right click in the field to make the authority list appear. To view the definition of a condition term (except when using the Overall Condition field), highlight the term and click on More Information About the Selected Condition Entry button (file folder icon).
Condition Terms authority file
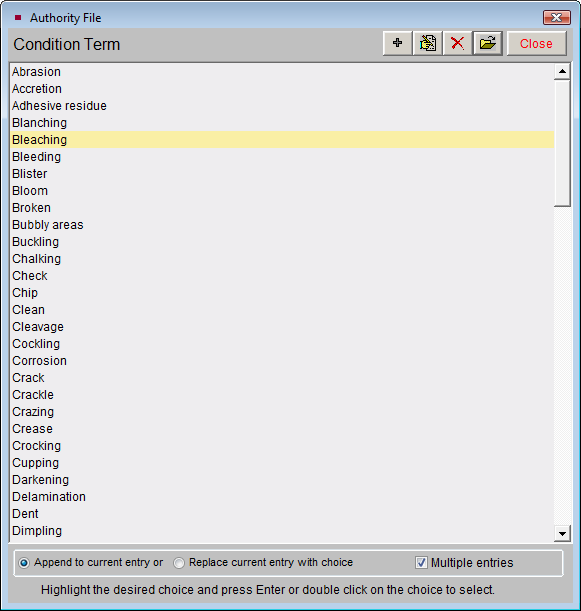
You have two options for creating entries in the field. Use the radio button to select which option you prefer: Append to current entry or Replace current entry with choice. The check box Multiple entries allows you to populate the field with more than one entry without leaving the authority file.
To add, edit, or delete entries in the authority file use the buttons at the top of the screen. You may also go to the Main Menu | Setup | Authority Files. First select Common Screens, then highlight "Condition Term" in the authority file list and press Next at the bottom of the screen. You may then use the Add, Edit, and Delete buttons to populate the authority file.
Dimensions Subscreen
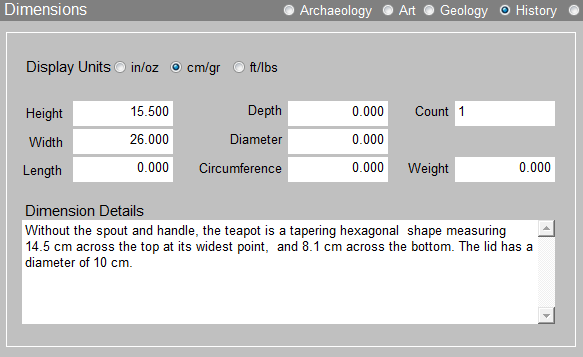
Enter the appropriate dimensions for the object you are cataloging. Not all measurements are appropriate for all objects. Select the measurements you need to describe the object. Any additional information about the measurement of the object may be written in the Dimension Details field.
The Objects catalog screen has a special auto-conversion feature that will convert the length, height, width, depth, diameter, circumference, and weight that you enter from one dimension unit to another. Click on the radio button to change from inches/ounces to centimeters/grams or feet/pounds. Units of measure may be changed while in Add or Edit Mode.
Dimensions subscreen
Lexicon Subscreen
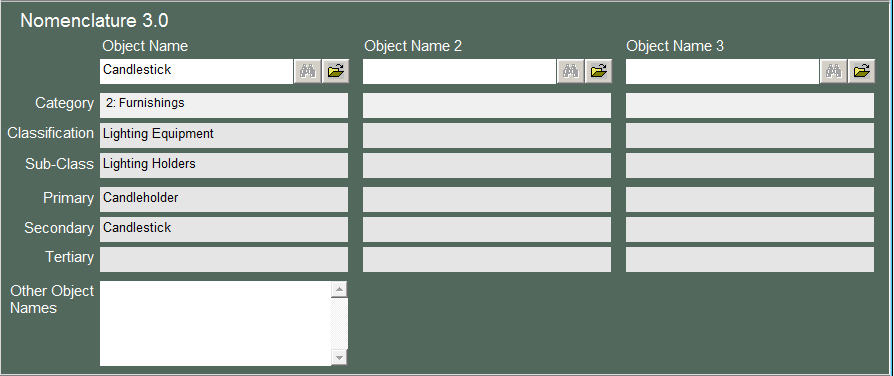
When you added the catalog record with the Object Name "Candlestick," the Category "2: Furnishings" and Classification "Lighting Equipment" were automatically assigned as part of the Nomenclature 3.0 classification system. If the Object Name is not in the Lexicon, "Category 10: Unclassifiable Artifacts" and Classification "Need to Classify" will be assigned. When in Edit Mode, you can search the Lexicon to change the Object Name to an approved term.
You can add up to two more Object Names for an item. Using multiple object names will enable you to cross index multipurpose or combination objects. An example of when you might use multiple object names for cross reference is an art vase. You would enter "Vase" in Object Name to classify it as a Horticultural Container |Household Accessories. Then enter "Artwork" in Object Name 2 to classify it as Art. Depending on your organization's collection and purpose, you might first classify it as an Artwork then a Vase.
To add a new Object Name to the Lexicon, please go to the Main Menu | Setup | Lexicon screen. Please see Chapter 10 - The Lexicon for more information.
Lexicon subscreen
Location Subscreen
PastPerfect derives each item's Home Location by combining the fields found in the Location subscreen.
Location subscreen
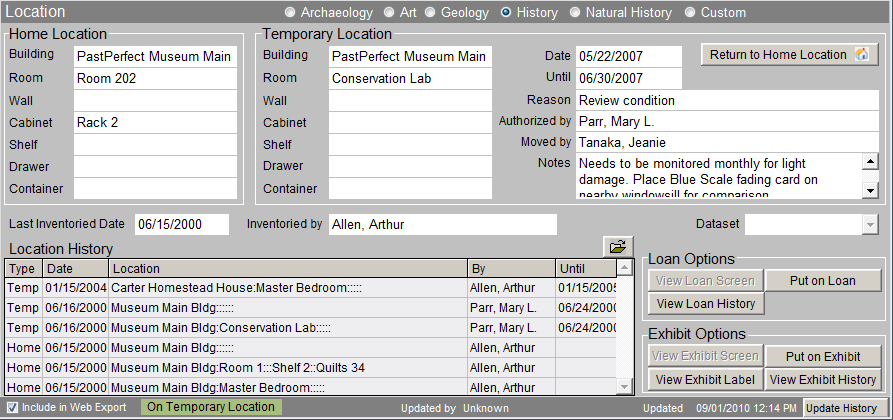
There are seven fields from which the Home Location is compiled. These are: Building, Room, Wall, Cabinet, Shelf, Drawer, and Container. The user may select which fields are appropriate for each item. Each of these fields is controlled by a user defined authority file. The authority files are shared by all catalogs. To enter data in the location fields, click Edit, click in the chosen field, and press F7 or right click in the field to access the authority file. Highlight and double click on an entry to populate the field. Repeat with each of the appropriate fields to create the home location. When you return to the main catalog screen the separate fields will appear compiled in the Home Location field, separated by colons. The file folder button pictured above will allow you to access location history.
Home Location fields
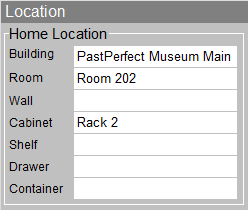

TIP: The names of the Building, Room, Wall, Cabinet, Shelf, Drawer, and Container fields may be changed. If you do not have a "Container" but you do have a "Box," you can change the name of this field to "Box." Changes to the Location field names are made by going to the Main Menu | Setup | Custom Fields | Catalog Record Locations. Remember these changes apply to all records in Objects, Photos, Archives, and Library, and for both the Home Locations and the Temporary Locations.
To edit the Home Location, you must return to the Location subscreen. Press the Edit button in the Navigation Bar at the top of the screen and make your change. Then press the Save button to make your change permanent. Any time you change or delete existing data in a location field, you will be asked if you want to record the change in the Location History.
Temporary Location fields share the same location authority files. Temporary Location should be used to record any movements of the object from its home location. When you enter a temporary location, a green flag will appear at the bottom of the catalog screen indicating this item is in a temporary location. If you move an item from its Temporary Location back to its Home Location, you may click the Return to Home Location button. You will be asked if you want to clear the Temporary Location fields, and if you want to record this move in the Location History. By choosing Yes for both of these actions, your Temporary Location will be recorded in the Location History file, and the Temporary Location fields will be cleared. Tracking the movement of objects is an important component of intellectual control of your collections.
The Location subscreen also displays Loan Options and Exhibit Options. You may view outgoing loan and exhibit histories, view and edit exhibit labels, view associated outgoing loan and exhibit records, or place the item on an outgoing loan or exhibit.
Notes & Legal Subscreen
The Notes field may be used to record any additional information. There is no limit to the number of lines or the type of information recorded in this field.
The Legal Status field provides information about legal status and copyrights. Clicking the Edit button in the Navigation Bar allows you to edit the information in these unlimited fields. Additional fields for Repatriation Type and Display Value are also included.
Notes & Legal subscreen

People-Subjects-Classification-Search Terms Subscreen
This subscreen provides four different fields with authority files for creating searchable access points for your object records. These access point fields are People, Subjects, Classification, and Search Terms. You can find more information on these fields in Chapter 7 - The Photos Catalog.
People - This field is used to identify people who are associated with your items. When you enter names in this field, PastPerfect will automatically create an authority file from the names it finds in this field. You may then add any of these names to other records by using the authority file. Click Edit and with the cursor in the People field, right click in the field or F7 to display the People authority file. Highlight the name and double click, then click the Close button. This adds one name to the field. If you want to add multiple names, continue highlighting and double clicking names. They will appear in the People authority file screen's People field. Once all names are listed, click the Close button.
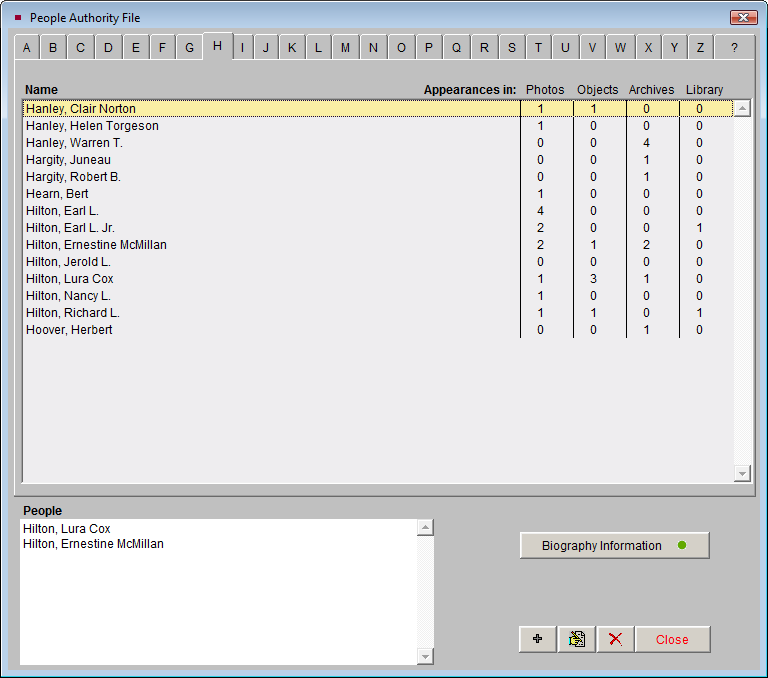
People authority file
The convention for entering names is last name, first name, middle name or initial, as in: "Hilton, Dorothy Ann." Occasionally, you will encounter a person who has undergone several name changes over his or her lifetime; there are several ways to deal with this. You may enter the person more than once using different names and enter all the names in the People field when appropriate. In the case of a woman who has changed her last name through marriage, enter the name in the following way; last name, first name, middle initial or name, maiden name, as in: "Hilton, Dorothy Ann Jones." The Other Names field in Biography Information is useful for recording maiden names, nicknames, and other names.
Subjects - The Subjects field in the Objects catalog is most useful for recording subject matter in works of art or general themes represented by objects or collections of objects. This field may be useful for listing the incidental details captured in a work of art. For example, a landscape painting may include several cows in the background next to a barn. The description of the painting may or may not mention these details. Use the Subjects field to record this information, for example: Landscape paintings, Outbuildings, Cows as shown below.
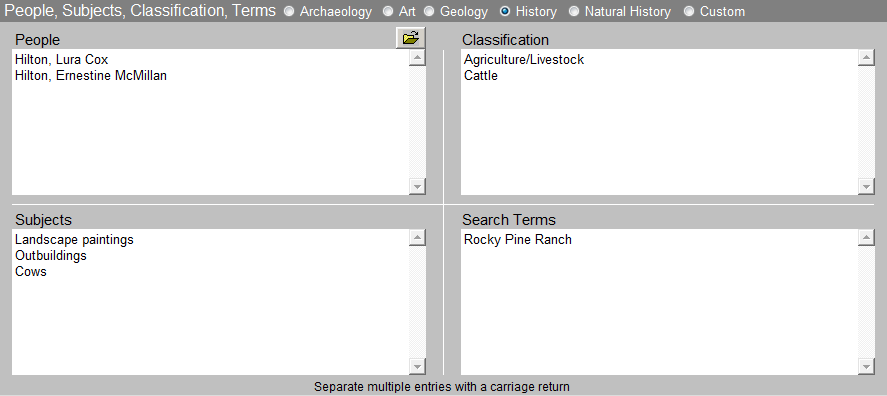
The Subjects authority file comes preloaded with the Library of Congress Thesaurus for Graphic Materials: Subject Terms, or LCTGM I. This field is especially useful in researching the Objects catalog when a researcher is interested in viewing all art items in your collection that contain a particular subject such as "Cows."
Classification - The Classification field is based on a hierarchical photograph classification system. In this system, each classification corresponds to a file folder that contains actual photographs. Within the folders, the photos are enclosed in mylar sleeves and placed in number order. This system works well for quick and easy retrieval. Thus, the classification system is actually used as a finding aid. As this field is designed to contain hierarchical terms, it is recommended that you arrange your entries from the general to the specific as in: Agriculture/Livestock, Cattle. PastPerfect automatically separates each level with a carriage return when you select terms from the authority file. You may wish to create your classification system and corresponding file folders before beginning data entry.
Search Terms - This field is used to record any terms, words, or names that will be helpful in researching the catalog database. These terms are specific to your organization and may include family names, institutions, or entities that are associated with items in your collection. For example, you may have photographs, objects and archival materials from the Rocky Pine Ranch. Including "Rocky Pine Ranch" as a search term allows all items connected with this entity to be related.
Sorting entries in People-Subjects-Classification-Search Terms fields - Entries in these fields are automatically separated by a carriage return, you may click the A/Z Sort button to arrange the entries alphabetically. The A/Z button is activated in Edit or Add Mode only. Alphabetizing the entries is not reversible.
Relations Subscreen
This subscreen gives you the ability to link items together, throughout the Objects, Photos, Archives, and Library catalogs.
Relations subscreen

Many collections have closely related objects. For example, the relationship between a sugar bowl and creamer from the same set should be preserved even though they have been assigned separate Object ID numbers. Selecting the Related subscreen displays existing relations.
To add a new relation, click Add Relation (plus sign), select the catalog in which the desired record is located, and input the Object ID or use the Browse, Prior, or Next buttons to search the catalog for the related item. Then press Add this Relation. Related items will now be listed on the screen. PastPerfect will set up the reciprocal and consequential relationships for you. You may enter more information about the relationship between the items in the Notes on Related Items field.
Repatriation Subscreen
Repatriation subscreen
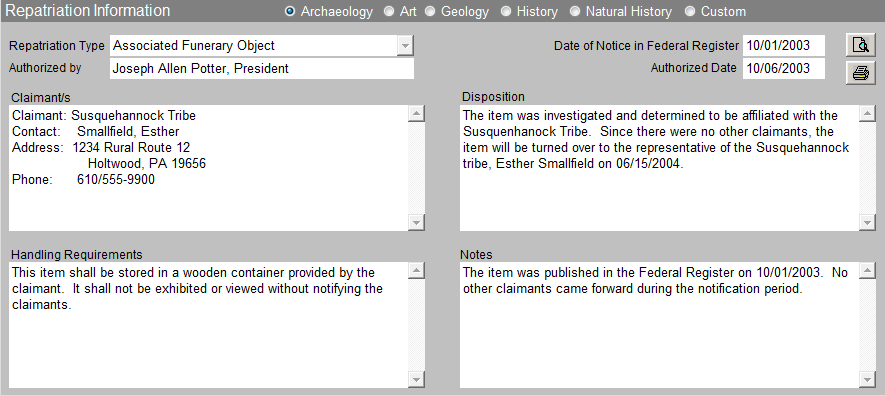
This subscreen has fields for items that are subject to repatriation, including: Repatriation Type, Authorized by, Authorized Date, Date of Notice in Federal Register, Claimants, Handling Requirements, Disposition and additional notes.
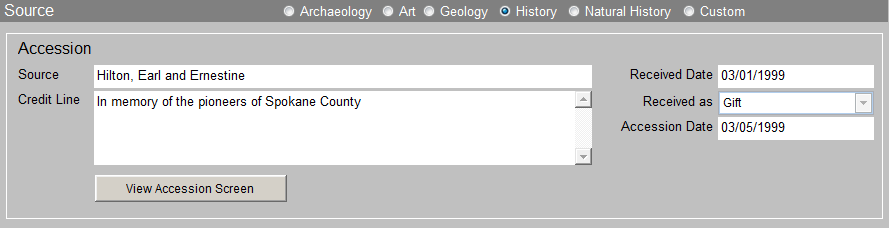
Source Subscreen
The Source subscreen displays data from the Accession or Incoming Loan record and contains a link to the Accession or Incoming Loan screen. Included fields are Source, Credit Line, Received as (for accessions) and pertinent dates.
Source subscreen
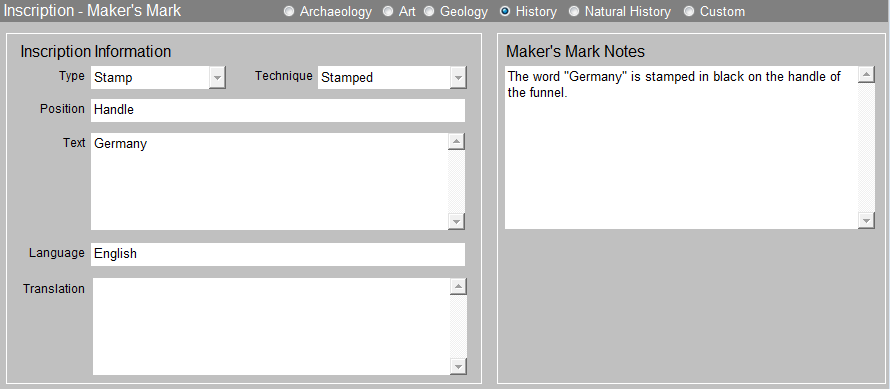
Inscription - Maker's Mark Subscreen
This subscreen allows you to save and display detailed information about the inscription type, inscription text, technique, position, language, translation, and other maker's marks that may appear on a decorative object or artwork.
Inscription - Maker's Mark subscreen
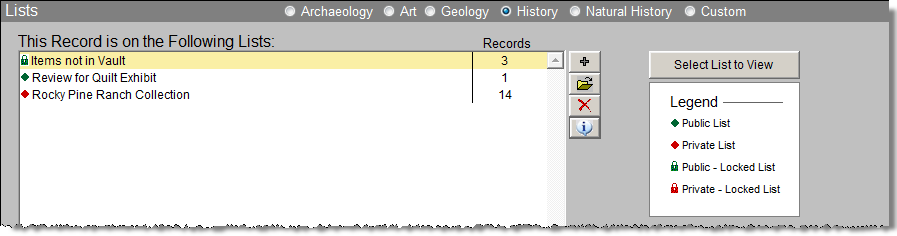
Lists Subscreen
This subscreen contains all the Catalog Lists in which this record is included. You can add this record to a list, view all records on the selected list, delete a selected list, and view more information about the selected list. The Select List to View button is a link to the List Manager, where you can Create, View, and Manage lists. For more information about Catalog Lists, please see Chapter 15 - Catalog Lists.
Lists subscreen
Virtual Exhibit Subscreen
This subscreen contains a list of all of the Virtual Exhibits in which this record is included. Users who have purchased the Virtual Exhibit Upgrade may access this screen view. For more information about using Virtual Exhibit, please see Chapter 28 - Virtual Exhibit.