Photograph Cataloging Tutorial
Now that you are aware of the options for cataloging photos, let's walk through the steps. For this example, let's catalog a photograph with the Object ID 2009.15.4. First, open the PastPerfect program and click on the Photos button on the Main Menu. On the Photos catalog screen, click the Add button at the top of the screen. The Add New Catalog Record screen will appear. For this tutorial, please be sure you have Add a Single Record and Blank Data selected in the Add Options section. Please complete the following fields:
- Enter the Accession#: 2009.15
- Enter the new Object ID#: 2009.15.4
- Enter the Object Name: Print, Photographic.
- Click the Add New Record button.
Complete the entry of information in the top section of the Photos catalog screen. For more information about these common fields, please see Chapter 6 - The Objects Catalog.
Photos Catalog Screen
Photos Catalog screen
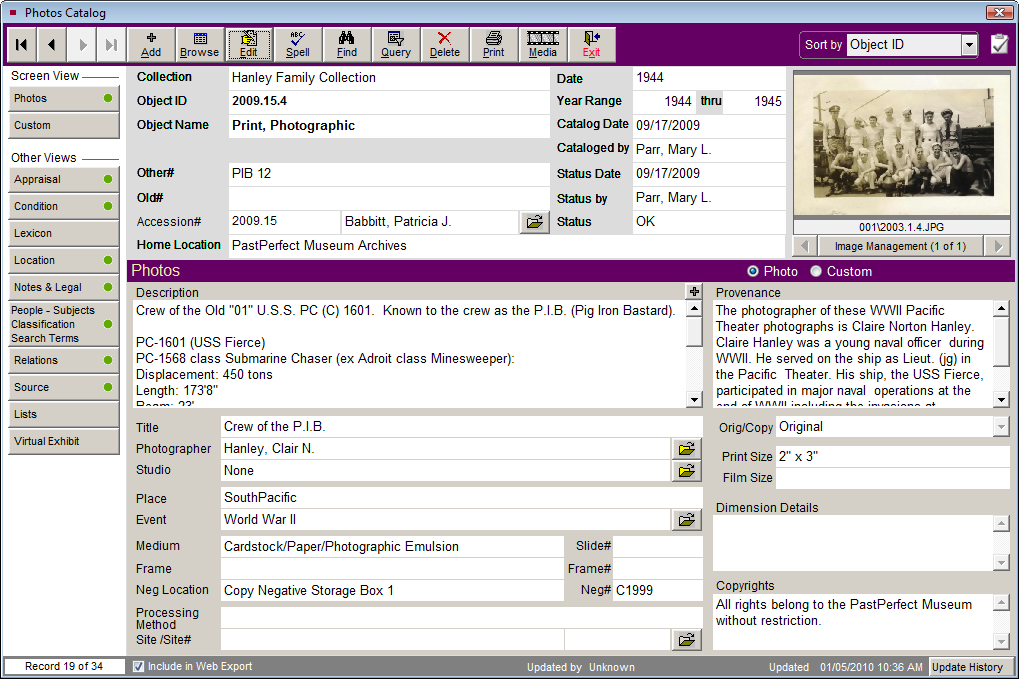
Description - This field provides an unlimited memo field for writing a description of the photo.
Title - Use this field to enter the title of the photograph. You may record the photographer's title, or if the item lacks a formal title, you can leave this field blank.
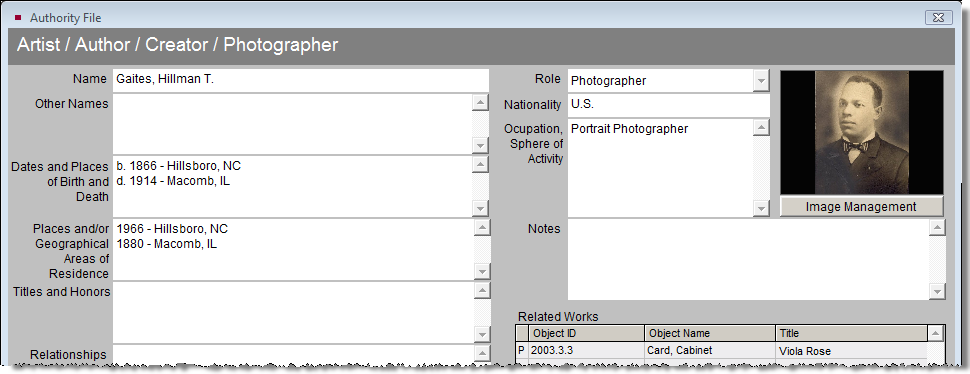
Photographer Information - Once a photographer's name is entered in the Photographer field, click the file folder icon to create and display biographical information about the photographer in the Artist/Author/Creator/Photographer authority file. A separate screen is provided with fields for other names, dates and places of birth and death, places and/or geographical areas of residence, nationality, titles and honors, occupation, relationships, and notes. You may search the Getty's ULAN (Union List of Artist Names) for the photographer's name and biographical information by clicking the Search ULAN Online button.
If you have multiple photographs by the same photographer, this detailed information need only be entered once. Each photo with the same name in the Photographer field will share a single Photographer Information screen. This authority file can be added to and edited by going to the Main Menu | Setup | Authority Files.
Photographer Detail screen
Studio - Use this field to record the studio where the photograph was created. Click the file folder icon to the right of the Studio field to record to bring up the Studio Details screen. You may record the studio's address, photographers, founder information and history. This authority file can be added to and edited by going to the Main Menu | Setup | Authority Files.
Place - This field is used to record the place that the photograph depicts or the location where the photo was taken. Place names should be entered from the general to the specific. For example: Pennsylvania/Chester County/Tamaqua. An authority file is provided for this field.
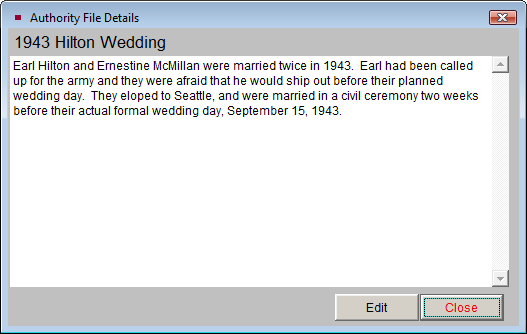
Event - This field provides a way to create named events for which you have objects in your collection. For example: You may have a hat, a balloon, three photos, and a program from a high school graduation. The event can be added to the Event authority file and you may use the unlimited Event Details field to describe the event. The Events field is available in all catalogs, so you can relate objects, archives, photographs, and library items through a shared event.
Before you can access the Event Details screen, you must enter an event name in the Event field. You can type a new event name in the field or press F7 to access the authority file for a list of established events. If the event is not yet listed in the authority file, you may choose to add it and then enter details for the event. This authority file can also be added to and edited by going to the Main Menu |Setup | Authority Files.
Once an event name has been entered, click the file folder icon to the right of the Event field, which will display details of the event.
Event Detail screen
Medium - The Medium field is used to list all media from which a photograph is made. You may choose to record a single entry such as "Paper" or "Mixed Media." However, you have the option to choose several entries separated by forward slashes as in, "Cardstock/Paper/Photographic Emulsion." Record multiple entries in descending order of percentage of composition. This field is controlled by an authority file from which you may choose pre-defined media types. Press the F7 key or right click with your mouse to view this authority file.
You have two options for creating entries in the field. Use the radio button to select which option you prefer: Append to current entry or Replace current entry with choice. The check box Multiple entries allows you to populate the field with more than one entry without leaving the authority file.
To add, edit, or delete entries in the authority file, use the buttons at the top of the screen. You may also go to the Main Menu | Setup | Authority Files | Common Screens and highlight "Medium" on the left hand list and click Next > at the bottom of the screen. You may then use the Add, Edit, and Delete buttons to modify the authority file.
Frame - This field is used to describe the frame that is associated with the photograph. If the frame is stored separately, it is recommended that you catalog the frame in the Objects catalog and relate the two items through the Related Items screen. Please see Chapter 6 - The Objects Catalog for more information about Related Items.
Negative Location - Photographic prints and negatives should be stored separately due to differences in the chemical stability of the materials. Indicate the location of the negative for this photographic image. This field uses the Home Location - Building authority file. To choose a location from the authority file, press F7 or right click in the field. If no negative exists, leave the field blank.
Slide#, Frame#, Neg# - Use these fields to record identification numbers assigned to the slide, frame, or negative associated with the item.
Processing Method - The photographic process refers to the method used to capture and develop an image. It may include how the photographer prepared photographic materials and how the chemicals reacted to each other. Some historic photographic processes are cyanotype, daguerreotype, ambrotype, albumen print, and gelatin silver print. An authority file is provided for this field.
Site and Site# - For items related to a particular site, such as a photograph of a building that once stood in a town, you may enter a site name and site number. These fields are linked to the sites listed in the Sites & Localities file. You may choose a site from the Sites authority file by pressing F7 or right clicking in the field. If the site is listed in the Sites & Localities file, you may click the file folder icon to the right of the fields to access the Sites & Localities screen. Doing so will automatically fill in the Site# field with the appropriate number. If the site is not listed in the Sites & Localities file, you may choose to add the site after clicking the file folder icon. You may also enter information in the Site field without linking to the Sites & Localities files by simply typing the information. The Sites & Localities may be edited by going to the Main Menu | Sites & Localities. For more information about the Sites & Localities file, please see Chapter 16 - People & Sites.
Provenance - This field is used to give a detailed history of the past ownership of an item. Information, including dates, is recorded on successive transfers of ownership and custody. Ideally, the Provenance field will list the history of the item from its creation, through subsequent owners, to its final transfer to your institution. This is an unlimited memo field. You may enter as much information as you wish.
Orig/Copy - Use this field to indicate whether the cataloged item is an original print or a reproduction. This field is controlled by a drop-down menu. Click on the down arrow to the right of the field to view the choices. To add, edit, or delete entries on this list, go to the Main Menu | Setup | Authority Files.
Print Size - Use this field to record the print size of a photograph. An authority file is provided for this field.
Film Size - Use this field to record the film size, such as 35mm. An authority file is provided for this field.
Dimension Details - Fill in any additional dimension information about the item, such as the size of the photograph within its mount or frame.
Copyrights - This field allows you to write a description of copyright restrictions or special circumstances that pertain to the reproduction, copy, sale or use of the image.
The Additional Information Subscreens
In the Sidebar of the Photos catalog screen, under Screen Views, you have a Custom button where you can enter data in any of the twenty-two custom fields. Under Other Views, you will notice the following buttons.
- Appraisal
- Condition
- Lexicon
- Location
- Notes & Legal
- People-Subjects-Classification-Search Terms
- Relations
- Source
- Lists
- Virtual Exhibit
These buttons provide access to additional data screens. These screens are common to all catalogs and are described in detail in Chapter 6 - The Objects Catalog, except for the People-Subjects-Classification-Search Terms screen which is described earlier in this chapter. To view these screens, move your mouse over the button. To hold that view on your screen, click on the button.
When any of the fields contained in the Screen Views and Other Views are populated with data, the green data light appears. This lets you know that there is more information available in that view.
After you have filled as many fields as you can, click the Save button at the top of the screen to save your new record.
NOTE: If the Photo record was added without an accession number, you may link to an existing Accession record, or create the Accession record from the Photo record. Click the file folder icon to the right of the Accession# field. You will be asked if you want to link to an existing Accession record, or create a new Accession record. The next screen will allow you to find the existing Accession records or create a new record.
Buttons in Edit Mode
Clicking the Edit button at the top of the screen will reveal more buttons.
Change Access#, Object ID or Loan# - Allows you to edit the Accession number, Incoming Loan number, and Object ID number for this record. Use this to correct records where the numbers were entered incorrectly.
Deaccession - Using this button, you may transfer the record from the Photos catalog to the Deaccession catalog. For more information about deaccessioning items, please see Chapter 5 - The Accession Process.
Change Catalog - Allows you to move the Photo record to a different catalog, such as Objects, Archives, or Library. From this screen you may select the correct catalog for the item and click OK. This will move the catalog record to the other catalog and mark the copy in the Photos catalog for deletion. Note the large yellow warning box near the top of the catalog screen. The record in the original catalog will be sent to the Recycle Bin and no longer displayed. Because each catalog contains different fields, not all data can be transferred to the new catalog. We suggest printing a copy of your record before using the Change Catalog function.