Email Settings
PastPerfect Web Edition allows users to send emails from a number of areas, including Image Management, individual Contact records, and bulk emails from Contacts Query, Contact Lists, and Pledge & Receipts. Please note, email settings are specific to each user login.
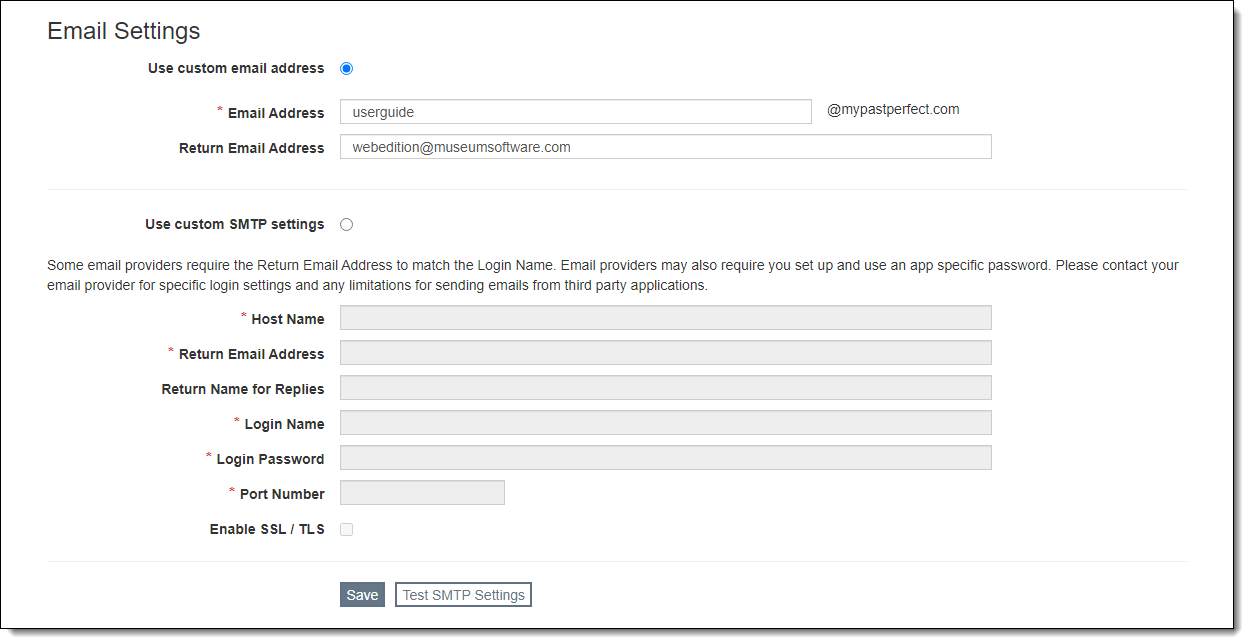
There are two options for sending email: Use custom email address or Use custom SMTP settings. By default, all users are set to Use custom email address. The custom Email Address will be pre-populated with the organization's PastPerfect Client Number so the sender will be ClientNumber@mypastperfect.com (e.g. 35294@mypastperfect.com) unless users change it. The ClientNumber can only be replaced with a value that is unique across all PastPerfect Web Edition organizations. With this setting, users are limited to sending 10 emails at a time.
With the Use custom SMTP settings option, users can send email from their own email address. The number of emails that can be sent at one time with this setting will be determined by your email provider.
After changing your email settings, we recommend you send a test email to make sure your settings are correct.
Access Email Settings Screen
1.Go to "Settings" on the Main Navigation Bar
2.Click "Email Settings"
Use Custom Email Address
1.Select the radio button for "Use custom email address" on the Email Settings screen
2.Populate the required Email Address field with a username before @mypastperfect.com
•Note: this entry must be unique across all organizations using PastPerfect Web Edition.
3.If you wish to receive reply emails, populate the Return Email Address field with a valid email address
4.Click "Save"
Use Custom SMTP Settings
Note: Sometimes you can find these settings through your email program (like Outlook). Other times you may need to contact your email administrator or Internet Service Provider for this information.
1.Select the radio button for "Use custom SMTP settings" on the Email Settings screen
2.Populate the fields:
•Host Name - host name of your SMTP server used to send email
•Return Email Address
•Return Name for Replies (optional)
•Login Name - login for logging into the SMTP server
•Login Password - password for logging into the SMTP server
•Port Number - port number of the SMTP server used to send email
•Enable SSL / TLS - check this box if your email provider requires additional encryption settings to send emails from third party programs
3.Click "Save"
Test SMTP Settings
1.Click "Test SMTP Settings"
2.Enter an email address where you want to receive a test email
3.Click "Send Email"
4.If your settings are correct, an "Email sent successfully" message will display
5.Check the inbox of the email address entered in step 2 to confirm
6.Click "Cancel" to close the window