Adding a Catalog Record
Click on the Add button, and the following screen will appear.
Add New Catalog Record screen
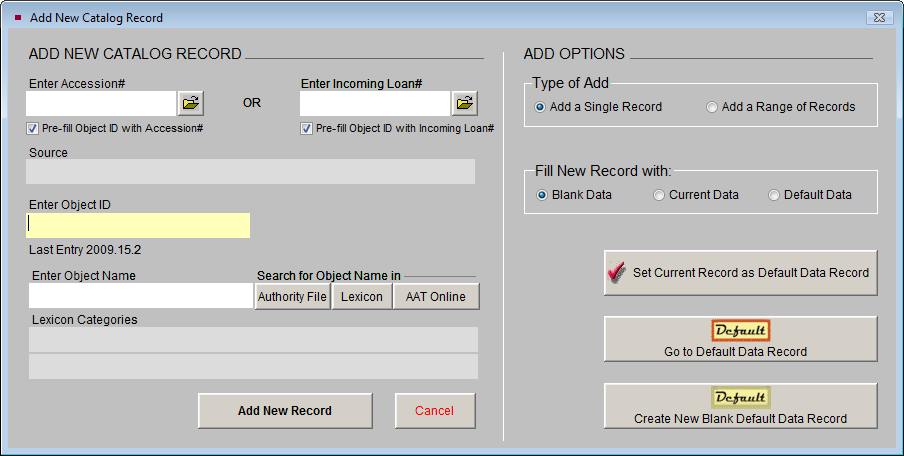
The first options to consider on this screen are on the right. If you are adding a single record, click in the radio button next to Add a Single Record. If you want to add multiple records using a range of Object IDs, click in the radio button next to Add a Range of Records. For more information about the Add a Range of Records options, please see Chapter 6 - The Objects Catalog.
Next choose whether you want your new record pre-filled with data. If you want to start with a blank record, click the radio button next to Blank Data. If you want to start with a record filled with the data from the record showing behind the Add New Catalog Record screen, click the radio button next to Current Data. If you want to start with a record filled with your default data, click the radio button next to Default Data.
Default Data Record
The Photos catalog has one record set as the Default Data Record. Data entered on the default record may be used to pre-fill the catalog screen when adding new records. For example, if one person will be cataloging a group of photographic prints, you may want to fill his or her name in the Cataloged By field and "Print, Photographic" in the Object Name field on the Default Data Record. When new records are added, the Cataloged by and Object Name fields will be pre-filled with the default data.
The Default Data Record can be changed at any time. On the Add New Catalog Record screen, you can view the record currently set as the Default Data Record by clicking the Go to Default Data Record button. You can set the record showing behind the Add New Catalog Record screen as the new Default Data Record by clicking the Set Current Record as Default Data Record button. Or you can make a new Default Data Record by clicking the Create New Blank Default Data Record button. The Default Data Record you choose will pre-fill any new Photo records that you add from the Accession catalog as well. Catalog records may be added from the photograph's Accession record, and you have the time saving option to use Fill with Default Data on the Accession's Add Item to Photo Catalog screen.
Object ID and Object Name
If this item is part of an existing accession or loan, you can enter the Accession# or Incoming Loan# in the appropriate field, or use the file folder icon button to the right of the field to search the file for the accession or loan. Doing so will fill in the Source field.
If you have selected to pre-fill the Object ID from the Accession# or Incoming Loan#, the Object ID field will be filled with that number. You will need to create the Object ID number from the pre-filled number. If the field is not pre-filled, then type the Object ID number. Each catalog record must be assigned a unique Object ID number. An Object ID number can be any combination of alpha-numeric characters up to 25 characters in length.
PastPerfect will verify that the Object ID number you assign has not already been used. If it has, you will receive a message asking you to assign a different number.
In the Enter Object Name field, type the object name, or use one of the options on the right to search for an object name. Access the authority file of object names in the Photos catalog by clicking the Authority File button.
Photos Object Name authority file
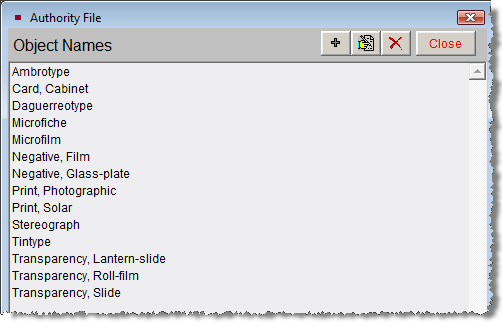
Search the Lexicon by clicking the Lexicon button, or search the AAT website by clicking the AAT Online button. You will be notified if the object name you entered is not in the Lexicon. Please see Chapter 6 - The Objects Catalog for more information about entering object names.
Once the Object ID number and Object Name fields are filled, click the Add New Record button to proceed.
Complete the Record by Entering Data in Pertinent Fields
The Photos catalog field descriptions can be printed from the Reports menu. Go to the Main Menu | Reports | Photos | Photos Field Descriptions. You may also use the F1 key on your keyboard. Click in the field in question, then press the F1 key to display the definition of the field.