Data Entry Basics
To enter data in a field, click inside the field to place the cursor and start typing. To advance the cursor to the next field, press the Tab key. To move the cursor to the previous field, press Shift+Tab. You may use the mouse to jump to any field on the screen by positioning the mouse over the field and clicking the left mouse button. Authority files may be accessed by clicking in a field and pressing the F7 key or right clicking with your mouse. The authority file flag will appear in the top right if an authority file is available for the field.
The upper portion of the Photos screen contains common fields for cataloging any object. This upper portion is essentially the same on all four catalogs. These fields include the collection name, identification numbers, source information, date information, status information, home location, and image management. Please see Chapter 6 - The Objects Catalog for more detailed information about these fields. Also, please see Chapter 3- Getting Started and Chapter 6 - The Objects Catalog for instructions on setting up and using Function Keys, Authority Files, and Drop-Down Menus.
Upper portion of the Photos Catalog screen
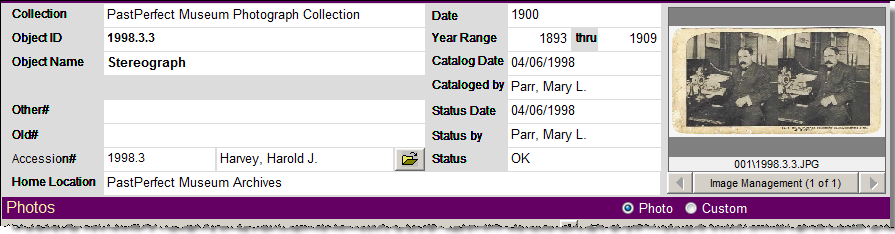
Image Management - If your PastPerfect system is equipped with the optional MultiMedia Upgrade, clicking the Image Management button opens the Image Management screen, where you may add digital images to your Photo record. Additionally, multimedia files may be attached to your Photo record by clicking the Media button at the top of the screen. Your Media, Browse, Edit, Print, etc. buttons in the Navigation Bar are available after you save your record.
Photos Screen View
The lower part of the screen is devoted to the specific fields used in cataloging photographs, in addition to the Description and Provenance. These are Title, Photographer, Studio, Place, Event, Medium, Frame, Negative Location, Slide#, Frame#, Neg#, Processing Method, Site and Site#, Original/Copy, Print Size, Film Size, Dimension Details, and Copyrights. These fields can be viewed by clicking the Photos button under Screen View on the Sidebar. A green data light will appear on the Photos button when there is data in this view. When in Edit Mode, you may set this screen view as the default (rather than Custom) by clicking the radio button next to Photo, which appears above the Provenance field.
Notice the file folder icon to the right of the Photographer, Studio, Event and Site# fields. This icon indicates that there may be additional information about the entry in that field.
Custom Screen View
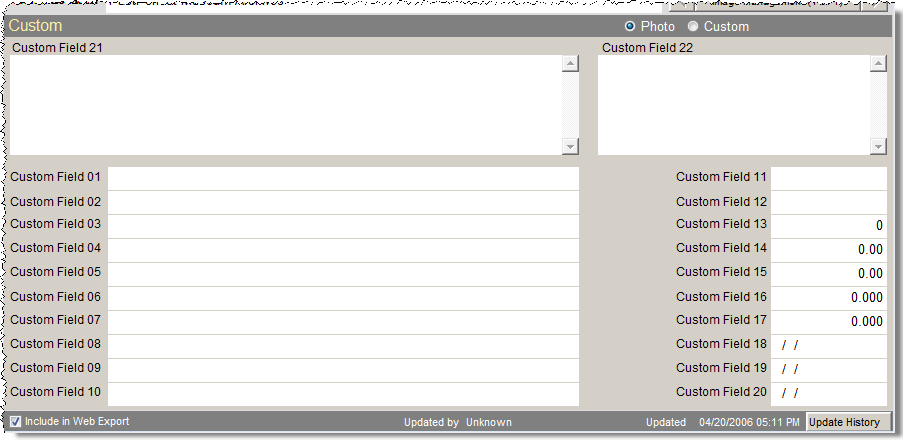
Clicking the button below the Photos button under Screen View on the Sidebar will display the custom fields for the Photos catalog. This screen provides twenty-two custom user-defined fields. You may assign your own name to this screen view and to these fields. For more information on the custom fields, please see Chapter 6 - The Objects Catalog. A green data light will appear on the Custom button when there is data in this view. Please note if you rename the screen view, the button will display the new name instead of "Custom." When in Edit Mode, you may set this Custom screen view as the default (rather than Photo) by clicking the radio button next to Custom (or the new name), which appears above the Provenance field.
Photos Catalog Custom Screen View
Other Views
The Sidebar in the Photos catalog displays ten buttons that contain more information about the item. A green data light will appear on the buttons when there is data in the view. Please see Chapter 6 - The Objects Catalog for detailed information about these views. The screen view for People-Subjects-Classification-Search Terms will be explored below.
People - Subject - Classification - Search Terms Subscreen
These four fields and their associated authority files are helpful in creating searchable access points for your photograph catalog records. These access point fields are People, Subjects, Classification, and Search Terms.
PastPerfect uses authority files to help standardize data input. Common entries can be saved in each file. Authority files are available whenever you are adding or editing catalog records. Authority files may be accessed by clicking in a field and pressing the F7 key or right clicking with your mouse. The authority file flag will appear at the top right of the screen if an authority file is available for the field.
The People authority file is unique. Not only does it look different, with alphabetic tabs at the top, but it is populated automatically with peoples' names as they are entered in the People field in any of the four catalogs. Since the number of entries could be large, PastPerfect uses tabs to make locating names easy. To the right of each person's name are the Appearances columns, indicating the number of photos, objects, archives, or library items that are associated with each name.
This authority file is linked to the People Biographies file which is found by clicking People Biographies under the People & Sites section of the Main Menu.
The People authority file can be populated manually from the Main Menu | People Biographies or from the catalog screens. To populate the file from the catalog screen, first check to see if the name is in the authority file by pressing the F7 key or right clicking in the People field to bring up the authority file. If the name is not in the list, click the plus sign button to bring up a screen where you can type the name. Then press Enter to add the name to the list. We suggest that you enter the names in "last name, first name middle name or initial" format to allow for alphabetical indexing by last name.
People authority file screen
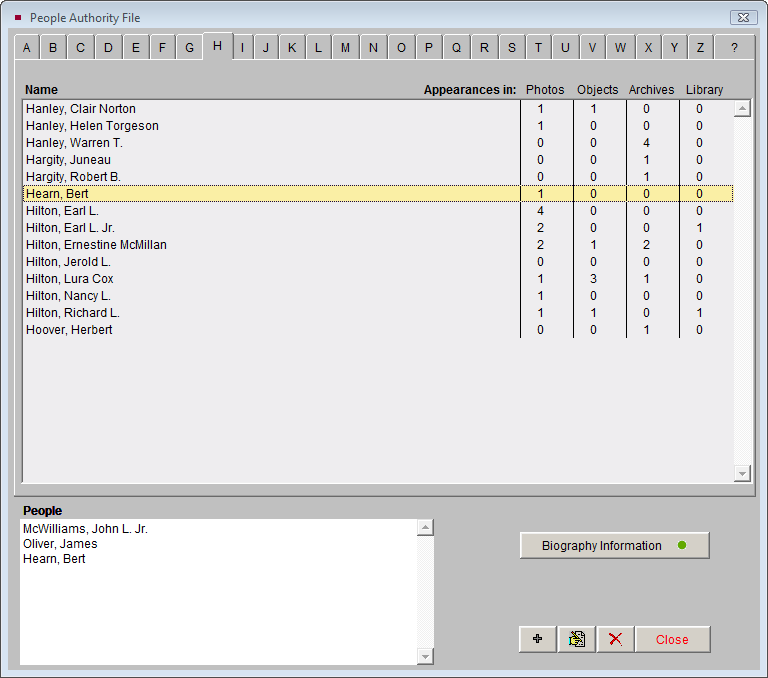
You may add biographical information to the person's record by finding the name and clicking once on it, then clicking the Biographical Information button. To add data, click the Edit button and type in the information. Click Save, then click Exit to return to the People authority file. To add this name to the Photo record, double click on the name so it appears in the box on the bottom left. Then click Close to return to the catalog record.
When you add a name to the People field, the number of appearances in the authority file for that name will increase. If you remove a name from the People field of a catalog record, the number of appearances in the authority file will decrease. However, the name will not be deleted from the People authority file.
Once names are entered in the People authority file, you may choose the name from the authority file rather than typing it, reducing the chance of misspellings. To choose a name from the authority file while doing data entry, first make sure you have clicked Edit to be in Edit Mode. Then click in the People field and press F7 or right click to open the authority file. To choose a name, double click on it so it appears in the box at the bottom left. You may choose multiple names by continuing to double click on the names. Click Close to return to the catalog record.
You can also add a name to the People authority file simply by typing it into the People field. However, this is not recommended as the name may already be in the authority file with a slight variation in the name, and it increases the chances of misspelling the name.
TIP: People's Biographies may also be accessed from the Photo record's People field by clicking on the file folder icon just above the field. This icon is active when you have saved the record and are no longer in Edit Mode.
The Subjects authority file comes pre-filled with the Library of Congress Thesaurus for Graphic Materials I: Subject Terms (LCTGM I). This Subjects file provides terms for subject indexing of pictorial materials, particularly collections of historic photographs. To learn more about LCTGM 1 go to: www.loc.gov/rr/print/tgm1/.
Subjects authority file
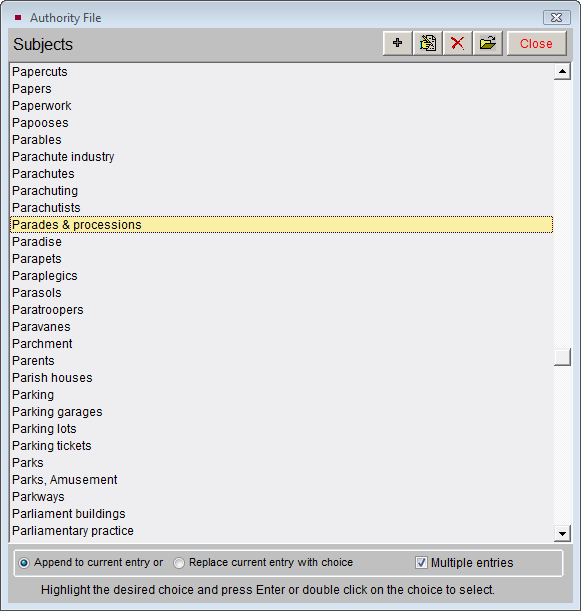
In photographs, the Subjects field may be used to record objects that appear in the photograph. For example, a photo may depict a child carrying a cat standing next to an oak tree in a crowd of spectators at a parade. The description of the photo may or may not mention any of these details. Use the Subjects field to record this information, with each term on its own line, as in: Parades & processions, Children, Cats, Trees, Oaks.
You never know what researchers may be looking for. This Subjects file is for describing graphical materials such as photographs and artworks. This field is especially useful in researching the photo or art object catalog when a researcher is interested in viewing all graphical materials in your collection that contain a particular subject such as "Cats."
Since the list of subjects is long, using the scroll bars or Page Up and Page Down keys may not be as efficient as you'd like. You can use the keyboard to move through the list. First, click on the list and then start typing the subject term you want to find. You will be advanced to the name that most closely matches the letters. For example, typing "CHIC" will take you to Chickadees and Chickens.
Classification - This field is based on a hierarchical photograph classification system. In this system, each classification corresponds to a file folder in filing cabinets that contain the actual photographs. Within the folders, the photos are enclosed in Mylar sleeves and are placed in numerical order. This system works well for quick and easy retrieval.
Classification authority file
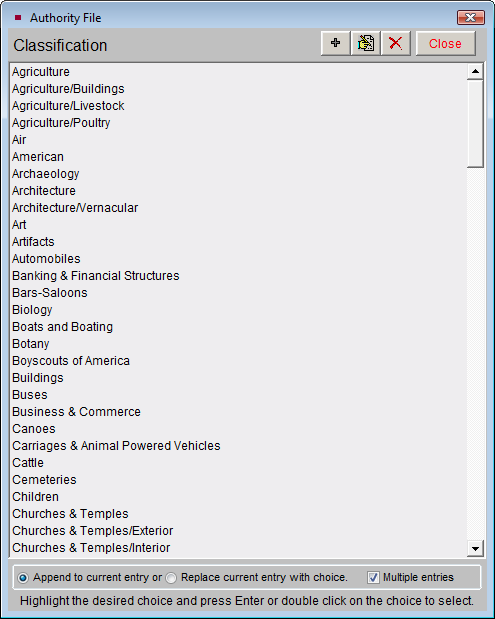
Thus, the classification system is actually a finding aid. This field is designed to contain classifications organized in a hierarchical system. It is recommended that you arrange your terms from the general to the specific, for example: Agriculture, Livestock, Cattle. Separate each term with a carriage return. You may wish to create your classification system and corresponding file folders before beginning data entry.
Search Terms - This field is used to record any terms, words, names, phrases, or entities that will be helpful in researching collections.
Search Terms authority file
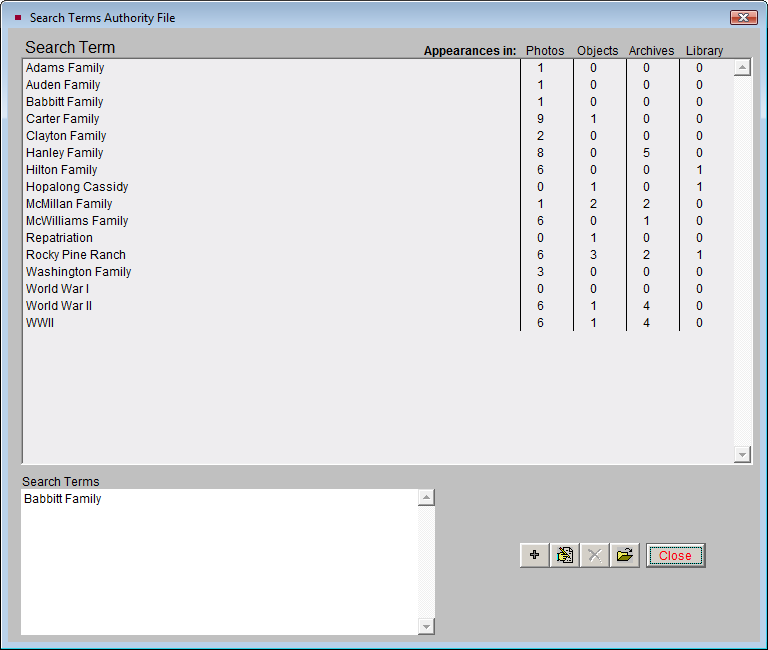
Search Terms are specific to your institution's collections and may include family names, groups or entities that are associated with items. For example, you may have books, photographs, objects and archival materials from the Rocky Pine Ranch. Including "Rocky Pine Ranch" as a search term allows items connected with this entity to be related. As you enter data, separate the entries with a carriage return to enable PastPerfect to create the authority file from the terms it finds in the field. This field is similar to the People field in that the terms that you enter here will automatically populate the authority file. Please check the authority file before typing a new search term, to see if the term already exists. If it does, choose the term from the authority file. The authority file screen will list the number of appearances of each term in the Objects, Photos, Archives, and Library catalogs.
Multiple Entries - The Subjects and Classification authority files allow single or multiple entries in these fields. Single entry means that after selecting a term, the authority file screen will close. If you wish to enter multiple terms from the authority files, be sure to check the Multiple Entries box so that you do not exit the authority file until you have made all your selections. If you would like the new terms that you select to be added to the existing list of terms, select the radio button next to Append to current entry. Multiple entries are added to the current field data and separated by a carriage return to form a list. If you want to overwrite the existing entries with new terms, select the radio button next to Replace current entry with choice.
Alphabetic Sorting - While we suggest using a hierarchical classification system, and organizing names in the People field according to the position of the person in the photograph, it is possible to sort entries in these four fields alphabetically. Press the A/Z Sort button while in Edit Mode to arrange the entries alphabetically. This process cannot be reversed without deleting the entries and re-entering them.