Web Publishing Wizard - Creating Selected Images Only
Concept
The Selected Images Only option, found on the Create Web Publishing
Files and the Publish Files to Web screens, allows you to choose which
image subfolders are created and uploaded. Being able to create just selected
image folders can greatly reduce the amount of time it takes to complete
the Create Files process and Upload Files process.
For most clients, after your first upload, you won't have to create
and upload all of the images again. PastPerfect is designed to put all
newly attached images into the most recent (highest numbered) subfolder.
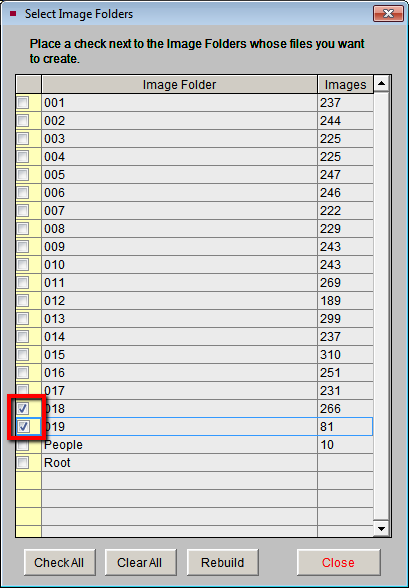
For example, if you have folders 001 through 019, your newest images should
be in folders 018 and 019. Images in the lower numbered folders (001,
002, etc) are unlikely to change.
There are a few scenarios where selecting only your most recent image
folders will not work well. In these cases, you will want to create all
images:
- If this is your first upload.
- If you have recently selected older catalog records with images
to be included in the web export for the first time.
- If you want to add or change selections affecting your images (watermark,
image file size, or stylized/unstylized thumbnails).
If you have questions about whether you should use the Selected Images
Only option, please contact us.
Task
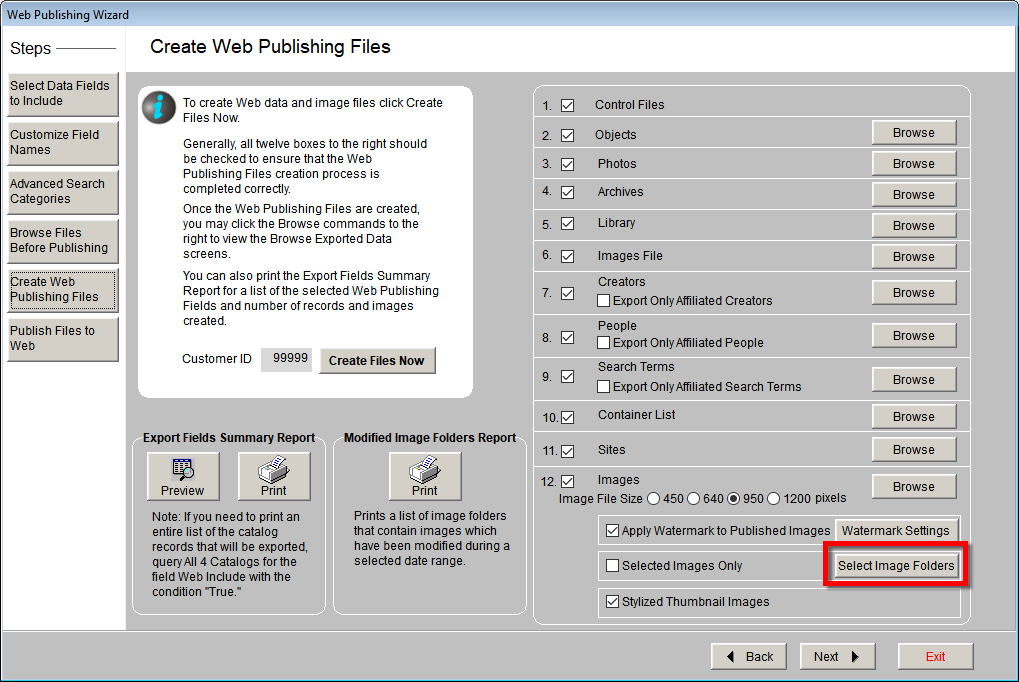
- From the Create Web Publishing Files screen, click the Select
Image Folders button.
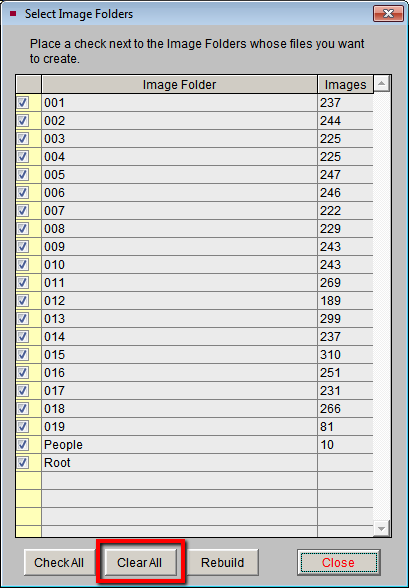
- Click the Clear All button to uncheck the check boxes to
the left of each Image Folder.
- Check the box next to the folders you want to create.
- Click the Close button.
- Put a check in the Selected Images Only check box.
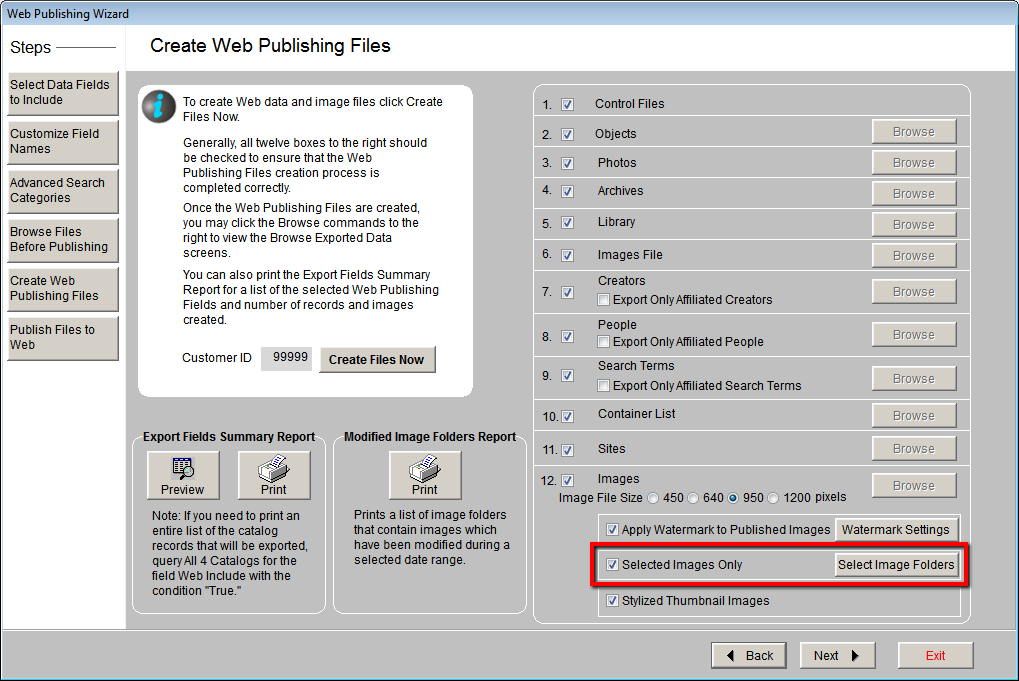
- Click the Create Files Now button.
- Once files have been created, click OK on the message that
appears and then click Next at the bottom of the screen.
- On the Publish Files to Web screen, click the Select Image Folders
button.
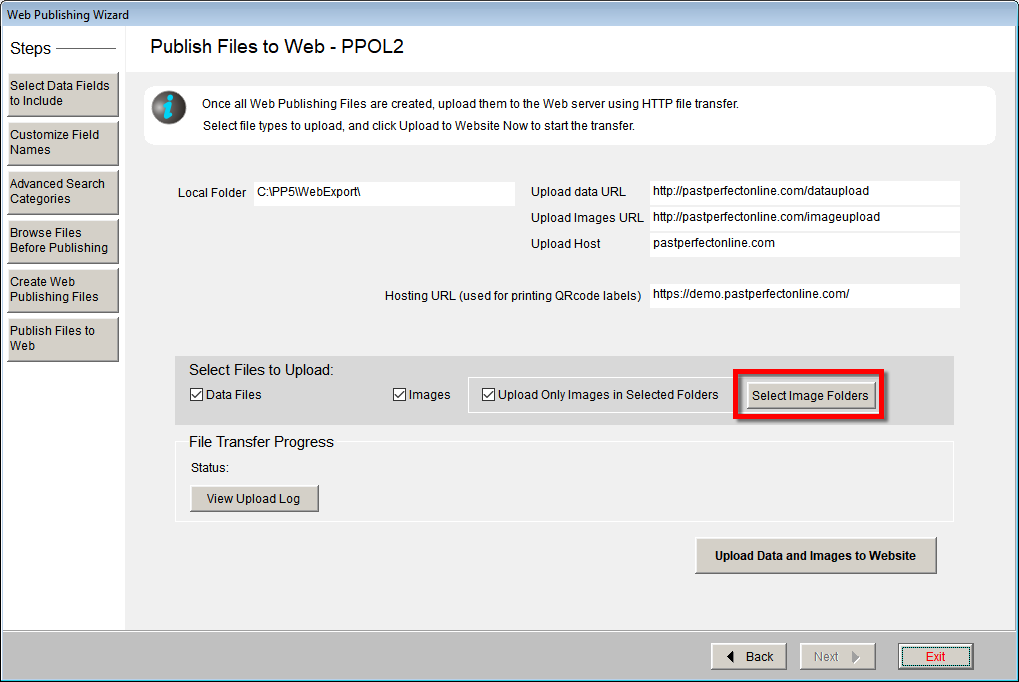
- Click the Clear All button.
- Check the box next to the folders you want to upload. These should
be the same folders you created.
- Click the Close button.
- Check the Upload Only Images in Selected Folders box if
it is not already selected.
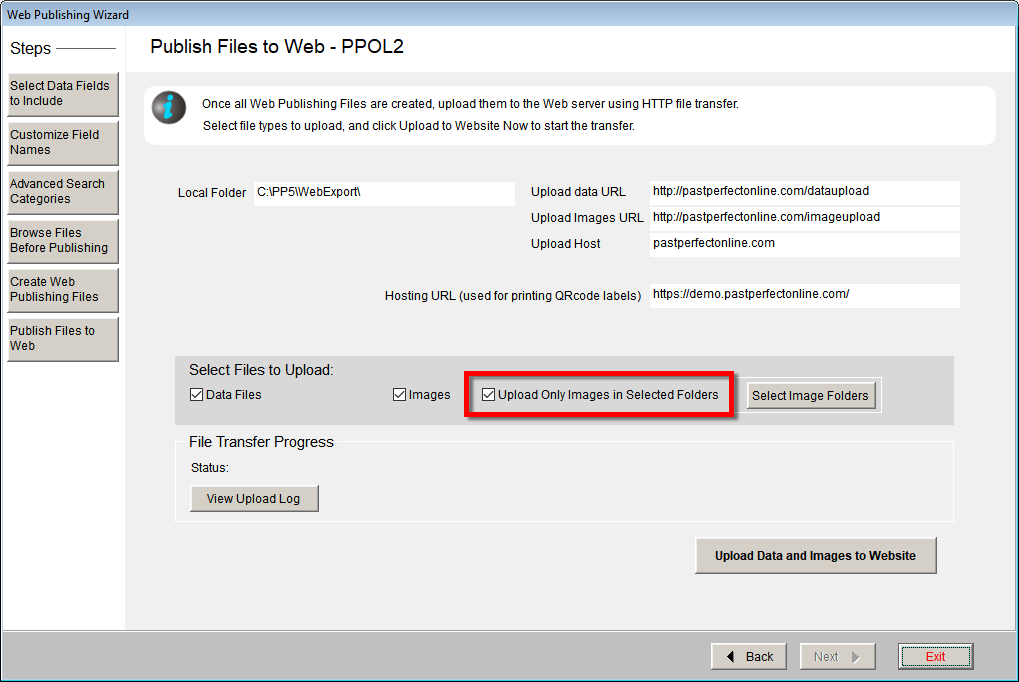
- Click the Upload Data and Images to Website button.
- Once the upload completes, click OK.
References