Including Site Records
Sharing Site records on your Public Access site can help your web visitors further explore your collection. Site records are accessible as links from catalog record pages and will display any Sites fields you have selected to share on your site. There will also be a list of Associated Catalog Records for this site.
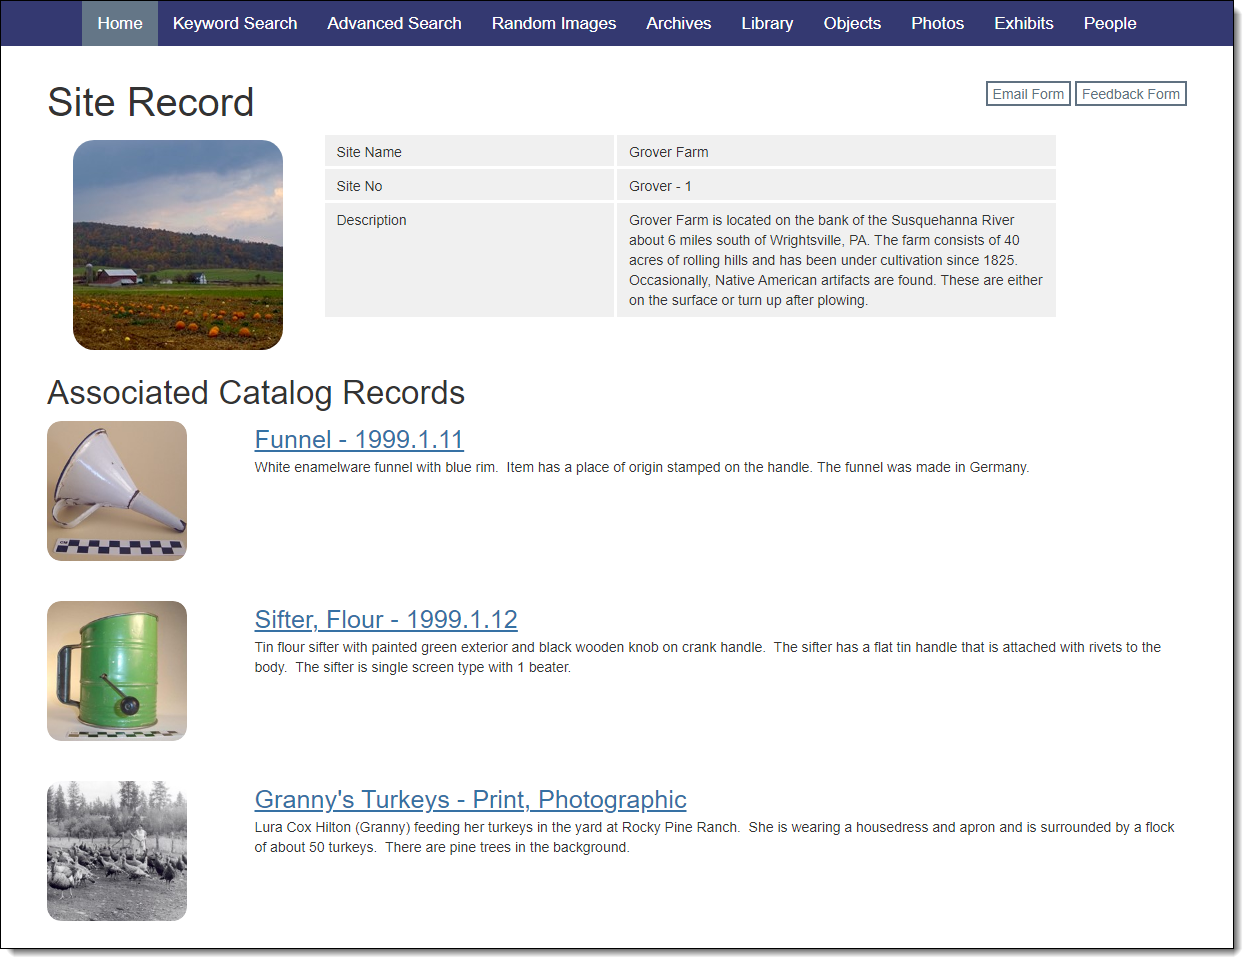
For the Site records to appear on your public site, you must select the Site records to be included on your public site, select the Site fields for catalog records, and also select the Site Record fields to display on your public site.
Select Site Records
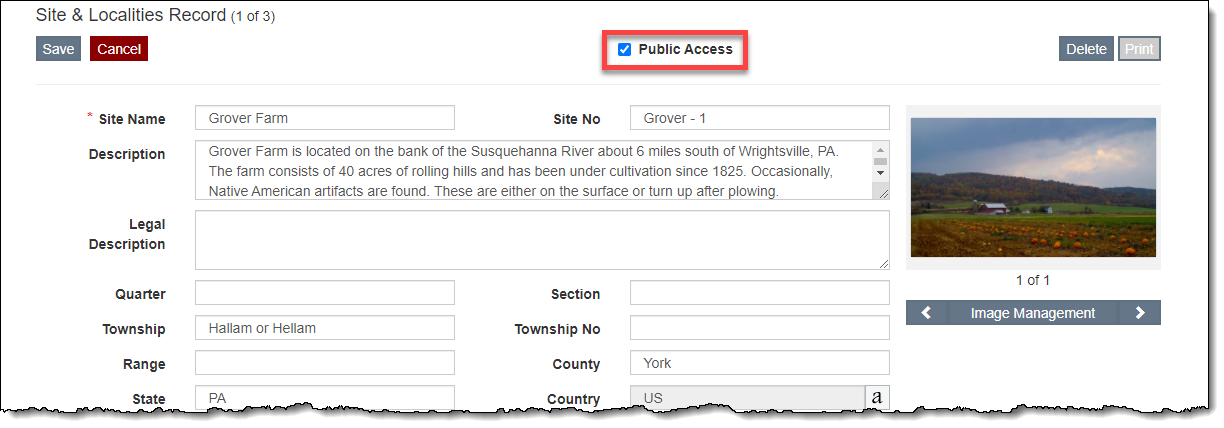
Including Sites on your public view site is optional and you may choose to include any or all of your Sites records. Similar to the catalog records, each Site record in PastPerfect has a Public Access check box that can be selected or deselected. By default, when you select a Site record to be included in Public Access, all images associated with that record are also selected to display on the public site. It is possible to deselect individual images on the Image Management screen.
Select Records Individually
1.Locate the Site record you wish to include on your public site
2.Click "Edit" at the top of the screen
3.Put a check in the Public Access check box
4.Click "Save" at the top of the screen
Deselect Records Individually
1.Locate the record you wish to remove from your public site
2.Click "Edit" at the top of the screen
3.Uncheck the Public Access check box
4.Click "Save" at the top of the screen
Deselect Individual Image
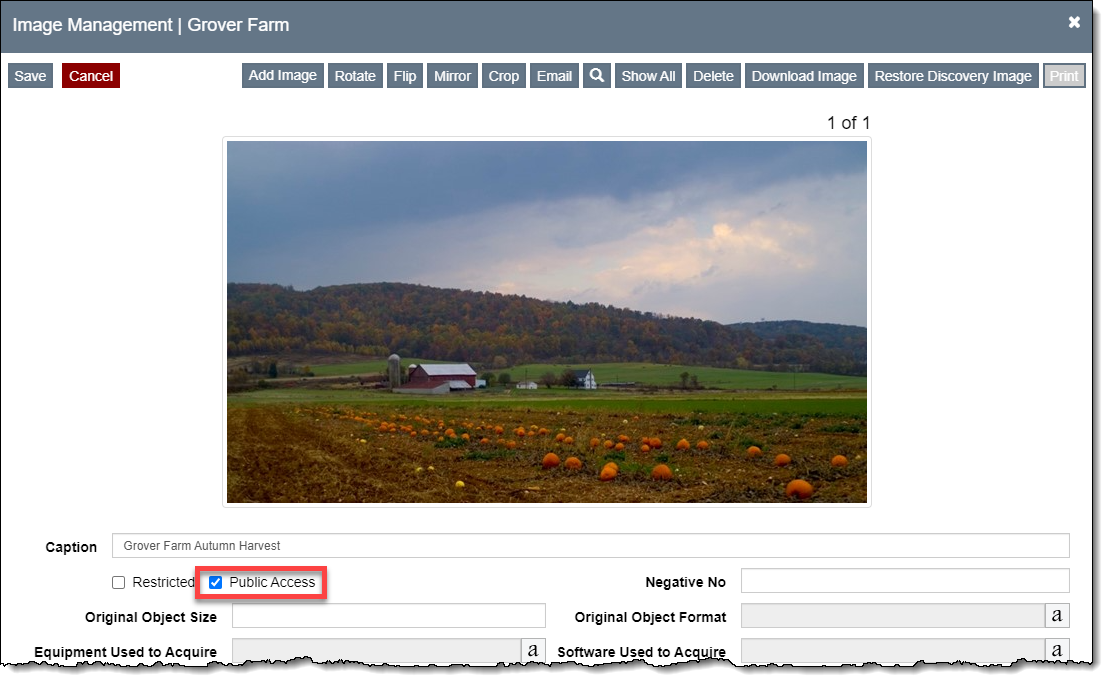
1.Locate the Site record that has the image you want to remove
2.Click "Edit" on the record screen
3.Locate the image you want to remove
4.Click "Image Management"
5.Uncheck the Public Access check box
6.Click "Save" on the Image Management screen
7.Click "Save" at the top of the record screen
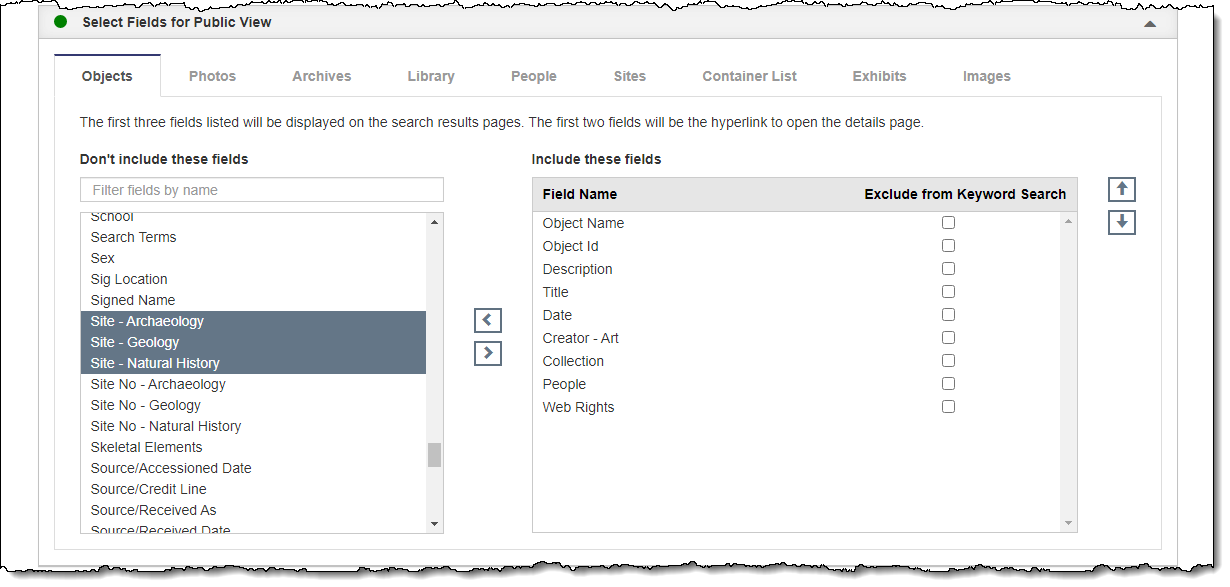
Select Site Fields in Catalogs for Public View
For the Site field to appear on your catalog records on your Public Access site, you must also select at least one of the Site fields on the Objects, Photos, Archives, or Library tabs.
Add Site Field on Catalog Records
1.Click "Edit" at the top of the Public Site Settings screen
2.Click the Select Fields for Public View Accordion to expand it
3.Select the Objects, Photos, Archives or Library tab
4.In the "Don't include these fields" column, click once on a Site field
5.Click the right arrow button. You should see the field move from the left column into the "Include these fields" column on the right.
6.Click "Save" at the top of the screen
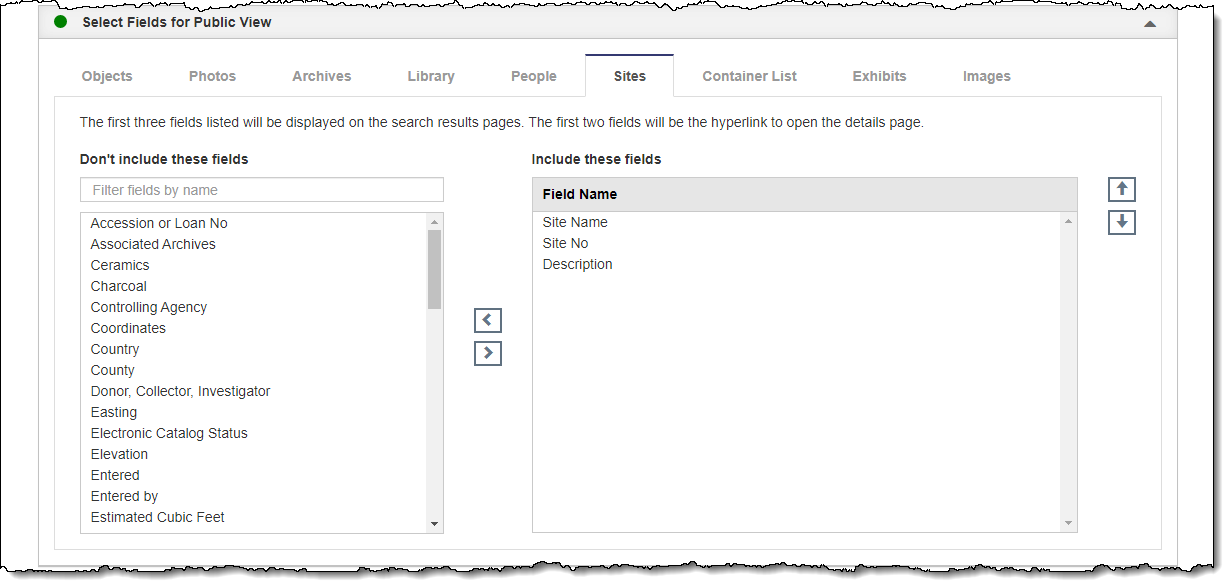
Select Site Record Fields for Public View
Be sure to select fields to include for your Site records or else they will not display online. Including at least the Site Name field will allow your web visitors to easily view other records related to this site. We suggest using the Site Name field as your first field.
Add Fields
1.Click "Edit" at the top of the Public Site Settings screen
2.Click the Select Fields for Public View Accordion to expand it
3.Select the Sites tab
4.In the "Don't include these fields" column, click once on a field you would like to add
5.Click the right arrow button. You should see the field move from the left column into the "Include these fields" column on the right.
6.Repeat for any additional fields
7.Click "Save" at the top of the screen
Remove Fields
1.Click "Edit" at the top of the Public Site Settings screen
2.Click the Select Fields for Public View Accordion to expand it
3.Select the Sites tab
4.In the "Include these fields" column, click once on a field you would like to remove
5.Click the left arrow button. You should see the field move from the right column into the "Don't include these fields" column on the left.
6.Repeat for any additional fields
7.Click "Save" at the top of the screen
Order Fields
1.Click "Edit" at the top of the Public Site Settings screen
2.Click the Select Fields for Public View Accordion to expand it
3.Select the Sites tab
4.In the "Include these fields" column, click once on a field you would like to move
5.Click the up and down arrow buttons to move the selected field to the desired position
6.Repeat for any additional fields
7.Click "Save" at the top of the screen