Interface Management Site - Changing Site Logo
Concept
When your PastPerfect Online site is set up, we include a logo to display
at the top of your site. You may change that logo at any time. This article
provides the steps you will need to follow.
When considering a different logo image, you should keep in mind how
your site will appear to the online visitor. Ideally, your logo should
be large enough to read clearly, but still allow most of the screen to
be available for the search functions and viewing your records.
Please note, some sites may have a modified logo that displays when
your site is viewed on a tablet or smart phone. If you are changing your
logo, it is a good idea to view your site in a smaller browser window
to make sure the new logo still looks appropriate when viewed on a mobile
device.
Task
- Sign into https://admin.pastperfectonline.com.
- Select the Site tab.
- Click the button to the right of Site Logo. This may say Choose File or Browse,
depending on your browser.
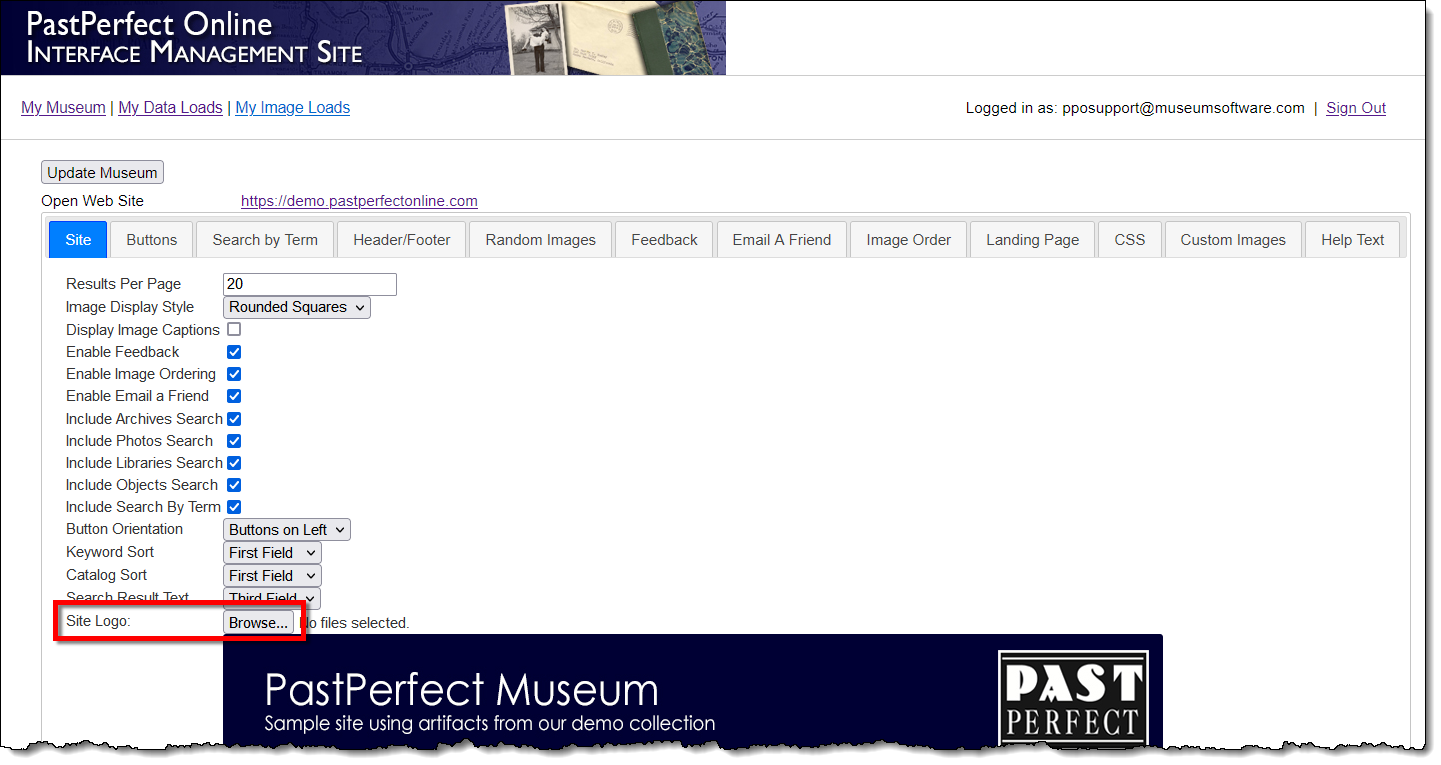
- Select your new logo image file, then click the Open button.
You should see your new logo image name display next to the Choose
File button.
- Click the Update Museum button at the top or the bottom
of your page to save the changes. You should then see your new logo
displayed on the Site tab.
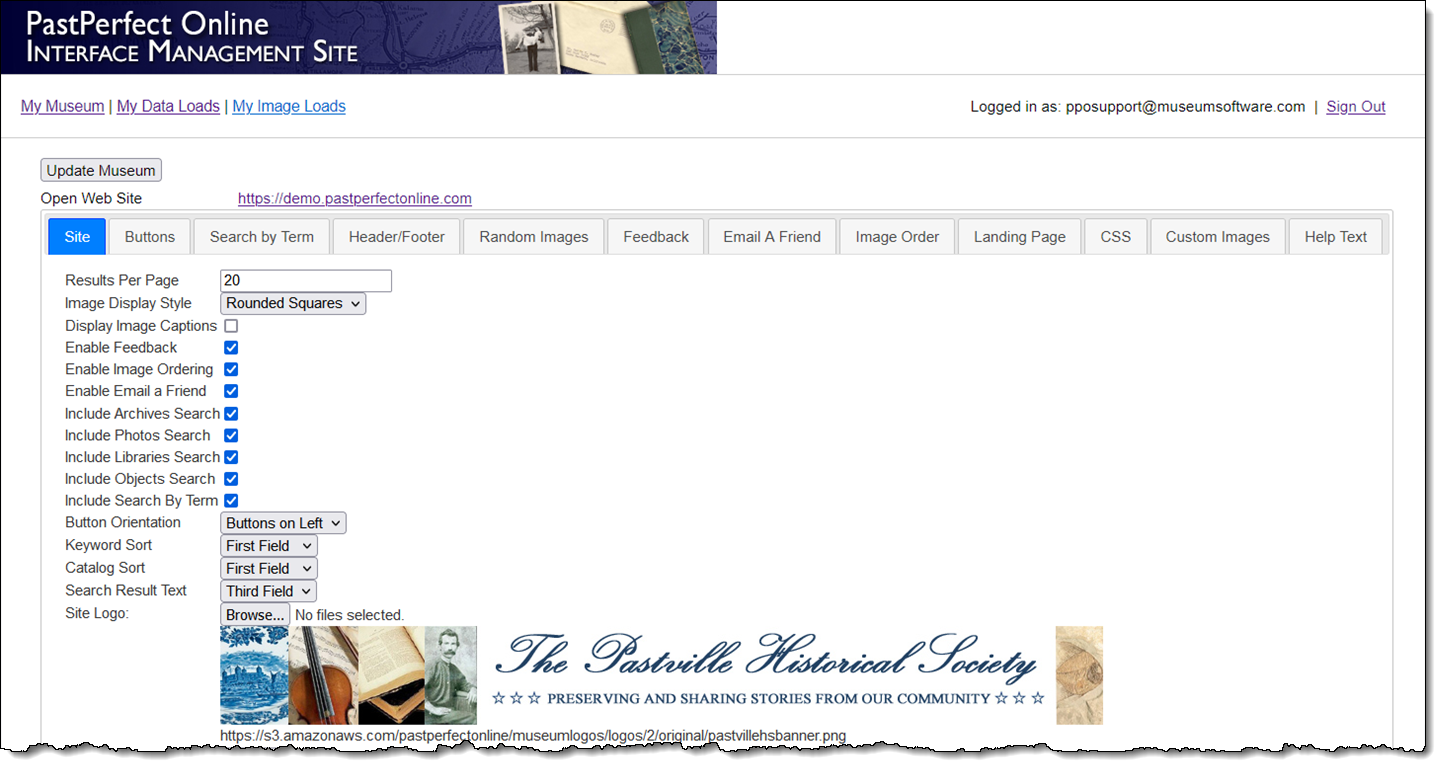
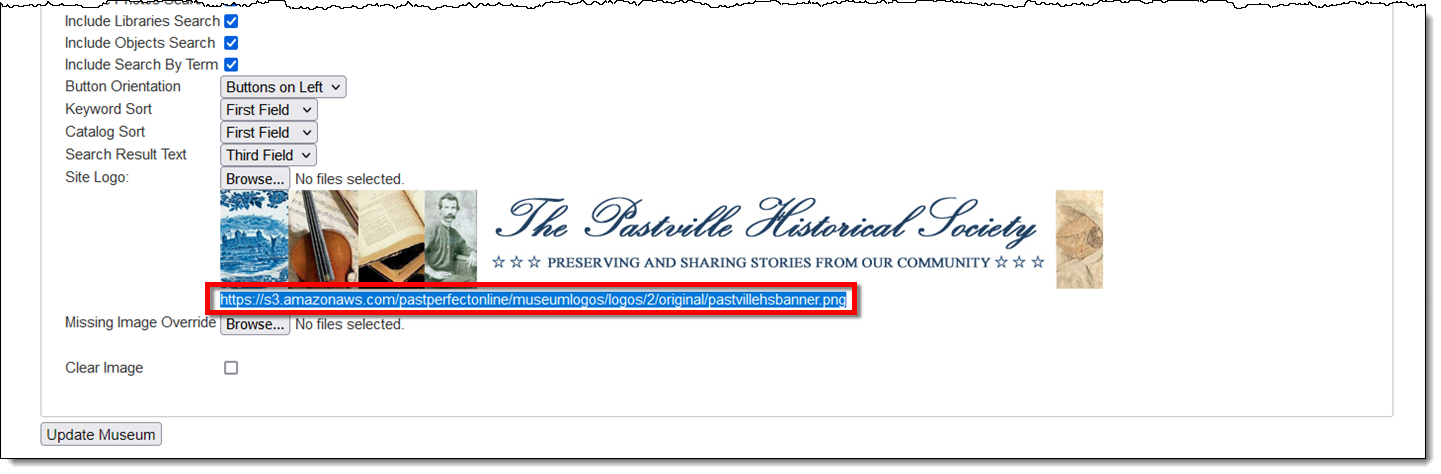
- Below the new logo, the URL for this image is displayed. Highlight
the URL and copy it.
- Select the Header/Footer tab.
- In the Header Text field, you will need to replace the URL for
your current logo with the new one. Look for the section of text that
starts with <img src=. The URL is listed between quotes.
Delete the current URL and then paste in the new one.
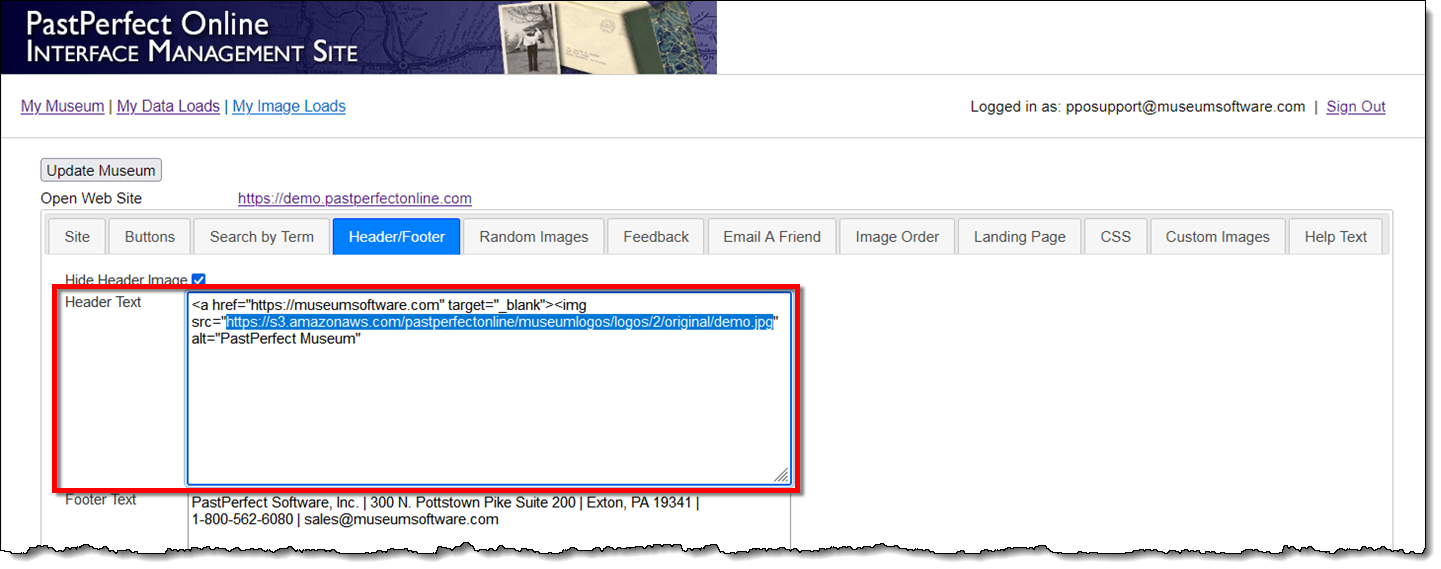
- Click the Update Museum button at the top or the bottom
of your page to save the changes.
- Click your Open Web Site
link at the top of your page to view your new logo.
References