Processing Receipts
Use Pledges & Receipts as an alternative to entering donations, dues and pledges in the Contacts screen. Once you have established your contacts database, processing receipts from this screen can save time since there are fewer screens to navigate. However, receipts may be processed only for contacts who already exist in your database; you cannot add new contact records on the Pledges & Receipts screen.
Another time saver available on the Pledges & Receipts screen is Batch Processing. From the Batch Processing screen, you are able to print deposit lists, reports, receipts, thank you letters and mailing labels for groups of contacts based on the date of their payments.
The Pledges & Receipts Screen
To get to the Pledges & Receipts screen, click the Pledges & Receipts button on the Main Menu. This screen allows you to view pledges, donations, and dues receipts for an entire fiscal year. The Pledges & Receipts screen is divided into three sections: Pledges, Donations, and Membership Dues. Each section lists the payments in date order, from the newest to the oldest. The total for the selected time period is at the bottom of each section.
You can view receipts for any given month or for the entire year by selecting the tabs at the top of the screen. To select the year you would like to view, use the Change Year up or down arrow in the Options section of the Sidebar, then click the tab for the desired month or the entire year.
Pledges & Receipts screen
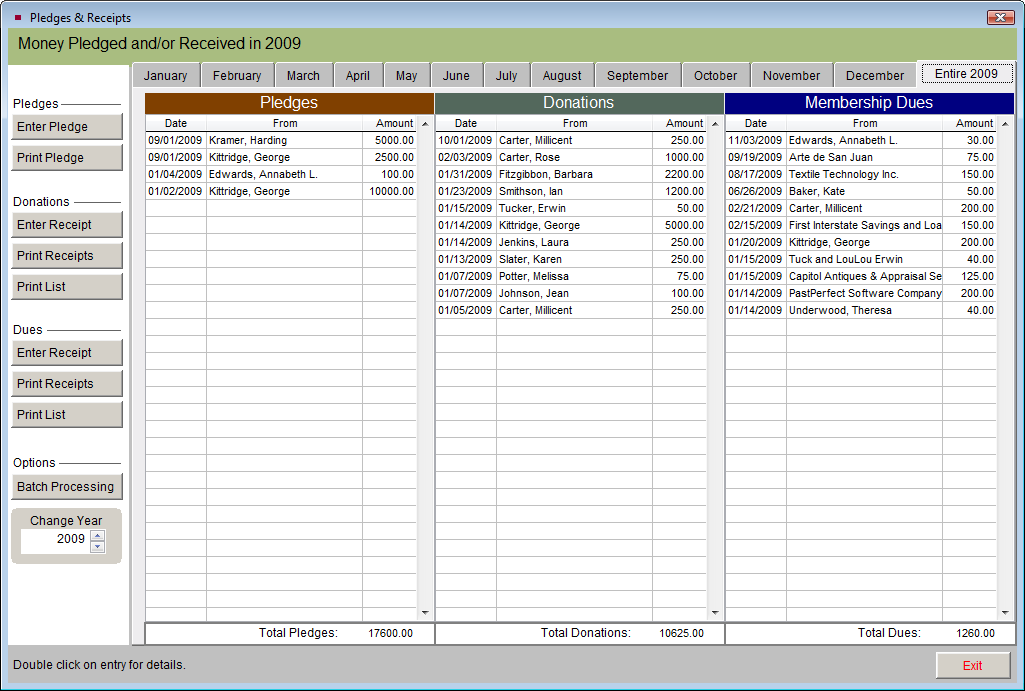
TIP: The fiscal year may be set by going to the Main Menu | Setup | Contacts | General Information. You may select the month when your fiscal year begins.
You can view and edit the details of a posted pledge, donation, or dues payment by double clicking the entry. For example, double clicking on a donation payment will display the Donation Detail screen, shown below.
Donation Detail screen

Entering Pledges, Donations and Dues Receipts
Enter a Pledge:
- Click Enter Pledge in the Pledges section of the Sidebar.
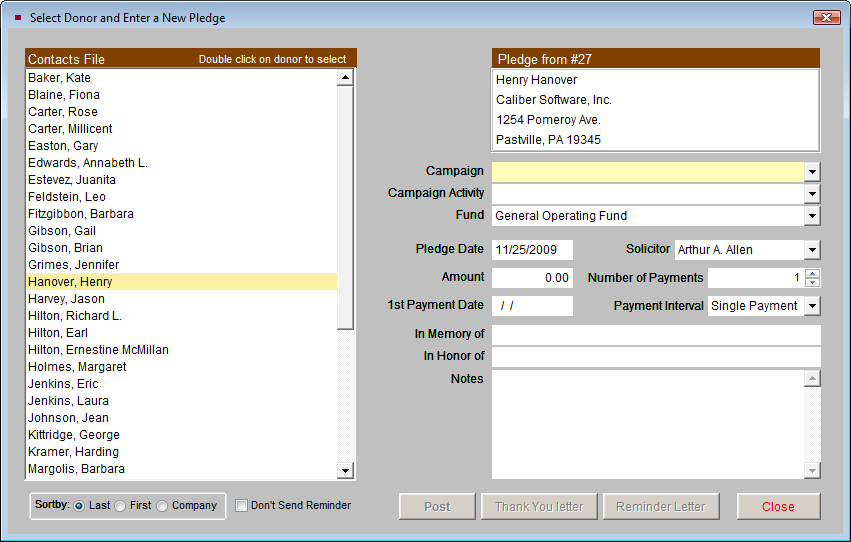
- Using the list of contacts on the left, find the contact who gave the pledge. You may change the sort order of the list by clicking the radio button next to "Last," "First," or "Company" at the bottom of the screen. Double click a contact's name to select that person. The contact's name, address and Contact ID# will appear at the top of the screen on the right, seen below.
- Enter the pledge information into the fields on the right. You must enter an Amount and a 1st Payment Date before the pledge can be posted. For more information about the Enter New Pledge screen, please see the Pledges section of Chapter 23 - Campaigns and Pledges.
- Click Post.
Enter New Pledge screen
You can print a thank you letter and a reminder letter after a pledge has been posted. Please see the Pledge Letters section of Chapter 23 - Campaigns and Pledges for more information on printing thank you and reminder letters.
Enter a Donation Receipt:
- From Pledges & Receipts, click Enter Receipt in the Donations section of the Sidebar.
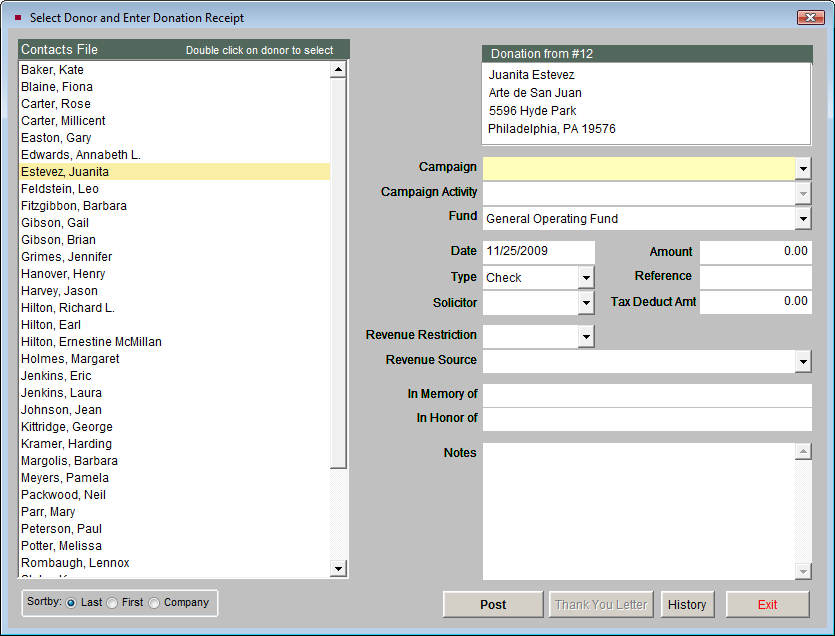
- Using the list of contacts on the left, find the contact who gave you the donation. You may change the sort order of the list by clicking the radio button next to "Last," "First," or "Company" at the bottom. Double click a contact's name to select that person. The contact's name, address and Contact ID# will appear at the top right of the screen, seen below.
- Enter the donation information into the fields on the right. You must enter a Fund, Amount, Date, and Reference (if using Check as payment type) before the donation can be posted. For more information about the Enter Donation Receipt screen, please see the Donation Screen View section of Chapter 20 - Contacts.
- Click Post.
Enter Donation Receipt screen
After the donation is posted, you may print a thank you letter for the contact by clicking the Thank You Letter button. For more information on printing and composing letters, see Chapter 22 - Letters, Labels & Email.
After a contact has been selected, you can also view the contact's donation history by clicking the History button.
Enter a Dues Receipt:
- From Pledges & Receipts, click Enter Receipt in the Dues section of the Sidebar. You will see the screen below.
- Using the list of memberships on the left, scroll to the membership name where you want to post the dues payment. You may change the list's sort order by clicking the radio button next to "Last," "First," or "Company" at the bottom of the screen. Double click on the membership name to select it. The member's name, address and Membership ID# will appear at the top of the screen on the right.
Enter Dues Receipt screen
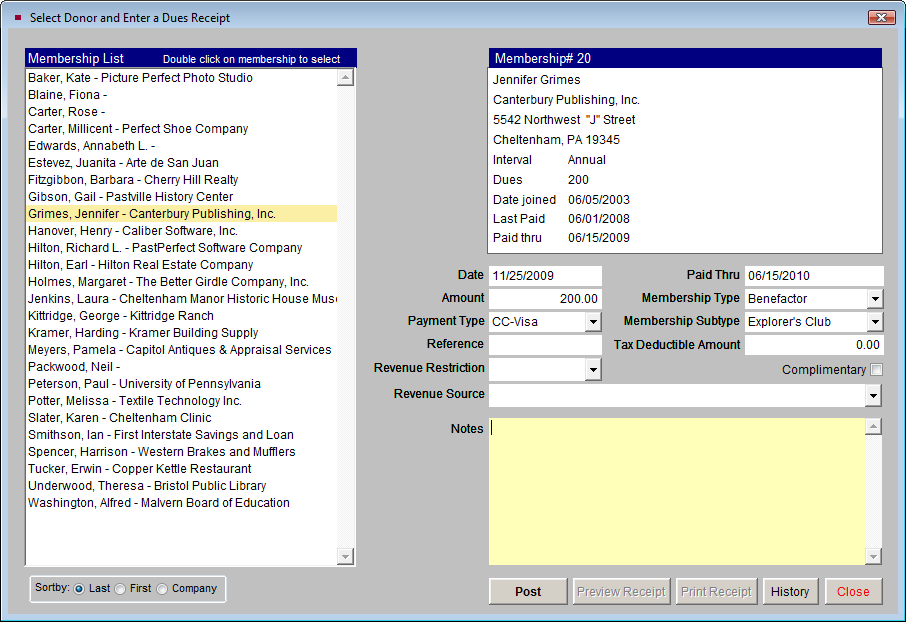
- Enter the dues information in the fields on the right. You must enter an Amount, Date, Paid Thru date and Reference (if using Check as payment type) before the dues payment can be posted. For more information about the Enter Dues Receipt screen, please see the Enter Dues Receipts section of Chapter 20 - Contacts.
- Click Post.
After the dues payment is posted, you may preview or print a receipt by clicking the Preview Receipt or Print Receipt buttons. To modify the dues receipt form, go to the Main Menu | Reports | Dues & Donations | Dues Payment Receipt | Custom Layout 1 or 2 | Modify Report Layout. After a membership has been selected, you can also view the dues history by clicking the History button.
Printing Pledge, Donation and Dues Receipt Reports
Print Pledges - You can print pledge reports by campaign or date range.
- Click the Print Pledge button in the Pledges section of the Sidebar.
Print Pledges by Campaign or Date screen
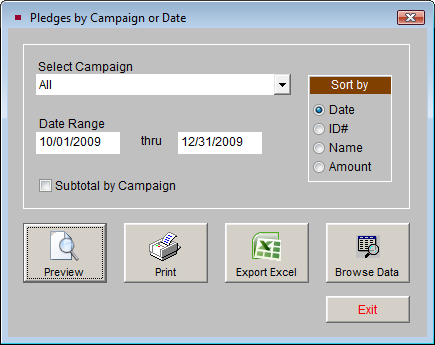
- Select a Campaign from the drop-down list, or use All to include all campaigns.
- The Date Range will be filled in automatically according to the year and month tab you selected prior to clicking Print. You can change the date range by clicking in date fields and typing different dates.
- Check the Subtotal by Campaign box to have PastPerfect automatically insert the subtotal for each campaign.
- Pledges can be sorted by date, ID#, amount, or alphabetically by name. Select the appropriate radio button for your Sort by.
- The report will include the pledge date, Contact ID#, contact name, campaign, payment interval, amount pledged, amount paid, date of last payment, and balance. Click Preview to preview the report, or click Print if you are ready to print the report. You may export the report to an Excel file by clicking the Export to Excel button. If you wish to view the results in a Browse screen, click Browse Data.
Print Donation Receipts - You can print donation reports by fund or date range.
- Click the Print Receipts button in the Donations section of the Sidebar.
Print Donations by Fund or Date Range screen
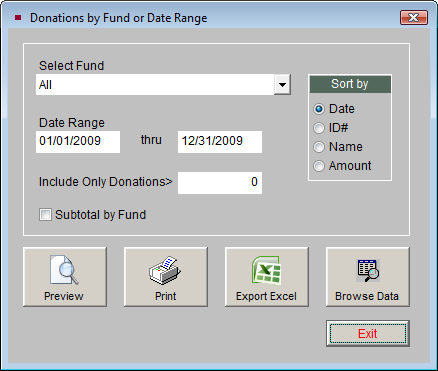
- Select a Fund from the drop-down list, or use All to include all funds.
- The Date Range will be filled in automatically according to the year and month tab you selected prior to clicking Print. You can change the date range by clicking in date fields and typing different dates.
- If you want to include only donations over a certain amount, enter that amount in the Include Only Donations> field. Leave this at 0 to include all donations.
- Check the Subtotal by Fund box to have PastPerfect automatically insert the subtotal for each fund.
- Donations can be sorted by date, ID#, amount, or alphabetically by name. Select the appropriate radio button for your Sort by.
- The printed report will include the donation date, Contact ID#, contact name, amount, type of payment, reference number, in memory of name, and fund. Click Preview to preview the report, or click Print if you are ready to print the report. You may export the report to an Excel file by clicking the Export to Excel button. The exported report will also include addresses, phone numbers and additional information. If you wish to view the results in a Browse screen, click Browse Data.
Print Donation List - Use the Print List button under Donations on the Sidebar to print the donations for a selected month, or for an entire fiscal year.
- Choose the month or year you would like to print by clicking its tab.
- Click Print List under Donations on the Sidebar.
Print Donation Receipts List screen
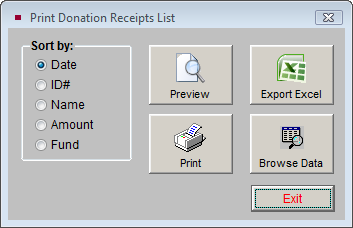
- Select how you would like the list sorted: by Date, Contact ID#, Name (alphabetically by last name), Amount, or Fund.
- The printed report will include the donation date, Contact ID#, contact name, amount, reference number and fund. Click Preview to preview the report, or click Print if you are ready to print the report. You may export the report to an Excel file by clicking the Export to Excel button. The exported report will also include additional information. If you wish to view the results in a Browse screen, click Browse Data.
Print Dues Receipts - You may print dues reports by membership type, subtype, or date range. To print membership dues reports:
- Click Print Receipts under the Dues section of the Sidebar.
Print Dues Receipts by Membership Type screen
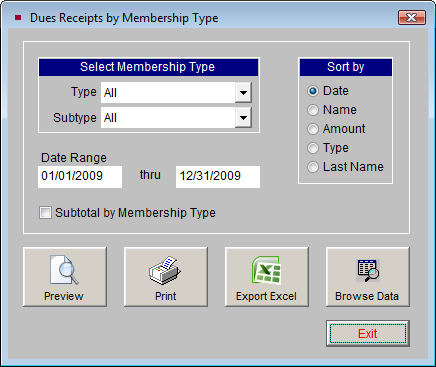
- Select a Membership Type and/or Subtype. You can also use the All option to include all membership types and/or subtypes.
- The Date Range is entered automatically according to the month and year selected before clicking Print Receipts. You can change the date range by clicking the date fields and amending them.
- Check the Subtotal by Membership Type box if you would like PastPerfect to provide the subtotal automatically.
- Choose whether you would like to sort dues by date, membership name, amount, membership type or last name by clicking the appropriate radio button.
- The printed report will include the dues payment date, Membership ID#, membership name, dues amount, payment type, reference number, membership type and subtype and notes. Click Preview to preview the report, or click Print if you are ready to print the report. You may export the report to an Excel file by clicking the Export to Excel button. The exported report will also include additional information. If you wish to view the results in a Browse screen, click Browse Data.
Print Dues List - Use the Print List button under Dues on the Sidebar to print the dues for a selected month, or for an entire fiscal year.
- Choose the month or year you would like to print by clicking its tab.
- Click Print List on the Sidebar.
Print Dues Received List screen
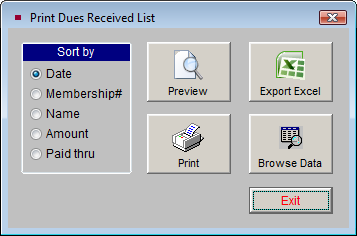
- Select how you would like the list sorted: by Date, Membership#, Name (alphabetically by membership name), Amount, or Paid Thru date.
- The printed report will include the dues payment date, Membership ID#, membership name and company, membership type and subtype, amount, reference number and paid thru date. Click Preview to preview the report, or click Print if you are ready to print the report. You may export the report to an Excel file by clicking the Export to Excel button. If you wish to view the results in a Browse screen, click Browse Data.