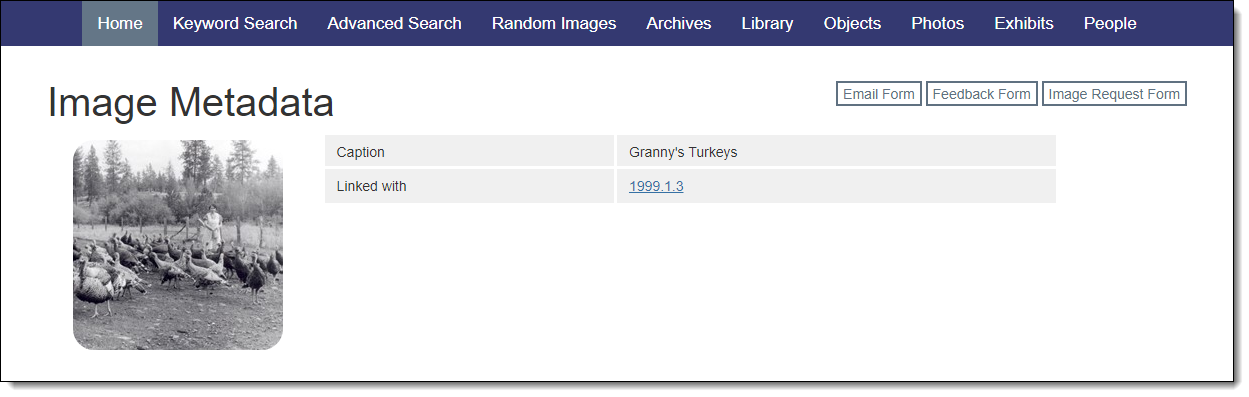
Including Image Metadata
When clicking on a thumbnail image to view a larger copy, an option to View Image Metadata is available. From the Image Metadata screen you can view additional information about a specific image, including the caption and details from the Image Management screen.
Select Records
Image Metadata records will exist on your public site whenever there is an image associated with a record. Even if no Image fields are selected, the Image Metadata record page will display a "Linked with" field. This field contains the Object Id of the parent record and allows visitors to navigate to the parent record.
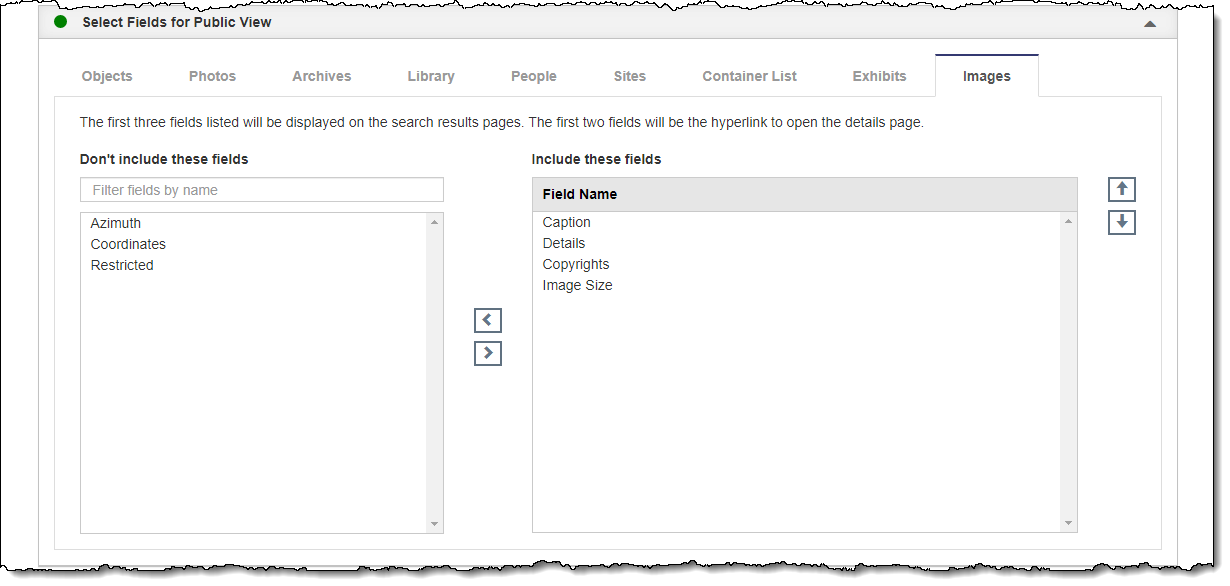
Select Image Fields for Public View
Add Fields
1.Go to "Settings" on the Main Navigation Bar
2.Click "Public Site Settings"
3.Click "Edit" at the top of the Public Site Settings screen
4.Click the Select Fields for Public View Accordion to expand it
5.Select the Images tab
6.In the "Don't include these fields" column, click once on a field you would like to add
•If you include the Caption field, it will replace "View Catalog Record" as the link to the record when viewing large images
7.Click the right arrow button. You should see the field move from the left column into the "Include these fields" column on the right.
8.Repeat for any additional fields
9.Click "Save" at the top of the screen
Remove Fields
1.Click "Edit" at the top of the Public Site Settings screen
2.Click the Select Fields for Public View Accordion to expand it
3.Select the Images tab
4.In the "Include these fields" column, click once on a field you would like to remove
5.Click the left arrow button. You should see the field move from the right column into the "Don't include these fields" column on the left.
6.Repeat for any additional fields
7.Click "Save" at the top of the screen
Order Fields
1.Click "Edit" at the top of the Public Site Settings screen
2.Click the Select Fields for Public View Accordion to expand it
3.Select the Images tab
4.In the "Include these fields" column, click once on a field you would like to move
5.Click the up and down arrow buttons to move the selected field to the desired position
6.Repeat for any additional fields
7.Click "Save" at the top of the screen