From the Main Navigation Bar or one of the colored tiles on the Home screen, you can access the Query screens for Contacts, Pledges & Receipts, and Campaigns. Query screens may also be accessed by clicking "Query" at the top of a record screen. This is the main access point to your records. From here, you can view subsets of your records and then access the full records.
The Left Sidebar provides more specific access points to your records.

In Campaigns, this is broken down into Current Campaigns, Past Campaigns, or All Campaigns.
In Pledges & Receipts, this is broken down into Membership Dues Received, Donations, In-Kind Gifts, Pledges, and Pledge Payments.
The Standard View includes all records of the type specified in the Left Sidebar and a set of default fields. After you have run a query or changed the view, you can click Standard View to return to these default settings. The Standard View cannot be edited, renamed, or deleted.
In Contacts, there are other Standard Views available for quick access to common subsets of your Contact records. These include All Members, Primary Members, Joint Members, Memberships Overdue, Non-Members, Pledged, Never Pledged, and Upcoming Membership Renewals. These Standard Views are based on set criteria, which you can see when you expand the Filter Section after selecting a Standard View. Users also have the option to set one of these Standard Views as their default view when accessing the Contacts Query screen. Standard Views cannot be edited, renamed, or deleted.
My Custom Views allows you to set up and save filter statements and/or option field selections that change what records and data appear in the Browse Grid. Each user login can create and save their own custom views. Users also have the option to set a custom view as their default view when accessing the selected Query screen. If you hover your mouse over the view name, you can edit the name or delete the view. Please note, you cannot delete a custom view if you are currently displaying that view or it is set as the default view.
My Last Modified Records lists the last five records recently modified in this area by your user login. Click the hyperlink to access the record directly.
The Browse Grid lists records based on the selected view. When you first come to a Query Screen, the list of records displayed will be based on the selected default view. You may narrow down the records by using the Filter Section. The fields you see and the sort order are controlled by the Options section. To view a full record, click on the hyperlinked field.

To change the number of records you see on this screen, change the "Page Size" option at the bottom of the screen. You can select 10, 20, or 50 records to display on one page.
This search box is located directly above the Browse Grid below the Action Buttons. It is designed to search only a few identifying fields based on the record type. The searched fields are displayed in the search box before you enter any text. Type the data you want to search for, and the search will begin immediately. The resulting records will display in the Browse Grid.

In Contacts, you can search by First Name, Last Name, or Id No.
In Campaigns, you can search by Campaign Name.
For more detailed searching, use the Filter Section.
The Filter & Option Field Settings section allows you to change what records and fields appear in the Browse Grid. In Contacts, the fields available for filters and options can be selected in Settings - Contact Filter & Option Fields.
Filtering the list of records and changing what fields appear in the Browse Grid allows you to target the records and fields to include when printing reports and exporting to CSV. Additional actions can be performed on the resulting records depend on the Query screen. These settings can also be saved as Custom Views, which are a quick way to see saved subsets of your records without having to change the Filter and Options on the Query screen each time.
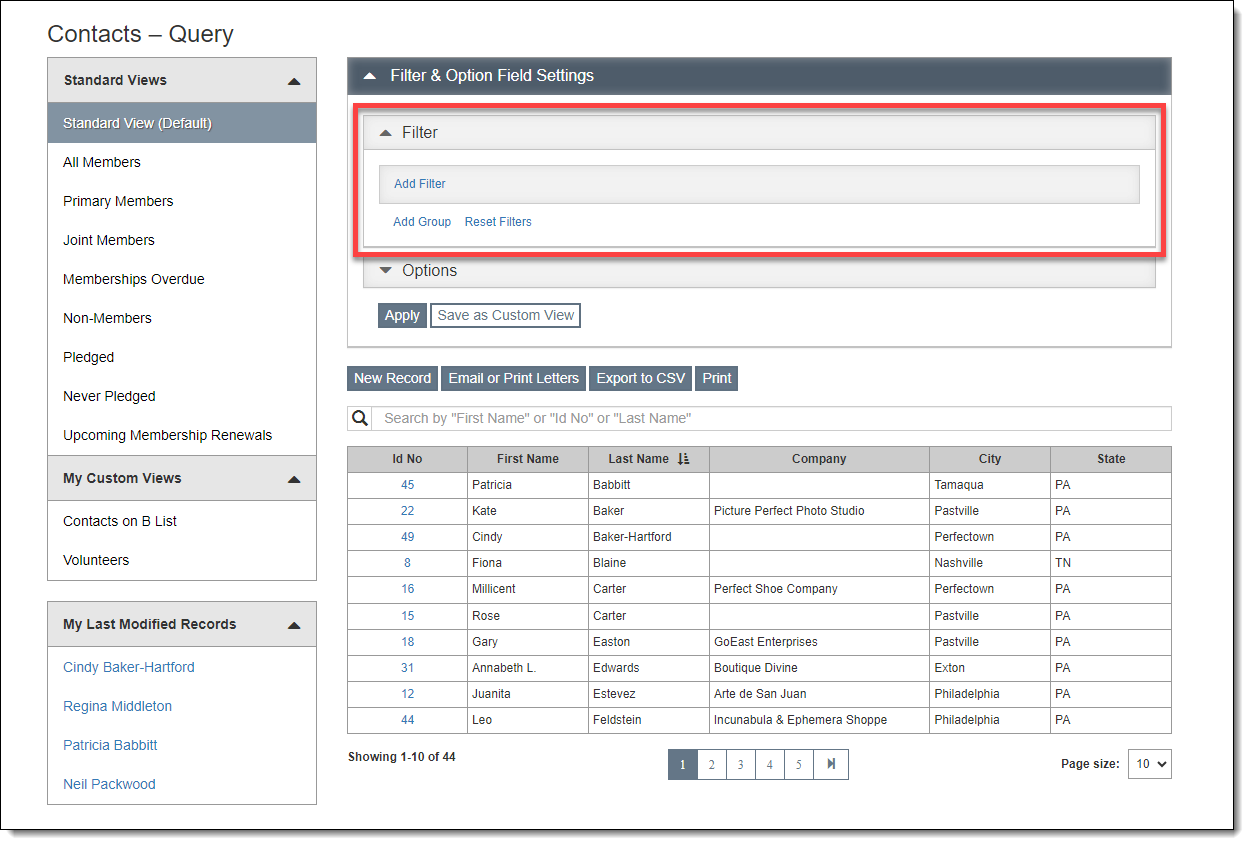
This section allows you to narrow the list of records appearing in the Browse Grid. Once a filter is applied, the resulting records will appear in the Browse Grid and will be included when printing reports and exporting to CSV. Depending on the Query screen, there are additional actions that can be performed on your results.

By default the Filter section is expanded when you go to a Query screen.

To add a filter, click "Add Filter." Use the first drop-down list to choose a field to filter on. Use the second drop-down list to choose your condition. If necessary, use the field on the right to select from the field's authority file (if available) or enter the text or value you are looking for. You may add multiple filters to do a complex search. Multiple filters can be joined by AND or OR.
To remove a filter, click the "X" button to the right of the filter.
Once your filters are created, click the "Apply" button below the Options section to view the records that meet your criteria.
If you want to go back to browsing all records,
click "Standard View".
For Contacts, the list of available fields used for filters can be changed under Settings | Contact Filter & Option Fields.
For more detailed information about using filters, see Working With Filters.
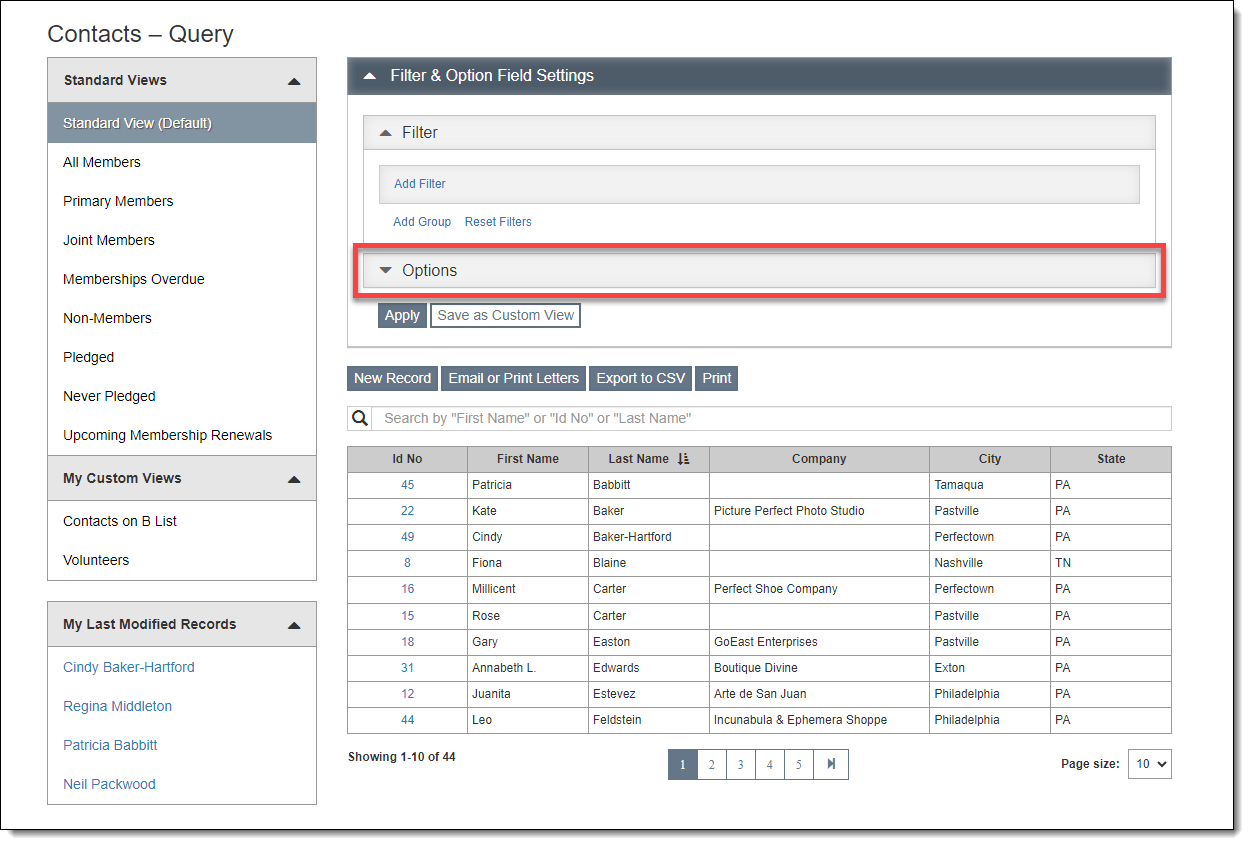
This section allows you to set the fields you see in the Browse Grid. Once you select option fields to include and apply your changes, the fields will appear in the Browse Grid and will be included when printing reports from the Query screen.
In Contacts and Pledges & Receipts, the selected option fields are included when exporting to CSV from the Query screen.

To access the Options section, click the down-arrow next to Options to expand the accordion.

To include a field in the Browse Grid, select the field in the Available Fields list on the left. Then click the right arrow to move it to the Included Fields list on the right.
To remove a field in the Browse Grid, select the field in the list on the right. Then click the left arrow to move it to the list on the left. The first field listed in Included Fields is always required because it links to the individual record and cannot be removed.
To change the order of the fields in the Browse Grid, select a field in the Included Fields list on the right and drag it up or down to the desired position.
To set the field by which the Browse Grid is sorted, first select the field so it appears in the list on the right. Then choose it in the drop-down list labeled "Sort by." You may also select "Ascending" (alpha A-Z or numeric 1-10) or "Descending" (alpha Z-A or numeric 10-1).
Once you have made your selections, click "Apply." If you are happy with the results, you may save this view (including filters) to use again later by clicking "Save as New View." The view name will appear under "My Custom Views" in the Left Sidebar. For more detailed information about Custom Views, see Creating Custom Views.
For Contacts, the list of available fields used for options can be changed under Settings | Contact Filter & Option Fields.
The Action Buttons are located in the middle of the Query screen, above the Simple Search Box. The buttons displayed depend on which Query screen you are viewing.

New Record: Creates a new record. Click "New Record" and fill in the required information. When you are in the Pledges & Receipts section, be sure to select the type of payment you are entering from the Left Sidebar before clicking "New Record."
Email or Print Letters: Allows you to print letters or send emails to the contacts listed in the Browse Grid. You can also print mailing labels. Use the Filter section to narrow the list if needed. Letters can be printed to PDF, then sent to your printer. Emails can be previewed in PDF form or emailed directly to the recipients.
Export to CSV: Creates a Comma Separated Value (CSV) file that you may open in Excel. The file will include all the records and fields in the Browse Grid. Use the Filter section to narrow the list if needed. Use the Options section to change the fields included in the export.
Print: Prints all records appearing in the Browse Grid. Use the Filter Section to narrow the list if needed. Depending on which Query screen you are on, you may have the following layout options: Grid, Grid with Images, List, List with Images, Mailing Labels. Mailing Labels are sized for Avery 5160 labels. Use the Options section to change which fields are included in the grid or list layouts. Fields included in the label layouts cannot be changed. The layout will be previewed before printing. You may choose to send to a printer or save it as a PDF.